| Vanguard
|

|
| Basic Information
|
| Developer(s): |
Unknown
|
| Map Info
|
| Environment: |
Construction
|
| Setting: |
Daytime
|
| Map Photos
|
|
|
| Map Overview
|
|
|
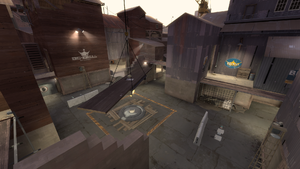
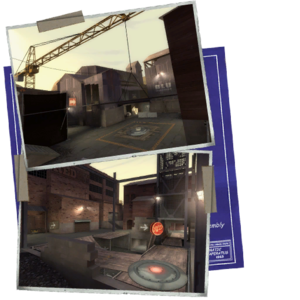
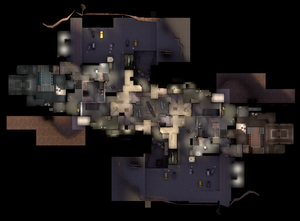
Vanguard is a Control Point map. It is set in a construction site, with many floors at varying heights. With many alternate routes towards objectives created by the construction props, it is easy to flank and gain a height advantage for all classes.
Vanguard was made an official map in the Tough Break Update.
Locations
Control Point 3
The middle capture is located in the center of the yard, underneath a suspended board.
- Entrances: For each team, there are five entrances through their team-colored buildings: The side entrance, the above platform, the center doorway, the unfinished wall, and the doorway next to the unfinished wall.
- Scaffolding: To the sides of the yard in the structures are rows of scaffolding bridges. The scaffolding can be used for cover, or as a path to the board above the point.
- Center Yard: The yard with the control point is an open area with no cover. Above the control point is a suspended board with a medium ammo kit on it.
- Secondary Spawn: Inside each team's entrance structure is a secondary spawn that will become active once their respective team has captured all but the last control point.
Control Point 2 & 4
The second and fourth control point are on a piece of scaffolding next to an elevator.
- Elevator: To the side of the control point is an inactive elevator tower. The elevator is at the second floor, turning the bottom floor into a walkway into the adjunct building. The elevator itself can be used as a lookout, and a teleporter hiding spot.
- Center Scaffolding: The scaffolding holding the control point is a raised platform with a bridge across to the team spawn.
- Right Balcony: Overlooking the control point is a structure with a balcony that can provide suppressive fire against the enemy team.
- Left Building: The structure to the left of the control point that links to the elevator.
RED's second control point from near.
RED's second control point from afar.
BLU's second control point from near.
BLU's second control point from afar.
Control Point 1 & 5
The final Control Point is to the side in the middle of a section of computer terminals.
- Air Vent: An air vent lays on the side of the building, allowing an ambush to the enemy team's spawn doors.
- Observation Room: Overlooking the control point is a large observation room. The glass is one way, allowing for sneak attacks.
- Control Area: The terminal area with the control point.
BLU's last control point.
RED's last control point.
Inside view of BLU's defensive observation room.
Inside view of RED's offensive observation room.
Strategy
Control point timing
| Control Point 1 and 5
|
×1
|
|
| ×2
|
|
| ×3
|
|
| ×4
|
|
| Control Point 2 and 4
|
×1
|
|
| ×2
|
|
| ×3
|
|
| ×4
|
|
| Control Point 3
|
×1
|
|
| ×2
|
|
| ×3
|
|
| ×4
|
|
Update history
December 17, 2015 Patch (Tough Break Update)
- Added Vanguard to the game.
January 7, 2016 Patch
- Updated Vanguard to fix an exploit related to spawn room doors.
February 2, 2016 Patch
- Added new path to the last point.
- New geometry to reduce sightlines on the middle point.
- Reorganized spawn points to better exit final spawns.
- Fixed Red forward spawn door blocking when held open.
- Fixed some material issues.
February 29, 2016 Patch
- Removed teleporter exploit on second point.
- Various minor fixes (lighting, collision, optimization).
April 25, 2016 Patch
Trivia
- Behind the vault doors near both spawns, there is a small room with a single banana peel.
 Tough Break Update Tough Break Update |
|---|
| | Maps | | | | Cosmetics | | | | Weapon skins |
|
Autumn · Boneyard · Macabre Web · Nutcracker · Pumpkin Patch · Wildwood | | |
Coffin Nail · Dressed to Kill · High Roller's · Top Shelf | | |
Balloonicorn · Blue Mew · Brain Candy · Flower Power · Mister Cuddles · Rainbow · Shot to Hell · Stabbed to Hell · Sweet Dreams · Torqued to Hell | | |
Airwolf · Blitzkrieg · Butcher Bird · Corsair · Killer Bee · Red Bear · Warhawk |
| | | Taunts | | | | Tools | | | | Other | |
|


