Granary
| Granary | |
|---|---|

| |
| Basic Information | |
| Developer(s): | Unknown |
| Map Photos | |
| Map Overview | |
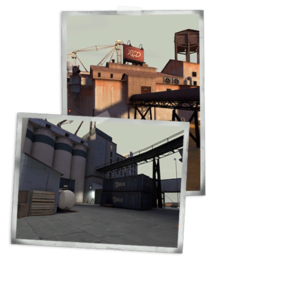
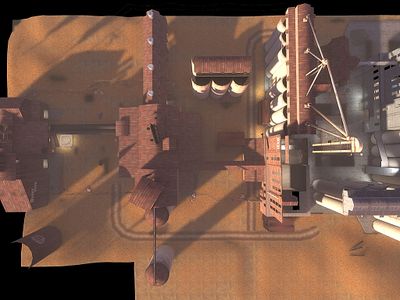
Granary is a standard control point map. The objective for each team is to capture all five Control Points to win the round. Each team starts with the two Control points closest to them and one neutral Control point in the middle of the map.
Keep in mind that like all other Command point maps, such as Well, only the two Control points nearest to each other can be captured by the enemy side. All other Control points have a lock symbol on them in the HUD and cannot be taken by either side.
Contents
Introduction video
Locations
Overview
Resupply building
The initial respawn and resupply area is a missile silo with two exits either side leading to a yard containing Control point 1 just outside the building.
- Cp granary spawn.jpg
RED's main resupply room
Control point 1/5
Located directly outside the resupply building at the back of an open yard area. Behind the Control point, a small staircase and ramp runs over the yard leading to the second level of the building housing Control point 2. Various obstacles scattered around the yard provide cover from incoming fire.
- Cp granary cp1a.jpg
Control point 1
Control point 2/4 (building)
This is the only Control point to be enclosed within a building (CP 4 is a mirror image). With seven narrow entrances from all angles this building can get quite congested and become a site of hectic fire-fights. Another respawn room on the second level in the left of the building is only available to the team when a team controls Control point 3. In the right side of the building on the second level an enclosed corridor leads to the ramp room of Control point 3.
- Cp granary cp2a.jpg
Control point 2 (building)
Control point 2/4 (yard)
A small yard in-between CP2 and CP3 containing several cargo containers. At the right side of the yard an additional respawn room is available for whichever team controls Control point 3.
- Cp granary cp2b.jpg
Control point 2 (yard)
Control point 3 (building)
This building has two entrances leading to Control Point 3. The left entrance is a simple throughway but the right side has a medium sized room with a ramp leading to a balcony above Control point 3. The exit of the corridor from CP2 is located just behind this ramp room where the player can drop down through a circular hole.
- Cp granary cp3b.jpg
Control point 3 (building)
Control point 3 (yard)
Being the halfway point and main focus for most battles, Control point 3 has a slightly raised, large capture point area. This capture area is surrounded by cargo containers stacked two high providing vantage points. There is a medium sized health pack at either end of the yard, two small medpacks on top of the containers and four small ammo boxes on the ground at each side for the yard. From here the map is a mirror image with Control points 4 and 5 being a reverse of 2 and 1 respectively.
- Cp granary cp3a.jpg
Control point 3 (yard)
Strategy
- The containers located around the central control point (aka Control Point 3) provide a significant height advantage to both attackers and defenders. Access to the containers is easy for Demomen or Soldiers who can Rocket jump (or sticky jump) up to them. Alternatively other classes can use the balcony ramps. Engineers for example can use the upper ramps to access them and place Sentry Guns and Teleporters. Snipers can even use the elevation to their advantage. The top of the container, however, is vulnerable to long range attacks, so too much reliance should not be placed on the "no one looks up" adage.
- The containers also provide ambush opportunities. A Pyro can defend the control point by awaiting any potential attackers from the containers, flaming all who attempt to take it.
- In order to defend Control point 2 from attacks, Engineers should build Sentry Guns on the catwalk observing the Control point. This can be problematic, however, as attackers can traverse the catwalk from the right hand side doorway.
- As with all 5-CP maps, most matches depend on which team controls the central Control Point. If control of CP3 is lost, all efforts should be focused on taking it back as Control point 2 and 1 are difficult to defend.
- The middle Control point 3 should not be neglected by defenders because if left unattended it presents an easy capture opportunity.
- Health packs are widely abundant around the central Control Point. Consider forgoing Medics in favour of other classes if the Control Point is in dispute.
Related Achievements
|
Trivia
- At one point, setup time and gates were added to Granary in the April 29, 2008 Patch. They were later removed in the October 21, 2008 Patch.
Control Point Timing
See also


