Difference between revisions of "Watchtower"
m (→Strategy) |
m |
||
| (52 intermediate revisions by 39 users not shown) | |||
| Line 1: | Line 1: | ||
{{Map infobox | {{Map infobox | ||
| − | |game-type=Arena | + | | map-status = community |
| − | |file-name=arena_watchtower | + | | map-game-type = Arena |
| − | |map-image=Watch 01.jpg | + | | map-file-name = arena_watchtower |
| − | | | + | | map-image = Watch 01.jpg |
| + | | map-released = {{Patch name|2|24|2009}} | ||
| + | | map-released-major = Scout Update | ||
| + | | map-environment = Alpine | ||
| + | | map-setting = Daylight, sunny | ||
| + | | map-pickups-health-small = 2 | ||
| + | | map-pickups-ammo-small = 2 | ||
| + | | map-stamp-link = https://steamcommunity.com/stats/TF2/leaderboards/30385 | ||
}} | }} | ||
| − | |||
{{Quotation|[http://www.teamfortress.com/scoutupdate/watchtower_and_junction.htm The Scout Update]| | {{Quotation|[http://www.teamfortress.com/scoutupdate/watchtower_and_junction.htm The Scout Update]| | ||
An Arena map that plays unlike any of Valve’s Arena maps, with a heavy focus on vertical space and long, open sight lines. Control of the central building is a key decision that teams must wrestle over.}} | An Arena map that plays unlike any of Valve’s Arena maps, with a heavy focus on vertical space and long, open sight lines. Control of the central building is a key decision that teams must wrestle over.}} | ||
| − | + | '''Watchtower''' is a [[Steam Workshop|community-created]] [[Arena]] map. It was included in the [[Scout Update]] as an official map due to its outstanding quality. | |
== Introduction Video == | == Introduction Video == | ||
{{youtube|DF2DO6ESMUc}} | {{youtube|DF2DO6ESMUc}} | ||
| + | |||
== Locations == | == Locations == | ||
| − | * | + | *'''Tower Shack''': The large room on the top of the tower, where the control point is located. Has four main entrances, two from the stairs that come from the center valley and the other two from both sides where the Higher Pipes are. Additionally, the shack's roof has one opening and is accessible to explosive jumping Soldiers or Demomen. |
| − | + | *'''Lower Pipes''': Two large metal pipes that connect the respawn area to the tower main stairs. | |
| − | * | + | *'''Higher Pipes''': Two large metal pipes that run from the stone wall to the tower shack, accessible from the external ring by two pairs of logs. A small health pack is placed on each pipe where the logs connect. |
| − | + | *'''Center Valley''': The largest area where the tower rises. Small pools of deep water and small ammo packs are found here. Two ramps of stairs lead to the tower shack. | |
| + | *'''External Ring''': A path that revolves around the whole map, it allows access to the center valley and the higher pipes by two wooden logs. | ||
| + | *'''Respawn Area''': Two caves facing each other located on the external ring. Partially protected by large wooden walls. | ||
| + | |||
| + | <gallery widths=150px heights=80px> | ||
| + | File:Watchtower path.jpg | A side path taken to the valley. | ||
| + | File:Watchtowercap.jpg | The cap area. | ||
| + | File:Watchtower valley.jpg | The valley below the cap area. | ||
| + | </gallery> | ||
== Strategy == | == Strategy == | ||
| − | + | {{map strategy link|Watchtower|main=yes|stub=yes}} | |
| − | |||
| − | |||
| − | |||
| − | |||
| − | |||
| − | |||
| − | == Control | + | == Control point timing == |
{{Control Point Timing/Official Map}} | {{Control Point Timing/Official Map}} | ||
| − | == | + | == Update history == |
| − | * | + | '''{{Patch name|2|24|2009}}''' ([[Scout Update]]) |
| + | * Added Watchtower to the game. | ||
| + | |||
| + | '''{{Patch name|2|3|2010}}''' | ||
| + | * Fixed a case where players could open and get stuck on the starting gates before the round start. | ||
| + | * Improved clipping to prevent people from getting out of the map. | ||
| + | * Optimized the map for better performance. | ||
| + | |||
| + | == Notes == | ||
| + | * With the use of [[Jumping|explosive jumps]], it is possible to reach the top of the tower shack, and the area behind the billboards above the spawn rooms. | ||
| + | == External links == | ||
| + | * [https://www.teamfortress.com/scoutupdate/watchtower_and_junction.htm ''The Scout Update'': Maps - Watchtower + Junction] | ||
| + | * [https://www.youtube.com/watch?v=p120yAhXblM The Making of Arena_Watchtower] | ||
| − | {{Maps | + | {{Scout Update Nav}} |
| + | {{Maps Nav}} | ||
Latest revision as of 15:13, 17 January 2024
| Watchtower | |
|---|---|

| |
| Basic Information | |
| Map type: | Arena |
| File name: | arena_watchtower
|
| Released: | February 24, 2009 Patch (Scout Update) |
| Developer(s): | Joshua "JoshuaC" Shiflet |
| Map Info | |
| Environment: | Alpine |
| Setting: | Daylight, sunny |
| Map Items | |
| Map Photos | |
| Map Overview | |
| Map Stamp | |
| Supporters Leaderboard | |
| “ | An Arena map that plays unlike any of Valve’s Arena maps, with a heavy focus on vertical space and long, open sight lines. Control of the central building is a key decision that teams must wrestle over.
|
” |
Watchtower is a community-created Arena map. It was included in the Scout Update as an official map due to its outstanding quality.
Contents
Introduction Video
Locations
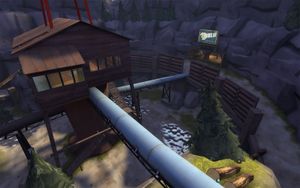
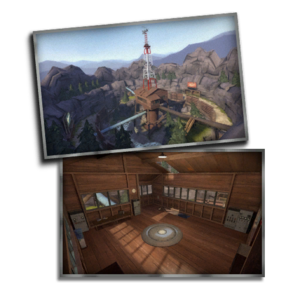
- Tower Shack: The large room on the top of the tower, where the control point is located. Has four main entrances, two from the stairs that come from the center valley and the other two from both sides where the Higher Pipes are. Additionally, the shack's roof has one opening and is accessible to explosive jumping Soldiers or Demomen.
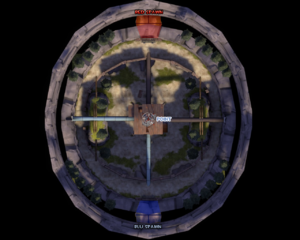
- Lower Pipes: Two large metal pipes that connect the respawn area to the tower main stairs.
- Higher Pipes: Two large metal pipes that run from the stone wall to the tower shack, accessible from the external ring by two pairs of logs. A small health pack is placed on each pipe where the logs connect.
- Center Valley: The largest area where the tower rises. Small pools of deep water and small ammo packs are found here. Two ramps of stairs lead to the tower shack.
- External Ring: A path that revolves around the whole map, it allows access to the center valley and the higher pipes by two wooden logs.
- Respawn Area: Two caves facing each other located on the external ring. Partially protected by large wooden walls.
Strategy
Main article: Community Watchtower strategy
 | “Sun Tzu's got nothing on us!” This map's Community strategy page is a stub. As such, it is not complete. You can help the Team Fortress Wiki Community Strategy Project by expanding it. Notes: None added |
Control point timing
| Control Point | Multiplier | Seconds | ||
|---|---|---|---|---|
| Capture point | ×1 |
| ||
| ×2 |
| |||
| ×3 |
| |||
| ×4 |
|
Update history
February 24, 2009 Patch (Scout Update)
- Added Watchtower to the game.
- Fixed a case where players could open and get stuck on the starting gates before the round start.
- Improved clipping to prevent people from getting out of the map.
- Optimized the map for better performance.
Notes
- With the use of explosive jumps, it is possible to reach the top of the tower shack, and the area behind the billboards above the spawn rooms.
External links
| |||||||||||||||||


