|
|
| (66 intermediate revisions by 41 users not shown) |
| Line 1: |
Line 1: |
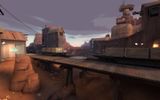
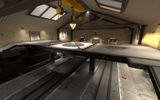
| − | [[Image:Arenalumberyard.jpg|thumb|right|300px|Lumberyard]] | + | [[File:Arenalumberyard.jpg|thumb|right|300px|The RED spawn on [[Lumberyard]], one of the first Arena maps to be introduced into the game.]] |
| − | {{Quotation|'''Abraham Lincoln''', ''Second Inaugural Address, 1865''|I say this to you with the unvarnished factualism of plain talk: I ''love'' Arena Mode.}} | + | |
| − | '''Arena''' is [[List of game modes|game mode]] in which teams [[RED]] and [[BLU]] pitted against each other, in a battle to the death. The goal for both teams is to kill all of the opposing team's players, with no respawning during rounds. If both teams survive one minute of fighting, a [[control point]] will unlock, allowing a team to win by capping the point. | + | {{Quotation|'''US President Abraham Lincoln''', ''Second Inaugural Address, 1865''|I say this to you with the unvarnished factualism of plain talk: I ''love'' Arena Mode.}} |
| | + | |
| | + | '''Arena''' is a [[List of game modes|game mode]] added during the [[Heavy Update]] in which [[RED]] and [[BLU]] are pitted against each other in a battle to the death. The goal for both teams is to kill all of the opposing team's players, with no respawning during rounds; instead, players will be sent to [[Team#Spectate|spectate]] upon death. If both teams survive one minute of fighting, a [[control point (objective)|control point]] unlocks, allowing a team to win by capping the point. |
| | | | |
| − | ==Gameplay== | + | == Gameplay == |
| | {{See also|Tips#Arena|l1=Arena tips}} | | {{See also|Tips#Arena|l1=Arena tips}} |
| − | Arena maps are designed to keep the class diversity of Team Fortress 2 while focusing goals around combat between two teams. Whereas other game modes lean towards a broad, overall strategy for the team, Arena concentrates on the specific tactical choices the teams make in a single fight.
| |
| | | | |
| − | Arena features smaller maps that play out more quickly. The round ends once either team has no players left in the arena, or when the control point has unlocked and been captured. Rounds tend to be very fast and highly competitive, with an emphasis on a team's class makeup and plans to counter the opposing team's class choices. Arena mode is suitable for smaller matches such as three-versus-three, while still comfortably supporting huge knockdown twelve-on-twelve brawls. There are usually very few, if any, [[Health|health kits]], and even then they are often far from the main action, near stage hazards, or both. This forces teams to rely more on [[Dispenser]]s and Medics. | + | Arena maps are designed to keep the class diversity of ''Team Fortress 2'' while focusing goals around combat between two teams. Whereas other game modes lean towards a broad, overall strategy for the team, Arena concentrates on the specific tactical choices the teams make in a single fight. |
| | + | |
| | + | Arena features smaller maps that play out more quickly. The round ends once either team has no players left in the arena, or when the control point has unlocked and been captured. Rounds tend to be very fast and highly competitive, with an emphasis on a team's class makeup and plans to counter the opposing team's class choices. |
| | + | |
| | + | Arena mode is suitable for smaller matches such as three-versus-three, while still comfortably supporting huge knockdown twelve-on-twelve brawls. There are usually very few, if any, [[Health|Health kits]], and even then they are often far from the main action, near stage hazards, or both. [[Ammo]] boxes are also few and far between. This forces teams to rely more on [[Dispenser]]s and Medics. |
| | | | |
| | Players may have to sit out to keep team numbers balanced if they were on the losing team, but players on the winning team never have to sit out the next round. | | Players may have to sit out to keep team numbers balanced if they were on the losing team, but players on the winning team never have to sit out the next round. |
| | + | |
| | + | Loadouts changed during the countdown before the match do not do so in-game unless the player commits suicide. Changing classes and back also works if done so before the countdown ends. |
| | | | |
| | The [[First Blood]] Critical hit buff is unique to the Arena game mode, and can be used to give the player an advantage against the enemy team. | | The [[First Blood]] Critical hit buff is unique to the Arena game mode, and can be used to give the player an advantage against the enemy team. |
| | | | |
| | == Strategy == | | == Strategy == |
| − | ===General===
| + | {{main|Community Arena strategy}} |
| − | *The First Blood mechanic, lack of respawn, team scrambling, and the fact that the “last man standing wins” can encourage teams in Arena matches to adopt an “every man for himself” style of play, especially on public servers with alltalk on. While it can be rare to see teams attempt to coordinate their actions, teams that do can gain a large advantage over teams that don’t, as is the case in all Team Fortress 2 matches.
| |
| − | *Simply sticking together can make a huge difference, since even talented players will have a tough time dealing with more than one opponent at once. Help out teammates in trouble, especially while you still have teammates to distract the enemy for you. If you come too late to the party, expect to find the odds stacked against you.
| |
| − | *Since arena maps often lack large health packs and sometimes lack health pickups altogether, having a Medic or keeping an Engineer's Dispenser alive can make a huge difference. It is important to protect any healers on a team as long as possible. It can be equally important to deny healing to your enemies, either by killing their healing classes, or by blocking their access to medkits. Without healing, players are extremely vulnerable to “chip damage” and can be worn down and killed eventually even from relatively weak hits. Bide your time and chip away at your enemies if they don’t have healing.
| |
| − | *Always take note of what classes are on your team (and on the enemy’s team when possible), and make a plan on how to play the round based on that. For example, if your team has several Engineers, leave them ammo and play defensively to keep the enemy at bay while they build their Buildings and upgrade them. Engineers rarely push out early on, so being very aggressive early is a poor strategy since you will have no support and if you die, the Engineers will be left unsupported as well. If your team has a Medic, do him a favor and give him a buddy to help build his Übercharge and protect him.
| |
| − | *Arena rewards players who are willing and able to play different classes, since this can allow you to strategically pick classes to complement your team, or counter the enemy team.
| |
| − | *Watch out for the First Blood Crit buff – in many cases first blood can decide a round such as when a Soldier or Demoman receives it. If an enemy player gets first blood (you can tell by looking at the [[Head-up display#Other elements|Kill reporter]]), try to lay low for a few seconds until their Crit buff has worn off. If you get first blood, try to make it count, but don’t get reckless. Killing your enemies always has to be balanced with keeping yourself alive. Note that [[Dead Ringer]] Spies can also trigger first blood; if the enemy receives it through these means, no warning will be given at all through the kill reporter, so keep this in consideration.
| |
| − | *While many players charge headlong around the map looking for enemies to kill, it’s usually bad tactics to enter an area if you don’t know what to expect. Where to go and when are very important decisions when you have only one life to lose. Patience is a virtue. Arena maps are small, and eventually enemies will come to you. This doesn’t mean that it’s best to “camp.” However, it does mean that you should use every possible source of information at your disposal to find out what classes your enemies are, where they are, and what they are doing. Looking around in multiple directions is advisable, but listening carefully can be even more important, since sound can give you important clues about areas you can’t see. Most weapons and abilities have distinct sounds when used and players that are attuned to those sounds have a sort of "X-Ray vision". Finally, you can check the team roster and the kill reporter to see what players are alive, what classes they are, and what weapons they are using.
| |
| − | *Choose your weapon loadout with care. Many weapons are not as useful in Arena as they are in other modes, due to the shortness of the rounds and the lack of respawn. Items such as the Buff Banner and Vita-Saw are usually best left at home. Weapons that provide a source of healing such as the [[Black Box]], [[Mad Milk]], or [[Sandvich]] can be incredibly useful. Loadout changes only take effect upon respawn, i.e. the following round, or via suicide during the countdown phase.
| |
| − | *The Control Point comes into play later in the round, and capturing it to win the round is an alternative to hunting down every last enemy player. It is especially useful against teams or players that are “turtling” or playing extremely defensively -- most often Engineers or players camping an Engineer Sentry Gun/Dispenser -- or against players trying to play “hide and seek”, such as Spies. Capturing can also be an effective way of gaining an advantage by forcing the enemy team to try to stop the capture attempt, preventing the remaining enemies from trying to win through delaying tactics while chipping away at your team bit by bit. However the Control Point is a double-edged sword. Standing on the point will reveal your location to your enemy, and Control Points are always in exposed areas in the middle of the map. Your team all bunched up on the point would play right into the hands of an enemy Sniper or enemy Kritzkrieg pair! Abandon a capture attempt if it will make you too easy of a target.
| |
| | | | |
| − | ===Class Specific=== | + | == Maps == |
| | + | {{main|List of maps}} |
| | | | |
| − | {| class="wikitable grid" cellpadding="0" cellspacing="0"
| + | Arena maps carry the '''arena_''' prefix; community maps are identified with italic font. |
| − | ! class="header" colspan="1" width="100"| Class
| + | {{Maps table|Arena}} |
| − | ! class="header" | Strategy
| |
| − | |-
| |
| − | | class="small" align="center" valign="center" style="padding:0.5em" | [[Image:Scout.png|100x100px|link=Scout]]<br>[[Scout match-ups|Scout]]
| |
| − | | Commonly seen in Arena, the Scout’s speed gives him an excellent shot at First Blood (hence the related Scout achievements). However, a full out rush straight at the enemy from the start of the round is also a great way to get killed immediately and give the enemy First Blood instead. While it is possible to catch the enemy by surprise with the speed of your initial rush, it won’t work every time. Always be ready to abort a rush if you get compromised and lose the element of surprise. Mobility is a great help in Arena, since action takes place all over the map very quickly and flank attacks are common. Your speed usually means you’re the flanker and not the one getting flanked, but be careful about where you run to – Sentry Guns can't be ambushed! Change your angle of attack often and find isolated and distracted enemies to finish off. Even against groups of enemies, you can use your speed to pick off and distract enemies at the edges and prevent yourself from being overwhelmed. Retreat to find healing when you are hurt, or use [[Mad Milk]] to heal yourself. Use your extra capture force to your advantage on the control point when appropriate.
| |
| − | |-
| |
| − | | class="small" align="center" valign="center" style="padding:0.5em" | [[Image:Soldier.png|100x100px|link=Soldier]]<br>[[Soldier match-ups|Soldier]]
| |
| − | | Skilled use of [[Jumping#Rocket jumps|Rocket jumps]] or simply pushing forward early can give you a great shot at First Blood. A Crit buffed Soldier can lay waste to an enemy team before they even know what happened and can easily make early aggression worthwhile. Ideally, get an [[Healing#Overhealing|overheal]] from a friendly Medic to offset the health lost from rocket jumping, or use the [[Gunboats]]. The Black Box can also be very useful to regain some of the health lost when rocket jumping. Keep in mind your lowered rocket ammo and consider using it in conjunction with the Shotgun. Always try to control and fight from high ground areas of the map, such as the top of the containers on Granary.
| |
| − | |-
| |
| − | | class="small" align="center" valign="center" style="padding:0.5em" | [[Image:Pyro.png|100x100px|link=Pyro]]<br>[[Pyro match-ups|Pyro]]
| |
| − | | A bum rush can result in a First Blood if you’re lucky, and inexperienced players are often caught by surprise. If you choose to rush, try and take a route that is fast but offers some concealment. Hug a wall or take a low ground route and wait for an enemy to come out or wait until several have passed you before pulling the trigger. This tactic becomes more and more risky in large games and when the enemy team has several tough classes and Medics waiting for you. In that situation, it can be a good idea to bide your time, play defense, and use the [[Flare Gun]] at range to wear down opponents. Many Arena maps have water that players will usually seek out if they are on fire. Position yourself to block access to the water or to Health kits. Several Arena maps also contain environmental hazards, and it is possible (and hilarious) to use the Compression Blast to knock opponents off cliffs or into saw blades.
| |
| − | |-
| |
| − | | class="small" align="center" valign="center" style="padding:0.5em" | [[Image:Demoman.png|100x100px|link=Demoman]]<br>[[Demoman match-ups|Demoman]]
| |
| − | | Like the Soldier, the Demoman can give himself a great chance at snagging First Blood by using an aggressive early sticky jump. However, it is equally viable to play defensively with Stickybomb traps. Be careful of equipping the [[Chargin' Targe]] or the [[Eyelander]]. The loss of firepower or health can be tough to offset, especially in an Arena round where accumulating several heads is hard due to time constraints and player numbers. Fight to your strengths, using the indirect damage of your weapons as much as possible.
| |
| − | |-
| |
| − | | class="small" align="center" valign="center" style="padding:0.5em" | [[Image:Heavy.png|100x100px|link=Heavy]]<br>[[Heavy match-ups|Heavy]]
| |
| − | | Despite his slow speed, the Heavy can also “rush” – if backed up by a Medic, a Heavy can push opponents back with his sheer resilience and trap them in their spawn or another disadvantageous location. Don’t expect to get First Blood regularly however, unless you manage to come face to face with an enemy rusher and kill them. It can be a extremely risky to be aggressive early especially since it is early in the round when enemy Snipers and Spies are the most active and often the most dangerous due the amount of distractions. Also, if you are lucky enough to have a Medic, playing defensive early is good to help him survive to build up his Übercharge. If you don't have a Medic, try to play ambush style and don't take on too many enemies at once. In the late game when the Control Point becomes available, you can use your toughness to begin capturing and force your opponents to show themselves.
| |
| − | |-
| |
| − | | class="small" align="center" valign="center" style="padding:0.5em" | [[Image:Engineer.png|100x100px|link=Engineer]]<br>[[Engineer match-ups|Engineer]]
| |
| − | | While it is rare for an Engineer to win First Blood, an Engineer can do two great things in an Arena match. One, you can provide healing to your team from your Dispenser and two you can create a “safe zone” with your Sentry Gun. The Sentry Gun is great for defending against early rushers, but make sure to build it as fast as possible in order to have it ready in time. Both your Dispenser and Sentry should start building within seconds of the round start, and you should always speed-build and upgrade as fast as possible. Make sure you remind your teammates to leave you the ammo pickups whenever possible, and search actively (though not recklessly) for dropped weapons. While your initial Buildings will usually go up near your team’s spawn location, make sure to “move that gear up” whenever the opportunity presents itself such as when your team is moving out in a certain direction. Late in the round, having a Sentry covering the Control Point by the time it becomes available for capture can be a winning advantage and forces the other team to take you on as opposed to simply capping. The other alternative for a Sentry location is covering the health pack(s) if there are any, though can depend on whether the enemy team has healing abilities or not. It becomes harder and harder to relocate your Buildings safely if your team starts to get outnumbered and you lose your allies, so plan ahead.
| |
| − | |-
| |
| − | | class="small" align="center" valign="center" style="padding:0.5em" | [[Image:Medic.png|100x100px|link=Medic]]<br>[[Medic match-ups|Medic]]
| |
| − | | It can be less than rewarding to play on a team with a rush mentality as a Medic, since you want to be building your Übercharge and not banzai charging. Hopefully your team doesn’t get itself killed too fast and gives you a chance to heal them (reminding them can be helpful). Always overheal your entire team before the round starts to give even your rushers as much health as possible, and to help you build your Über faster. Try to stay alive as much as possible, and try to attach yourself to the most talented player on your team but don’t ignore your other teammates. Also, don’t be afraid not to follow a teammate into an area when you aren’t sure it’s safe for you. Use your own judgment, and don’t put your fate into the hands of your heal target. In keeping with this, if your team is outnumbered in a combat situation, pull out a weapon and assist. Your healing talents are wasted if all your allies are killed outright. As far as which Medi Gun to use, the [[Kritzkrieg]] is usually the better choice for two reasons. Firstly, Arena rounds are short so the faster charge is more useful more often, and secondly, enemies will often simply try to run away from a regular Über and can usually succeed. Outrunning an invulnerable Heavy is much easier than outrunning a Critting Minigun. Finally, if you end up all alone, all is not lost. Use your advantages of health regeneration and speed to try and outlast your foes.
| |
| − | |- | |
| − | | class="small" align="center" valign="center" style="padding:0.5em" | [[Image:Sniper.png|100x100px|link=Sniper]]<br>[[Sniper match-ups|Sniper]]
| |
| − | | It is often possible to get First Blood within seconds of the start of a round as a Sniper, but remember the same is also true of enemy Snipers! However this advantage is a very small window of opportunity, and in a couple more seconds a Scout or Soldier could very well be in your face. Always stay near a tougher teammate to protect you against close encounters while you try for another shot. Rushing forward is fairly uncommon for a Sniper, however with the [[Huntsman]] and [[Jarate]] a Sniper can prove devastating alongside other rushers. Late in the round, keep moving around the edges of the map and try to remain as concealed as possible. Instead of trying to capture the Control Point, wait for an enemy to try and then shoot them off of it. Also use Health kits or Engineer Buildings as other potential “bait”.
| |
| − | |-
| |
| − | | class="small" align="center" valign="center" style="padding:0.5em" | [[Image:Spy_RED.png|100x100px|link=Spy]]<br>[[Spy match-ups|Spy]]
| |
| − | | The Spy can be one of the trickiest Classes to play in Arena because of time pressure. You can’t take forever to plan your attacks and get into position, because by the time you do, most of your team could already be dead, leaving a bunch of enemy players left who will often be in groups, and who by then will usually be expecting a Spy. Spies must attack fast while they have distractions to take advantage of, but not so fast that they don’t wait for enemy targets to become isolated. Later in the round, gunplay usually becomes more feasible than knifeplay, especially since Disguises become less and less useful when only a few enemies are left. Using your Cloak in combination with the gun can be used to bait people to you for a possible backstab. It can often be more advantageous to disguise as a friendly than as an enemy either very early or very late in the round. Also remember that enemy Buildings can help you, either as bait or as healing, so don’t just simply sap everything in sight. If you are using the Dead Ringer, remember that it can grant an easy First Blood to the enemy. Try not to activate it before First Blood occurs.
| |
| − | |}
| |
| | | | |
| − | ==Related achievements== | + | == Related achievements == |
| − | ==={{Icon class|class=scout|link=scout}} [[Scout]]=== | + | === {{Class link|Scout}} === |
| | {{Achievement table | | {{Achievement table |
| | | 1 = {{Show achievement|Scout|First Blood}} | | | 1 = {{Show achievement|Scout|First Blood}} |
| Line 66: |
Line 36: |
| | }} | | }} |
| | | | |
| − | ==Arena maps== | + | == Update history == |
| − | Arena maps carry the '''arena_''' prefix; community maps are identified with italic font.
| + | {{Update history| |
| − | {| class="wikitable grid" | + | '''{{Patch name|8|19|2008}}''' ([[Heavy Update]]) |
| − | ! class="header" |
| + | * Added Arena mode. |
| − | ! class="header" | Map
| + | * Added maps: Badlands (Arena), Granary (Arena), Well (Arena), Lumberyard, and Ravine. |
| − | ! class="header" | File Name
| + | |
| − | |-
| + | '''{{Patch name|2|24|2009}}''' ([[Scout Update]]) |
| − | | [[File:Arenabadlands.jpg|100px|link=Badlands (Arena)]]
| + | * Added map: Watchtower. |
| − | | '''[[Badlands (Arena)|Badlands]]''' | + | |
| − | | arena_badlands | + | '''{{Patch name|5|21|2009}}''' ([[Sniper vs. Spy Update]]) |
| − | |- | + | * Added maps: Sawmill (Arena) and Nucleus (Arena). |
| − | | [[File:Arenagranary.jpg|100px|link=Granary (Arena)]] | + | |
| − | | '''[[Granary (Arena)|Granary]]'''
| + | '''{{Patch name|8|13|2009}}''' ([[Classless Update]]) |
| − | | arena_granary | + | * Added map: Offblast. |
| − | |- | + | |
| − | | [[File:Arenalumberyard.jpg|100px|link=Lumberyard]] | + | '''{{Patch name|6|28|2011}}''' |
| − | | '''[[Lumberyard]]''' | + | * Fixed a problem with Arena mode first blood [[Critical Hit#Crit-boost|Crit-Boost]] not removing itself at the correct time. |
| − | | arena_lumberyard | + | |
| − | |- | + | '''{{Patch name|10|6|2015}}''' ([[Invasion Community Update]]) |
| − | | [[File:Arenanucleus.jpg|100px|link=Nucleus]]
| + | * Added map: Byre. |
| − | | '''[[Nucleus]]''' | + | |
| − | | arena_nucleus | + | '''{{Patch name|6|25|2016}}''' |
| − | |- | + | * Fixed servers running arena mode constantly entering and exiting the [[Setup time|pre-round state]] while empty. |
| − | | [[File:Offblast 01.jpg|100px|link=Offblast]]
| + | |
| − | | '''''[[Offblast]]'''''
| + | '''{{Patch name|10|5|2021}}''' ([[Scream Fortress 2021]]) |
| − | | arena_offblast_final
| + | * Added map: Graveyard. |
| − | |-
| + | |
| − | | [[File:Arenaravine.jpg|100px|link=Ravine]]
| + | '''{{Patch name|7|7|2022}}''' |
| − | | '''[[Ravine]]''' | + | * Updated Arena mode. |
| − | | arena_ravine | + | ** Fixed players being able to late-join the game. |
| − | |- | + | ** Fixed players on team Unassigned being able to kill other players. |
| − | | [[File:Sawmill.PNG|100px|link=Sawmill]]
| + | |
| − | | '''[[Sawmill]]'''
| + | '''{{Patch name|10|9|2023}} #1''' ([[Scream Fortress 2023]]) |
| − | | arena_sawmill
| + | * Added map: Perks. |
| − | |-
| + | |
| − | | [[File:Watch 01.jpg|100px|link=Watchtower]]
| + | '''{{Patch name|10|27|2023}}''' |
| − | | '''''[[Watchtower]]'''''
| + | * Fixed Arena mode player count HUD layout problem ([https://steamcommunity.com/sharedfiles/filedetails/3049413665 community fix] from [https://steamcommunity.com/profiles/76561199432578055 Funicular]) |
| − | | arena_watchtower
| + | }} |
| − | |- | + | |
| − | | [[File:Tg arenawell.jpg|100px|link=Well (Arena)]]
| + | == Gallery == |
| − | | '''[[Well (Arena)|Well]]'''
| + | <!-- |
| − | | arena_well
| + | No need to include images of other Arena maps, just Watchtower is fine! |
| − | |}
| + | --> |
| | + | <gallery> |
| | + | File:Changeteam arena.png|Team selection interface in the Arena mode. |
| | + | File:HUD Arena.png|The HUD on Arena mode. |
| | + | </gallery> |
| | + | |
| | + | == See also == |
| | + | * [[Capping (competitive)]] |
| | | | |
| | + | {{Heavy Update Nav}} |
| | + | {{Maps Nav}} |
| | | | |
| − | {{HeavyUpdateNav}}
| |
| − | {{maps}}
| |
| | [[Category:Game modes]] | | [[Category:Game modes]] |
| − | [[Category:Strategy]]
| |





 Scout
Scout


