Difference between revisions of "Mann Manor"
m (→Control Point C: idk why it don't have it) |
m (→Control Point A) |
||
| Line 38: | Line 38: | ||
* '''Control Point''': The first control point is nested against the side of the [[RED]] facility. Behind it is an elevated platform from which enemies returning to the battle from spawn may appear. Although this control point takes longer to capture than any other on any map, its proximity to the attackers' spawn and distance from the defenders' spawn usually make it very easy for [[BLU]] to seize. When the point is captured, the shortcut used by RED team is closed. | * '''Control Point''': The first control point is nested against the side of the [[RED]] facility. Behind it is an elevated platform from which enemies returning to the battle from spawn may appear. Although this control point takes longer to capture than any other on any map, its proximity to the attackers' spawn and distance from the defenders' spawn usually make it very easy for [[BLU]] to seize. When the point is captured, the shortcut used by RED team is closed. | ||
* '''Tunnel''': A rock archway to one side provides a medium health kit and a main highway for both teams' travel. | * '''Tunnel''': A rock archway to one side provides a medium health kit and a main highway for both teams' travel. | ||
| − | * ''' | + | * '''Shed''': The house across from the tunnel contains a large health kit and ammo crate, making it a popular sentry location. |
* '''Warehouse''': The small two-floor building directly across from the point, connects to BLU's spawn yard. | * '''Warehouse''': The small two-floor building directly across from the point, connects to BLU's spawn yard. | ||
* '''Yard''': The yard outside BLU's spawn, connects to the warehouse and the main chokepoint. | * '''Yard''': The yard outside BLU's spawn, connects to the warehouse and the main chokepoint. | ||
Revision as of 06:47, 9 April 2023
| Mann Manor | |
|---|---|
| |
| Basic Information | |
| Variants: | Mountain Lab |
| Developer(s): | Unknown |
| Map Info | |
| Environment: | Halloween |
| Setting: | Nighttime, overcast |
| Hazards: | Pumpkin bombs, Horseless Headless Horsemann, Pit |
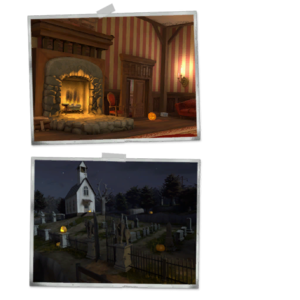
| Map Photos | |
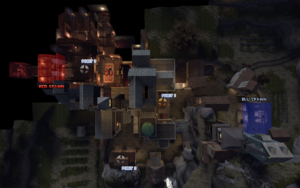
| Map Overview | |
| “ | Also, what's that behind you? Oh, it's just someone drinking a bottle of sparkling water. Oh wait it's a skeleton! [sound of creaking door]
— Scream Fortress
|
” |
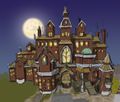
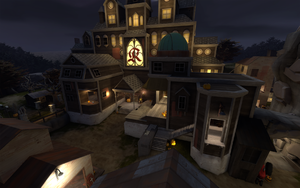
Mann Manor is a community-made Attack/Defend Control Point map. It is a night-time map set in and around the old, decaying mansion of Redmond Mann. It shares elements with other Halloween maps as well as having some gameplay elements that were unique to the map when it was released, such as the Horseless Headless Horsemann, a neutral boss that periodically spawns at contested points on the map and mercilessly attacks all players. Also, in keeping with the Halloween spirit, Pumpkin bomb hazards frequently spawn around the map and Halloween pumpkins can be dropped by killed players.
This map introduced the original Haunted Halloween Gifts. Prior to Scream Fortress 2015, Haunted Halloween Gifts would appear at random locations, one at a time, for each player individually – only the player for which the gift has spawned would see the spawn and obtain notifications. Upon picking up the gift, the player would receive a class-based paper bag mask.
Since Scream Fortress 2015, Halloween Masks are available through completing Merasmissions (Halloween Contracts), or through the Halloween Transmute feature. Haunted Halloween Gift drops have also been replaced by "Ghost Gargoyle" pickups, which interact with the Soul Gargoyle backpack item (obtained during Scream Fortress 2015 or later Halloween Events ) and give the player points, which both raise the "Souls Collected" value on the Soul Gargoyle, and count towards completing Merasmissions.
Mann Manor was released as an official community-developed map with the Scream Fortress Update, due to winning the TF2Maps.net Art Pass Contest.
Contents
Locations
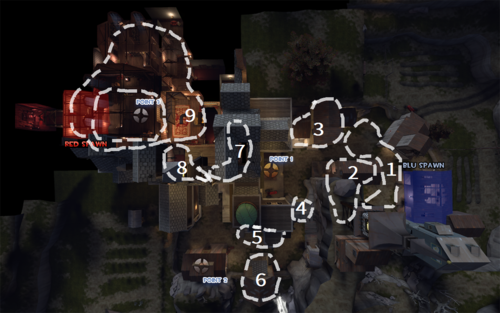
Note: If you're having trouble with finding the locations listed here, you can scroll down to the Helpful overview section to see their exact position marked on the map.
Control Point A
- Control Point: The first control point is nested against the side of the RED facility. Behind it is an elevated platform from which enemies returning to the battle from spawn may appear. Although this control point takes longer to capture than any other on any map, its proximity to the attackers' spawn and distance from the defenders' spawn usually make it very easy for BLU to seize. When the point is captured, the shortcut used by RED team is closed.
- Tunnel: A rock archway to one side provides a medium health kit and a main highway for both teams' travel.
- Shed: The house across from the tunnel contains a large health kit and ammo crate, making it a popular sentry location.
- Warehouse: The small two-floor building directly across from the point, connects to BLU's spawn yard.
- Yard: The yard outside BLU's spawn, connects to the warehouse and the main chokepoint.
Control Point B
- Control Point: The second point is located inside a wood structure overlooked by the main entrance to the RED base. Many corners and edges outside the base make for numerous sentry locations, and long sightlines make it a popular area for Snipers. An elevated outcrop on the far side of the building makes for an excellent Sniper nest, but also an easy entry point into the base by explosive jumping soldiers and Demomen. The defenders in this area tend to stay near the RED base, using it to force the enemies to get close before attacking. However, this sometimes leads to fairly easy captures when attackers are able to slip by.
- Cliffs: The cliff that rest atop the tunnel. Popular sniping spot for attackers. A jump from the cliff can be made to the small house next to the rocky outcrop.
- Small House: The house situated next to the capture point's shack. Its entrance faces opposite the defenders and offers good cover.
- Base Entrance: The base entrance has two sets of stairs on both of its sides. One leads to an overlook of the yard and entrance to the top floor of RED's base, while the other leads to Point A.
Control Point C
- Control Point: The final control point is in the heart of the RED facility, surrounded by a pit on three sides. The large room is accessible from almost every direction, including above - a large hole in the roof allows Soldiers and Demomen to rain explosives down on RED Engineers if the defenders do not control the area. Because the control point is surrounded by a lethal fall, an effective tactic is for defending Pyros to come directly out of the spawn point and airblast foes off of the point - if they don't land in the pit, they will be all the way on the other side of it.
- Lower Entrance Tunnels: From the main entrance are two tunnels. The long way leads directly to the final control point while the other leads to the command room.
- Upper Entrance Tunnels: Above the main entrance is a tunnel that leads to the top floor.
- Top Floor: The top floor leads to the overlook above the point and a hallway containing a series of stairs that lead to the point.
- Command Room: The room at the end of one of the tunnels from the main entrance. One of its walls is a giant window from which the point can be observed.
- RED Spawn: A two-story spawn. The bottom level has two exits to the left and right of Point C, while the top exit has staircases leading down to C or up to the Top Level.
Helpful overview
1.Yard
2.Warehouse
3.house
4.Tunnel
5.Small House
6.Cliffs
7.Lower Entrance Tunnels
8.Upper Entrance Tunnels
9.Top Floor (Surrounding the final control point)
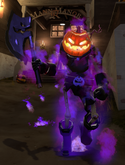
Horseless Headless Horsemann
Mann Manor was the first map to feature an enemy like the Horseless Headless Horsemann – a giant, hostile entity that will chase and kill members of both teams. He has a great deal of health, can severely wound any player with one attack, and moves as fast as the Scout. Additionally, the Horseless Headless Horsemann is capable of maneuvering around obstacles and climbing slopes, but cannot jump. Thus, defeating him requires a good deal of effort and cooperation from multiple players from either team.
The Horseless Headless Horsemann will spawn at whichever capture point is being disputed. He will single out and chase one player randomly determined to be "It", slaying any other players unfortunate enough to be caught between him and his target. A player who is "It" will be notified via an on-screen message and can be identified by a white skull and crossbones icon which floats above their head, similar to the effect from the Fan O'War. A player will be designated as "It" until he is killed, is far enough away from the Horseless Headless Horsemann, survives for 30 seconds, or is in an area inaccessible to the Horseless Headless Horsemann, such as the respawn room, in which case another player will be randomly assigned as "It". Additionally, a player can hit an enemy with a melee weapon to pass the "It" status to them.
Strategy
 | “Sun Tzu's got nothing on us!” This map's Community strategy page is a stub. As such, it is not complete. You can help the Team Fortress Wiki Community Strategy Project by expanding it. Notes: None added |
Control Point Timing
| Control Point | Multiplier | Seconds | ||
|---|---|---|---|---|
| Control Point A | ×1 |
| ||
| ×2 |
| |||
| ×3 |
| |||
| ×4 |
| |||
| Control Point B | ×1 |
| ||
| ×2 |
| |||
| ×3 |
| |||
| ×4 |
| |||
| Control Point C | ×1 |
| ||
| ×2 |
| |||
| ×3 |
| |||
| ×4 |
|
Related achievements
 Scarechievements
|
|
 Ghostchievements
|
|
Gallery
Screenshots
Portraits
Painting of Gravel Pit.
Painting of Badlands.
Painting of Badwater Basin.
Painting of Badlands.
Painting of Granary.
Painting of Dustbowl.
Redmond Mann's family crest as seen on the tablecloths in the manor.
Concept art
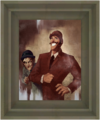
An unused portrait of Redmond Mann. Originally, this painting hung at control point C, but after a last minute QA session between YM and Rexy, the painting was not included as it was deemed a major weakness in the map's potential. A new portrait of Redmond was created and included in the shipped version.
Easter eggs
There are nine rubber duckies hidden throughout the map. While previous statements claim this is homage to a gaming community Rexy belonged to, he has stated this was merely a fun Easter egg and was implemented instead by YM. There are also other hidden animals, such as a spider and frog.
The ninth duck is hidden behind the locked doors to Redmond's room adjacent to RED's spawn point.
2fort2furious' IP address on the wall in front of BLU's spawn point
The scarecrow outside of the map wearing a white Ghastly Gibus
Update history
October 27, 2010 Patch (Scream Fortress Update)
- Added Mann Manor to the game.
- Improved clipping to prevent players from getting out of the map and to fix various exploit ledges.
- Fixed players who are spectating teammates being able to collect the Haunted Halloween Gift in Mann Manor.
- Fixed Engineers being able to build under the final capture point in Mann Manor.
- Fixed players building in rafters.
Trivia
- Originally, a version of the mansion chair prop existed with an animated sequence to make the chair "move" by itself several times over a 2-minute loop. This was cut from the shipped map, and appears only in the piano room of the contest entry version, artpass_ym.bsp.
- Mann Manor is located in the city of Manne-upon-Thames.
- Mann Manor is the birthplace of Redmond, Blutarch, & Gray Mann.
External links
| |||||||||||||||||||||||||
| ||||||||||||||||||||||||||||||||||||||||||||||
