Difference between revisions of "Wutville"
m (common typo) |
m (→Locations: Added location images) |
||
| Line 39: | Line 39: | ||
* '''First RED spawn''' and '''Checkpoint A''': RED's first spawn is a small room tucked away in a corner, with a big front yard and two medium ammo boxes and health kits, one on each side, and a clear view of Checkpoint A from its doors. | * '''First RED spawn''' and '''Checkpoint A''': RED's first spawn is a small room tucked away in a corner, with a big front yard and two medium ammo boxes and health kits, one on each side, and a clear view of Checkpoint A from its doors. | ||
| + | <gallery> | ||
| + | File:PL wutville1.png|BLU spawn area. | ||
| + | File:PL wutville2.png|The Arch. | ||
| + | File:PL wutville3.png|First RED spawn. | ||
| + | File:PL wutville4.png|Checkpoint A. | ||
| + | </gallery> | ||
=== Checkpoint B === | === Checkpoint B === | ||
| Line 46: | Line 52: | ||
* '''Second RED spawn''': A small room right next to Checkpoint C. Turning right takes RED to the Alleyway and the tunnel that leads to the entrance to Checkpoint B; turning left takes RED to the exit of the Checkpoint B building and one of its round doorways. | * '''Second RED spawn''': A small room right next to Checkpoint C. Turning right takes RED to the Alleyway and the tunnel that leads to the entrance to Checkpoint B; turning left takes RED to the exit of the Checkpoint B building and one of its round doorways. | ||
| − | + | <gallery> | |
| + | File:PL wutville5.png|Checkpoint B. | ||
| + | File:PL wutville7.png|The Alleyway. | ||
| + | File:PL wutville6.png|Second RED spawn. | ||
| + | </gallery> | ||
=== Checkpoint C === | === Checkpoint C === | ||
* '''Checkpoint C''': After RÜDY leaves the building with Checkpoint B, it must make a right turn and follow an upward and mostly straight path to reach point C. BLU's only flank option is to go around RED's second spawn. | * '''Checkpoint C''': After RÜDY leaves the building with Checkpoint B, it must make a right turn and follow an upward and mostly straight path to reach point C. BLU's only flank option is to go around RED's second spawn. | ||
| − | + | <gallery> | |
| + | File:PL wutville8.png|Checkpoint C. | ||
| + | </gallery> | ||
=== Checkpoint D === | === Checkpoint D === | ||
* '''The Wooden Path''': A wooden platform that goes around a building and isn't much higher than the cart's path. | * '''The Wooden Path''': A wooden platform that goes around a building and isn't much higher than the cart's path. | ||
| Line 60: | Line 72: | ||
* '''Checkpoint D''': The final goal for BLU, it is a pit with a narrow entrance and an open ceiling. | * '''Checkpoint D''': The final goal for BLU, it is a pit with a narrow entrance and an open ceiling. | ||
| + | <gallery> | ||
| + | File:PL wutville11.png|The fenced flank. | ||
| + | File:PL wutville9.png|RED final spawn. | ||
| + | File:PL wutville10.png|Final point. | ||
| + | </gallery> | ||
== Helpful overview == | == Helpful overview == | ||
Revision as of 21:42, 9 November 2023
| Wutville | |
|---|---|
| |
| Basic Information | |
| Developer(s): | Unknown |
| Map Info | |
| Environment: | Smissmas |
| Setting: | Night, Town |
| Hazards: | Pitfalls, Payload Cart explosion |
| Map Photos | |
| Map Overview | |
| “ | Ol Nick has scores of naughty children forced into his employ by the arcane rules of the Austrialian Christmas.
(...) The children, however, took advantage of Nick's lack of attention and intoxication. They made a plan and hired the Blue Team with the promise of fancy hats to shove a train into Ol Nick's Bottomless Pit as a distraction while they make their own safe exit. — Wutville publicity blurb
|
” |
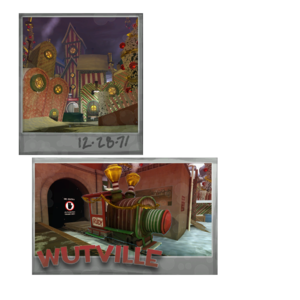
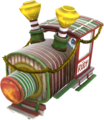
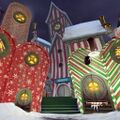
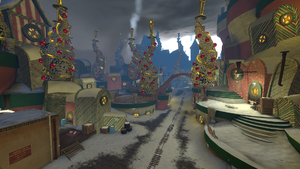
Wutville is a community-created, single-stage, Smissmas-themed Payload map added in the Smissmas 2020 update. BLU has been hired to escort the bomb-ladened RÜDY, a red-nosed railroad engine similar to Li'l Chew-Chew from Frontier, through four checkpoints within Old Nick's prison workcamp for naughty children.
The setup timer is 60 seconds.
Wutville was contributed to the Steam Workshop.
Contents
Locations
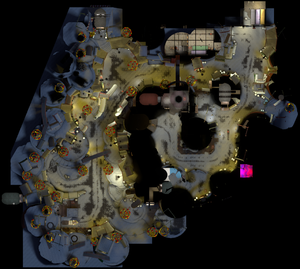
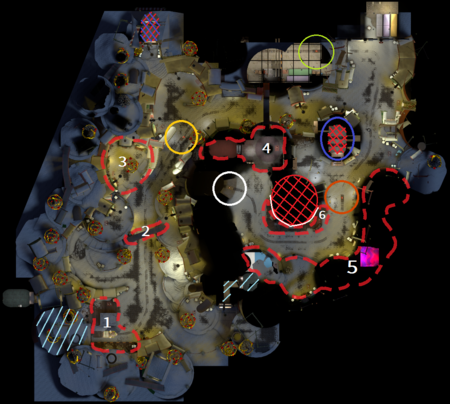
Note: If you are having trouble with finding the locations listed here, you can scroll down to the Helpful overview section to see their exact position marked on the map.
Checkpoint A
- RÜDY's station: RÜDY, the Payload, starts on a station with two platforms, one on each side; a long one that must be jumped on and a small one with a booth. The small platform contains a medium ammo box and health kit and access to one of BLU's alternate rollouts and resupply room.
- BLU spawn: BLU's other alternate rollout and resupply is located on higher ground. Here, you start in a room with only one exit. As they leave the spawn, they may either go down a curved ramp or jump over a fence to the right past medium health pack and a large ammo box. Either way they have to cross a big, open area in order to reach RÜDY.
- The Arch: A big arch that passes high over the cart's tracks. Both teams can reach it from either of its sides, but BLU has it easier; for RED to reach the right side (from their perspective), they must do some crouch-jumping over some barrels and a fence. This side is home to a medium ammo box and health kit.
- The Plaza: Just past the Arch and to the left (from BLU's perspective) is a Christmas tree with plenty of space around it, as well as a medium ammo box and a small health kit. A tall wall offers protecting for BLU. On the other side of the tracks, a slope takes player to a vantage point over the RED spawn's exit and to a building that leads to the Alleyway, just past the first checkpoint.
- First RED spawn and Checkpoint A: RED's first spawn is a small room tucked away in a corner, with a big front yard and two medium ammo boxes and health kits, one on each side, and a clear view of Checkpoint A from its doors.
Checkpoint B
- Checkpoint B: Soon after Checkpoint A, RÜDY must go into a building that houses Checkpoint B after a turn and a ramp. There are four passages in total: two train passages and two round doorways.
- The Alleyway: A side path outside the building housing Checkpoint B with access to multiple tunnels that offer flank routes; the first tunnel connects the entrance to Checkpoint B straight to the second RED spawn, the second tunnel loops back to point A, a fork to the right also takes BLU to RED's second spawn, and the final tunnel passes beneath the second RED spawn and the train tracks after Checkpoint B.
- Second RED spawn: A small room right next to Checkpoint C. Turning right takes RED to the Alleyway and the tunnel that leads to the entrance to Checkpoint B; turning left takes RED to the exit of the Checkpoint B building and one of its round doorways.
Checkpoint C
- Checkpoint C: After RÜDY leaves the building with Checkpoint B, it must make a right turn and follow an upward and mostly straight path to reach point C. BLU's only flank option is to go around RED's second spawn.
Checkpoint D
- The Wooden Path: A wooden platform that goes around a building and isn't much higher than the cart's path.
- The Side Path: A fenced flank that takes BLU directly to a hole above the pit where they must throw RÜDY, with a vantage point over both RED spawns.
- RED Turbine Spawn: One of RED's last resupply rooms, right next to Checkpoint D and with a turbine right outside it.
- Side RED Spawn: Another small resupply room. As soon as RED leaves and turns left, they see the final checkpoint.
- Checkpoint D: The final goal for BLU, it is a pit with a narrow entrance and an open ceiling.
Helpful overview
1.RÜDY's station
2.Arch
3.Plaza
4.Alleyway
5.Side path
6.Wooden path
Blue/red diagonal lines: First Blu/Red spawn
Blue/red double diagonal lines: Second Blu/Red spawn
Blue/red double diagonal lines w/ a circle: Third Blu/Red spawn
Yellow circle: First checkpoint
Green circle: Second checkpoint
Orange circle: Third checkpoint
White circle:Final checkpoint
Strategy
 | “Sun Tzu's got nothing on us!” This map's Community strategy page is a stub. As such, it is not complete. You can help the Team Fortress Wiki Community Strategy Project by expanding it. Notes: None added |
Main article: Community Wutville strategy
Update history
December 3, 2020 Patch (Smissmas 2020)
- Added Wutville to the game.
- The Smissmas trees are now properly colliding with mercs and ordinance(sic)
- The larger first BLU spawn has been re-zoned for proper class changes and no more Engineer shenanigans
- Wooden crates and furniture from the 2Fort division has had the minimum DirectX levels restored and should now be visible to mercs
- Clipping of ledges and outcroppings around the Control Points has been installed to keep the merc's boots on the ground
- The train tunnels will no longer allow for early escape
- [Undocumented] Removed Poopy Joe mural located within the alternate BLU rollout.
- [Undocumented] Fixed fade distance issues with props on Wutville.
- Fixed a few static_prop models being used to stand on high up in the map
Bugs
- It is possible to go outside of the map's bounds via rocket jumping as the Soldier, stickybomb jumping as the Demoman, and sentry jumping as the Engineer.
- Projectiles can sometimes be shot though spawn doors.
- Taunt kills can sometimes trigger through spawn doors.
- Due to rendering issues, most of the map is rendered past the player's point of view, resulting in high resource usage and low framerates.
Trivia
- The architectural style of the buildings around the map, as well as the map's name, is based on the fictional town Whoville, as it appeared in the 1957 children's book How the Grinch Stole Christmas! written by Dr. Seuss.
- The name Rudy is often short for Rudolph. Rudolph the Red-Nosed Reindeer is a popular Christmas story character.
- A wall mural dedicated to Poopy Joe was once located inside the building at Checkpoint B, but was later removed.
Gallery
Pyroland reference on a storage container located near Checkpoint B.
| |||||||||||||||||||
| |||||||||||||||||||||||||
