Difference between revisions of "2Fort Invasion"
GrampaSwood (talk | contribs) (→Gallery: mc, I have my doubts that the "shut up carol" bit refers to Caroline from Portal, it's more likely to just be the "shut up carol" meme.) |
GrampaSwood (talk | contribs) (Does not exist) |
||
| Line 142: | Line 142: | ||
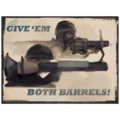
File:2fort invasion poster2.png|A tribute to the WWII [[commons:File:"Give'em Both Barrels" - NARA - 513619.jpg|propaganda poster]] by [[w:Jean Carlu|Jean Carlu]]. | File:2fort invasion poster2.png|A tribute to the WWII [[commons:File:"Give'em Both Barrels" - NARA - 513619.jpg|propaganda poster]] by [[w:Jean Carlu|Jean Carlu]]. | ||
File:Alien Propaganda 2.png|A tribute to the WWII [[commons:File:"Loose talk can cost lives" - NARA - 514910.jpg|propaganda poster]] by [[w:William Steig|William Steig]]. | File:Alien Propaganda 2.png|A tribute to the WWII [[commons:File:"Loose talk can cost lives" - NARA - 514910.jpg|propaganda poster]] by [[w:William Steig|William Steig]]. | ||
| − | File:Alien Propaganda 3.png|A tribute to the WWII [[commons:File:"Loose talk can cause lives" - NARA - 514915.jpg|propaganda poster]] by | + | File:Alien Propaganda 3.png|A tribute to the WWII [[commons:File:"Loose talk can cause lives" - NARA - 514915.jpg|propaganda poster]] by R. John Holmgren. |
File:Alien Propaganda 1.png|A giant alien walker. "[[w:We can do it!|We can do it!]]" was a famous WWII propaganda phrase. | File:Alien Propaganda 1.png|A giant alien walker. "[[w:We can do it!|We can do it!]]" was a famous WWII propaganda phrase. | ||
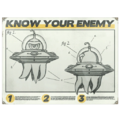
File:2Fort Invasion UFO Poster 1.png|A sign warning of an unsecured area. | File:2Fort Invasion UFO Poster 1.png|A sign warning of an unsecured area. | ||
Revision as of 17:04, 7 May 2024
| 2Fort Invasion | |
|---|---|
| |
| Basic Information | |
| Map type: | Capture the Flag |
| File name: | ctf_2fort_invasion
|
| Released: | October 6, 2015 Patch (Invasion Community Update) |
| Variants: | 2Fort |
| Developer(s): | Miguel "BANG!" Melara The Ronin Michael Egan Aeon "Void" Bollig Martin "Chaofanatic" Ellis Ryan "Freeflow" Leitao Harlen "UEAKCrash" Linke James "Retro" Wright |
| Map Info | |
| Environment: | Farmland |
| Setting: | Nighttime |
| Deep Water: | Yes |
| Pyrovision Support: | No |
| Map Items | |
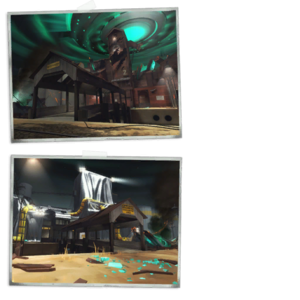
| Map Photos | |
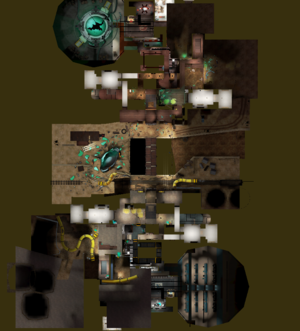
| Map Overview | |
| Map Stamp | |
| Supporters Leaderboard | |
| “ | The aliens are taking over but the teams are too busy trying to figure out better ways to kill each other with alien artifacts.
— Invasion Community Update
|
” |
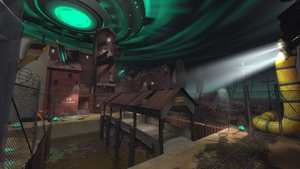
2Fort Invasion is a community-created Capture the Flag map. It is a version of 2Fort made for the Invasion Community Update.
Set at nighttime, the two bases have been converted into research labs studying alien technology.
- Because of the alien biology research conducted in BLU's secret lab, the BLU buildings are a biological containment site. The posters in this building either refer to the study of alien biology or advertise the sponsors of radio KKBC.
- With the scattered wrecks of alien saucers and walkers, the RED buildings depict the alien vs. mercenary battle zone. RED's secret lab is researching recovered alien technology, including portals and new guns. Most of the posters in this building are in the style of WWII era propaganda art.
Destroyed alien parts spawn around the map, which explodes when damaged, similar to Pumpkin bombs.
Contents
Locations
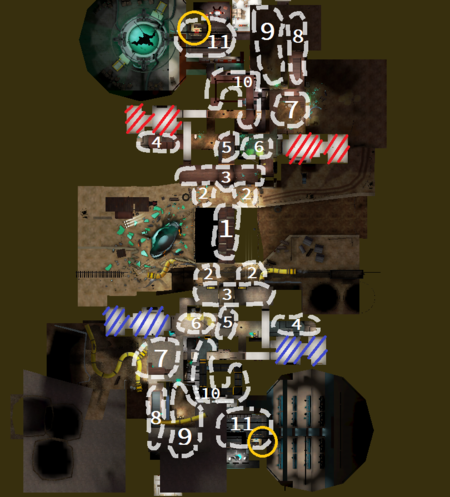
Note: If you are having trouble with finding the locations listed here, see the Helpful overview section to see their exact position marked on the map.
Outside locations
- Bridge: The bridge connecting the two forts. The bridge is covered, allowing mobile classes to get on top of it (such as with a shield charge or an explosive jump). It is possible for less mobile classes (such as Medic or Sniper) to get on the roof by jumping from the edge nearest to the window of the battlements. There are wooden poles on the side of the bridge which you can stand on, and there are a few holes in the roof of the Bridge, which allow for bullets and projectiles to pass through.
- Entrance: After crossing the bridge, there are two ground entrances into the base. The "Entrance" extends from those two doorways into the base a short distance. From here, the layout of the entrance is a T-shape. Turning left brings the player to the stairs that lead down to the sewers, as well as the narrow corridor linking the Battlement Resupply room to both the entrance and the Courtyard (there is a trapdoor in the ceiling allowing players to drop down from the Resupply room).
- Entrance side room: Turning right from the entrance leads into a medium-sized room with a door at the opposite end which provides access to the courtyard. This room is heavily trafficked by both teams, as it is the most direct way to reach the courtyard from the main entrance. Engineers can set up small camps in here if the enemy is attempting to push through the entrance. In addition, because the room is large, it is often a hiding place for Spies. In many other parts of 2Fort, corridors are too narrow to provide much cover for an invisible Spy, but this room is an exception, allowing them to move through it undetected.
- Battlements: The Battlements are on the front of the second floor of each base and have a center "bunker" section. This section has large glass-less windows and is a roofed structure. The windows allow almost unbroken lines of sight into the area. The battlements are also often referred to as the "balcony," as well as the "Sniper ledge" or "Sniper deck", due to their main purpose as a camping area for Snipers. The ledges provide Snipers with an excellent view of most of the exterior of 2Fort, with the exception of the bridge and the water beneath it. The RED side has a ledge placed high enough to cause fall damage if walked off of, while the BLU side's ledge is not tall enough.
Fort locations
- Sewers: The tunnels under each base, leading from the water beneath the bridge to the "Entrance", are generally referred to as "The Sewers". They have several sharp turns, creating numerous blind corners around which to fight. The sewers are generally used as a way of entering the enemy base free from the attention of the Snipers above. The narrowness of the sewers and the water makes it difficult for Spies to sneak past enemies who are also using the tunnels.
- Sewer room: In each sewer, there is a room recessed into a corner in such a way that it is impossible to see the entire room from inside the tunnels. On the water-side of the room, the tunnel has two 90 degree bends, but on the base-side of the room, there is one long unbroken stretch of tunnel. The long tunnel provides a long-range line of sight between the room and the sewer exit. The rooms are often camped by Engineers, who use Teleporters to allow their team to quickly access the enemy base, or Sentry Guns to prevent the opposing team from using that location.
- Courtyard: The Courtyard is the main means of transition between the ground floor and the second floor in each base. It is an enclosed, roofless space inside each base, next to the main spawn room and on the player's right when they come through the entrance. It is bounded on three sides by high ledges, and there are doors connecting to the spawn room, a staircase leading down to the Intelligence room on the second floor, and a door from the entrance and from the balcony spawn corridor on the ground floor. Two staircases allow access from below to the upper level. Engineers often use the space as a major defensive point, as it provides the only means of access to the Intelligence for most classes. By setting up a Sentry Gun, an Engineer can successfully provide an effective defense against assaults on the intelligence, particularly if positioned so as to cover the Battlements' doorway.
- Grate: This is the small room with the grated floor right above the entrance of each base. It is connected directly to the upstairs area and, as a result, is often used by players to gain quick access to battles in the entrance. Demomen, Soldiers, Engineers, Scouts, and Pyros can jump up to the second story through this, providing another means of access to the second floor. Classes such as the Engineer and Demoman can also camp above the grate, limiting enemy access through the front entrance. Splash damage can be dealt through the grate.
- Upstairs: This is the large room on the second floor, adjacent to the main resupply room. The Upstairs area has an exit to the Battlements, "Grate", "top of the Spiral", and "Courtyard". This room is heavily trafficked as it is a major crossroads on the map, connecting practically every area of the base. It is often used by Scouts who have jumped to the balcony, as it provides a direct route to the Intelligence via the spiral ramp. The Upstairs area is also commonly referred to as the "hay room" or "hayloft" (due to the large piles of hay on the floor,) or simply the "upstairs lobby".
Main base locations
- Wheelchair Access Ramp (Spiral): The Spiral ramp that leads from the Basement up and out of the base is one of only two access points to the Intelligence room. Like the Sewers, the Spiral is a narrow corridor with right-angle turns. This tends to result in close quarters fighting, and due to the confined space it is fairly easy to block enemy access with a Dispenser, Sentry Gun, or Heavy. At the top, the Spiral connects to the upstairs area via a small room in which there is a small Health Pack and Ammo Pack, as well as two small corners in which Spies often hide. A direct line of sight can be drawn from the upstairs area along the top length of the Spiral, allowing Snipers to eliminate enemies with the Intelligence as they climb the Spiral. The BLU Spiral ramp, however, has changed as it became more narrow, meaning that Engineers can block them with Dispensers easily.
- Stairs: This area contains a long ramp running from the back of the courtyard into the basement. It is the other exit point for a stolen Intelligence. It is often called the "back stairs", "long stairs", "straight stairs", or simply "straight". It is also called the "L-Shaft", because it contained an elevator in previous incarnations of the 2Fort map.
- Data Hall (Basement): This is the space downstairs between the Spiral ramp and the Stairs. It leads to the Intelligence Office and a Resupply Room exists at the end nearest to the Stairs. In spite of appearances, the Resupply Room is not a Respawn, no player will ever respawn in that room after they die. There is a Health pack and Ammo box in the middle of the Data Hall.
- Intelligence Office: The Intelligence Office has two entrances from the Data Hall. This is the primary defensive point of 2Fort, and as such, it is frequently camped, especially by Engineers. The Intelligence is on top of a desk in the opposite corner to both entrances. The layout of the room makes it very simple for campers to entrench themselves, and successfully removing them can be almost impossible without an ÜberCharge.
Helpful overview
1.Bridge
2.Entrances
3.Battlements
4.Sewer exits
5.Grate
6.Upstairs room and the Entrance Side room right below it
7.Courtyard
8.Stairs
9.Basement (Data Hall)
10.Spiral (Wheelchair Access ramp)
11.Intelligence Room
Strategy
Update history
October 6, 2015 Patch (Invasion Community Update)
- [Undocumented] Added 2Fort Invasion
- Fixed a few areas where players were getting outside of the map
- [Undocumented] Added the Invasion Community Update maps to regular quickplay lists.
- Added
ctf_2fort_invasionto Casual Mode.
Bugs
- It is possible for players to get stuck in the alien bombs.
Gallery
Posters
The movie night poster in BLU base that appeared in the midnight showing teaser.
BLU: Alien biology lab
A propaganda poster identifying the anatomy of the tentacled aliens.
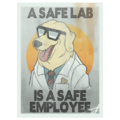
A lab safety poster seen in the Intelligence Office.
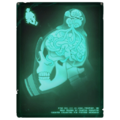
An x-ray of the Pyro with the Triboniophorus Tyrannus on top.
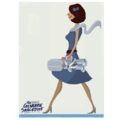
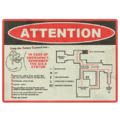
Evacuation poster for the alien research section. Caroline is Cave Johnson's "office mistress" in Portal 2.
RED: Alien technology research / war front
The posters in this building are a tribute to famous United States propaganda art from World War II.
A tribute to the WWII propaganda poster by Jean Carlu.
A tribute to the WWII propaganda poster by William Steig.
A tribute to the WWII propaganda poster by R. John Holmgren.
A giant alien walker. "We can do it!" was a famous WWII propaganda phrase.
A sign warning of an unsecured area. A variant was used to tease the update.
Intelligence
See also
| |||||||||||||||||||||||||||||||||||||||||||||||||||||||||||||||||||
