Difference between revisions of "Payload"
m (→Payload) |
Gabrielwoj (talk | contribs) m (Patagonia cart, removed needimage) |
||
| (172 intermediate revisions by 64 users not shown) | |||
| Line 1: | Line 1: | ||
| − | [[ | + | [[File:Goldrush.jpg|thumb|right|300px|The third stage of [[Gold Rush]], the first Payload map to be introduced into the game.]] |
| − | + | [[File:Badwater Basin RED Base.jpg|thumb|right|300px|The RED base and final checkpoint of [[Badwater Basin]].]] | |
| − | + | {{Quotation|'''The Heavy'''|Onward, great bomb-cart!|sound=Heavy cartmovingforwardoffense17.wav}} | |
| − | |||
| − | |||
| − | + | '''Payload''' is a game mode in which the [[BLU]] team must escort a [[#Carts|cart]], usually full of explosives, through a series of checkpoints and into the [[RED]] team's base within a certain amount of time. | |
| − | + | [[File:Pipeline.jpg|thumb|right|300px|The third stage of [[Pipeline]], a [[#Payload Race|Payload Race]] map.]] | |
| − | + | '''Payload Race''' is another game mode based on '''Payload''', in which both the [[RED]] and [[BLU]] teams have an explosive Payload. To win, each team must push their cart through enemy territory to reach the finishing point while preventing the enemy team from doing the same. | |
| − | [[ | ||
| − | + | == Cart mechanics == | |
| + | === General === | ||
| + | {{anchor|Cart Speed|Cart speed|Cart Speeds|Cart speeds|Speeds}} | ||
| + | The cart is pushed by standing next to it – the more people there are, the faster it moves, up to a limit of 3 players. Any additional players beyond 3 do not increase the speed further. | ||
| + | * [[Scout]]s and players carrying the [[Pain Train]] count for two people. | ||
| + | * If a member of the opposing team stands near the cart, it is [[defense|blocked]], and the cart does not move until the opposing player leaves or is killed. | ||
| + | * Spies [[Disguise|disguised]] as an enemy cannot push their own cart or block the enemy's cart, but will get healed by the enemy's cart. Spies disguised as teammates can push their own cart and block the enemy's cart. | ||
| + | ** Disguised Spies do not get bonuses when disguised as Scout, nor if the class they are disguised as is using the Pain Train. | ||
| + | * Different ÜberCharges interact differently with the cart, see the table below. | ||
| − | + | {{UberCharge Cart}} | |
| − | |||
| − | |||
| − | {{ | + | {{Anchor|inclined slope|Rollback}} |
| + | If the cart is left unattended, it stops moving forwards and, after 30 seconds, it begins to roll backwards until the previous checkpoint. The cart-pushing team must stand next to it again to once again move it forwards. | ||
| − | + | On some maps, there are special '''incline slopes''' or '''rollback zones''', where an unattended cart rolls backwards. In these zones, the cart-pushing team must continuously stand next to the cart to get it up such hills. These sections of track are marked with chevrons on the progress bar, to help show how far the cart must be pushed to overcome them. | |
| − | |||
| − | |||
| − | + | Currently, all Standard Payload maps use the same cart speed. Speeds are measured in [[Hammer unit]]s per second. | |
| − | {{ | + | {{Cart speeds}} |
| − | + | If any [[buildings]] are placed on the tracks, the building is destroyed as the cart passes through it. The cart works as a Level 1 [[Dispenser]] for the team it belongs to, restoring [[health]] and [[Ammo|ammunition]] to those pushing it. Unlike Level 1 Dispensers, the cart does not have a limit to the amount of metal it can give to Engineers. It also provides ammo and health to disguised enemy Spies. | |
| − | |||
| − | + | As of the [[July 8, 2010 Patch|Engineer Update]], the cart has a glowing, team-colored outline effect that enables its position to be identified through walls and from further away, allowing players to keep an eye on its whereabouts at all times. | |
| − | |||
| − | |||
| − | |||
| − | |||
| − | |||
| − | |||
| − | |||
| − | |||
| − | |||
| − | |||
| − | |||
| − | |||
| − | |||
| − | |||
| − | |||
| − | |||
| − | |||
| − | |||
| − | |||
| − | |||
| − | |||
| − | |||
| − | |||
| − | |||
| − | |||
| − | |||
| − | |||
| − | |||
| − | |||
| − | |||
| − | |||
| − | |||
| − | |||
| − | |||
| − | |||
| − | |||
| − | |||
| − | + | === Payload === | |
| + | In '''Payload''', the BLU team must push a cart through a series of checkpoints and into the RED team's base within a certain amount of time. Reaching a checkpoint adds time to the timer. | ||
| − | + | If a BLU player does not push the cart after 30 seconds have passed, the cart starts slowly moving backwards until it reaches a checkpoint/BLU spawn or a BLU player stands next to it again. If the cart is not moving backwards when time runs out, [[Overtime]] occurs, which gives the attacking team five seconds to move the bomb until they lose. The timer resets each time the cart is pushed. | |
| − | |||
| − | + | === Payload Race === | |
| − | + | {{anchor|PLR|plr|Plr|Race|race|Payload race|Payload Race}} | |
| − | + | In '''Payload Race''', both teams are issued a cart. The teams must simultaneously push their cart through enemy territory while preventing the enemy team from doing the same. Unlike Payload maps, the cart does not move backwards after any length of time (unless it is on an inclined slope) and there is no time limit; the map only ends when one team successfully pushes their cart to the finish point. | |
| − | |||
| − | |||
| − | | | ||
| − | | | ||
| − | |||
| − | |||
| − | |||
| − | |||
| − | |||
| − | |||
| − | |||
| − | |||
| − | |||
| − | |||
| − | |||
| − | + | Payload Race maps tend to use rolling slopes much more than standard Payload maps. During [[Overtime]], both carts automatically move forward slowly to prevent [[Match outcomes#Stalemate|Stalemates]]. Pushing one cart stops the other from moving forward by itself. If the carts' tracks cross paths, and both carts arrive at the intersection at the same time, one cart waits for the other to pass by even if players are on both carts. | |
| − | ' | ||
| − | + | === Li'l Chew Chew === | |
| + | {{main|Frontier}} | ||
| − | + | On the Payload map [[Frontier]], a substantially larger mechanized train engine known as '''Li'l Chew-Chew''' is used in place of the standard BLU cart. It has movable jaws with razor-sharp teeth and two headlights as eyes, and a rideable platform on the back. | |
| − | + | Providing cover from frontal attacks, Li'l Chew Chew is capable of significantly damaging any player of either team in its mouth when it is moving forwards. The damage done increases as more players ride its rear platform; three or more attackers cause the jaws to deal an instant-kill by "swallowing" the victim whole, leaving no corpse. The platform also has a built-in BLU [[Dispenser]]; however, those riding on it have trouble seeing directly in front of the cart, as the main body of the train is in the way. It has a noticeably increased pushing range when compared to normal carts. It cannot be blocked by opposing players from RED team standing in front of it, only when opposing players stand near or on top of the train's platform. Rüdy, a modified variant of Li'l Chew Chew, appears in [[Wutville]]. | |
| − | |||
| − | === Payload | + | == Strategy == |
| − | + | {{main | |
| + | |Community Payload strategy|l1=Community Payload strategy | ||
| + | |Community Payload Race strategy|l2=Community Payload Race strategy | ||
| + | }} | ||
| − | == | + | == {{anchor|Payload maps|Payload Maps|maps}} Maps == |
| − | + | {{main|List of maps}} | |
| − | + | Payload maps may be split into multiple rounds, such as [[Gold Rush]], [[Hoodoo]], and [[Thunder Mountain]]. These are split into three stages that the BLU team must advance through and win. Stages one and two have two checkpoints and stage three has three checkpoints (two for Hoodoo), counting the final point as such. | |
| − | + | Certain maps, like [[Badwater Basin]] and [[Upward]], have a single round with four checkpoints, including the final point. Advancing the cart to the next checkpoint gives the BLU team extra time. Advancing the cart to the final point moves the map onto the next stage. When the cart reaches the final point on the final stage, the Payload cart explodes, killing anyone standing too close to it and destroying the RED team's base as well. | |
| − | |||
| − | + | Payload Race maps can be single or multi-stage. [[Pipeline]] and [[Nightfall]] are split into three stages, whereas [[Hightower]] consists of only one stage. Winning in each of the first two stages gives an advantage to the winning team in the next stage (the cart starts slightly forward from the starting point). | |
| − | |||
| − | |||
| − | |||
| − | |||
| − | |||
| − | |||
| − | |||
| − | |||
| − | |||
| − | |||
| − | |||
| − | |||
| − | |||
| − | |||
| − | |||
| − | |||
| − | |||
| − | |||
| − | |||
| − | |||
| − | {{ | + | === Payload === |
| + | '''Payload''' maps carry the '''pl_''' prefix; community maps are identified with an italic font. | ||
| + | {{Maps table|Payload}} | ||
| − | == | + | === {{anchor|PLR maps|plr maps|Race maps|Payload Race maps}} Payload Race === |
| − | = | + | '''Payload Race''' maps carry the '''plr_''' prefix; Community maps are identified with an italic font. |
| − | + | {{Maps table|Payload Race}} | |
| − | |||
| − | |||
| − | |||
| − | |||
| − | |||
| − | |||
| − | |||
| − | |||
| − | |||
| − | |||
| − | |||
| − | |||
| − | |||
| − | |||
| − | |||
| − | |||
| − | |||
| − | |||
| − | |||
| − | |||
| − | |||
| − | |||
| − | |||
== Related achievements == | == Related achievements == | ||
| − | ==={{Class link|Scout}}=== | + | === {{Class link|Scout}} === |
{{Achievement table | {{Achievement table | ||
| {{Show achievement|Scout|Brushback}} | | {{Show achievement|Scout|Brushback}} | ||
}} | }} | ||
| − | ==={{Class link|Soldier}}=== | + | === {{Class link|Soldier}} === |
{{Achievement table | {{Achievement table | ||
| {{Show achievement|Soldier|Hamburger Hill}} | | {{Show achievement|Soldier|Hamburger Hill}} | ||
| Line 179: | Line 88: | ||
}} | }} | ||
| − | ==={{Class link|Demoman}}=== | + | === {{Class link|Demoman}} === |
{{Achievement table | {{Achievement table | ||
| {{Show achievement|Demoman|Bravehurt}} | | {{Show achievement|Demoman|Bravehurt}} | ||
| Line 185: | Line 94: | ||
}} | }} | ||
| − | ==={{Class link|Heavy}}=== | + | === {{Class link|Heavy}} === |
{{Achievement table | {{Achievement table | ||
| {{Show achievement|Heavy|Pushkin the Kart}} | | {{Show achievement|Heavy|Pushkin the Kart}} | ||
| Line 191: | Line 100: | ||
}} | }} | ||
| − | ==={{Class link|Engineer}}=== | + | === {{Class link|Engineer}} === |
{{Achievement table | {{Achievement table | ||
| {{Show achievement|Engineer|No Man's Land}} | | {{Show achievement|Engineer|No Man's Land}} | ||
}} | }} | ||
| − | ==={{Class link|Spy}}=== | + | === {{Class link|Spy}} === |
{{Achievement table | {{Achievement table | ||
| {{Show achievement|Spy|Is It Safe?}} | | {{Show achievement|Spy|Is It Safe?}} | ||
| Line 202: | Line 111: | ||
== Update history == | == Update history == | ||
| + | {{Update history| | ||
'''{{Patch name|4|29|2008}}''' ([[Gold Rush Update]]) | '''{{Patch name|4|29|2008}}''' ([[Gold Rush Update]]) | ||
| − | * Added | + | * Added Payload mode. |
| − | * Added Gold Rush | + | * Added map: Gold Rush. |
| − | '''{{Patch name|8|19|2008}}''' ([[ | + | '''{{Patch name|8|19|2008}}''' ([[Heavy Update]]) |
| − | * Added | + | * Added map: Badwater Basin. |
* Added proper handling of cart blocking recognition to Payload maps | * Added proper handling of cart blocking recognition to Payload maps | ||
| − | '''{{Patch name| | + | '''{{Patch name|12|15|2008}}''' |
| − | * Added | + | * Fixed Engineers being able to upgrade the bomb cart's {{botignore|dispenser}} found in Payload levels |
| + | * Fixed bomb cart's {{botignore|dispenser}} being solid to players and projectiles | ||
| + | |||
| + | '''{{Patch name|5|21|2009}}''' ([[Sniper vs. Spy Update]]) | ||
| + | * Added Payload Race mode. | ||
| + | * Added maps: Hoodoo and Pipeline. | ||
| + | |||
| + | '''{{Patch name|7|8|2010}}''' ([[Engineer Update]]) | ||
| + | * Added maps: Hightower, Thunder Mountain, and Upward. | ||
| + | |||
| + | '''{{Patch name|2|24|2011}}''' ([[Community Map Pack Update]]) | ||
| + | * Added maps: Frontier and Nightfall. | ||
| − | '''{{Patch name| | + | '''{{Patch name|6|23|2011}}''' ([[Über Update]]) |
| − | * | + | * Added map: Barnblitz. |
| − | '''{{Patch name| | + | '''{{Patch name|4|17|2012}}''' |
* {{Undocumented}} Payload carts no longer maintain player overheal. | * {{Undocumented}} Payload carts no longer maintain player overheal. | ||
| + | |||
| + | '''{{Patch name|5|10|2012}}''' | ||
| + | * Added Enabled/Disabled inputs for the {{code|mapobj_cart_dispenser}} entity. | ||
| + | |||
| + | '''{{Patch name|6|27|2012}}''' | ||
| + | * Fixed cases where the Payload [[Heads-up display|HUD]] looked like the cart is still on a hill when it isn't. | ||
| + | |||
| + | '''{{Patch name|2|1|2013}}''' | ||
| + | * Fixed exploit where players could be pushed into enemy spawn rooms by the Payload cart. | ||
| + | |||
| + | '''{{Patch name|6|18|2014}}''' ([[Love & War Update]]) | ||
| + | * Fixed physics debris triggering the Payload cart's finale explosion in [[Upward|{{code|pl_upward}}]]. | ||
| + | * {{Undocumented}} Added new voice lines for the Administrator for Payload Race. | ||
| + | |||
| + | '''{{Patch name|12|8|2014}}''' ([[End of the Line Update]]) | ||
| + | * {{Undocumented}} Added Payload carts, with bombs from the [[End of the Line (video)|End of the Line movie]]. | ||
| + | |||
| + | '''{{Patch name|7|2|2015}} #1''' ([[Gun Mettle Update]]) | ||
| + | * Added map: Borneo. | ||
| + | |||
| + | '''{{Patch name|7|4|2015}} #1''' | ||
| + | * Fixed an exploit related to taunting and then dying on the final control point of Payload maps. | ||
| + | |||
| + | '''{{Patch name|7|15|2015}} #1''' | ||
| + | * Fixed an exploit related to the final control point and dropped weapons on Badwater Basin, Barnblitz, Borneo, and Gold Rush. | ||
| + | |||
| + | '''{{Patch name|10|28|2015}} #1''' ([[Scream Fortress 2015]]) | ||
| + | * Added map: Hellstone. | ||
| + | |||
| + | '''{{Patch name|12|17|2015}} #1''' ([[Tough Break Update]]) | ||
| + | * Added map: Snowycoast. | ||
| + | |||
| + | '''{{Patch name|7|7|2016}}''' ([[Meet Your Match Update]]) | ||
| + | * Added map: Swiftwater. | ||
| + | |||
| + | '''{{Patch name|10|21|2016}}''' ([[Scream Fortress 2016]]) | ||
| + | * Added map: Brimstone. | ||
| + | |||
| + | '''{{Patch name|10|20|2017}}''' ([[Jungle Inferno Update]]) | ||
| + | * Added maps: Banana Bay and Enclosure. | ||
| + | |||
| + | '''{{Patch name|10|19|2018}}''' ([[Scream Fortress 2018]]) | ||
| + | * Added map: Gravestone. | ||
| + | |||
| + | '''{{Patch name|10|10|2019}}''' ([[Scream Fortress 2019]]) | ||
| + | * Added map: Precipice. | ||
| + | |||
| + | '''{{Patch name|10|1|2020}}''' ([[Scream Fortress 2020]]) | ||
| + | * Added maps: Bloodwater and Hassle Castle. | ||
| + | |||
| + | '''{{Patch name|12|3|2020}}''' ([[Smissmas 2020]]) | ||
| + | * Added maps: Pier and Wutville. | ||
| + | |||
| + | '''{{Patch name|10|5|2021}}''' ([[Scream Fortress 2021]]) | ||
| + | * Added map: Terror. | ||
| + | |||
| + | '''{{Patch name|12|2|2021}}''' ([[Smissmas 2021]]) | ||
| + | * Added maps: Bread Space, Chilly, and Polar. | ||
| + | |||
| + | '''{{Patch name|7|8|2022}}''' | ||
| + | * Fixed Payload cart not rolling back. | ||
| + | |||
| + | '''{{Patch name|10|5|2022}}''' ([[Scream Fortress 2022]]) | ||
| + | * Added maps: Bonesaw and Ghoulpit. | ||
| + | |||
| + | '''{{Patch name|12|5|2022}}''' ([[Smissmas 2022]]) | ||
| + | * Added maps: Frostcliff and Rumford. | ||
| + | |||
| + | '''{{Patch name|7|12|2023}}''' ([[Summer 2023 Update]]) | ||
| + | * Added maps: Cashworks, Phoenix, and Venice. | ||
| + | |||
| + | '''{{Patch name|10|9|2023}} #1''' ([[Scream Fortress 2023]]) | ||
| + | * Added maps: Corruption and Spineyard. | ||
| + | |||
| + | '''{{Patch name|12|7|2023}}''' ([[Smissmas 2023]]) | ||
| + | * Added maps: Camber, Emerge, and Hacksaw. | ||
| + | |||
| + | '''{{Patch name|7|18|2024}} #1''' ([[Summer 2024 Update]]) | ||
| + | * Added maps: Embargo and Odyssey. | ||
| + | |||
| + | '''{{Patch name|12|11|2024}}''' ([[Smissmas 2024]]) | ||
| + | * Added maps: Cutter and Patagonia. | ||
| + | }} | ||
| + | |||
| + | == Unused content == | ||
| + | The following models are present in the game files. | ||
| + | <gallery perrow=5> | ||
| + | file:Prototrain1.png|The prototype rideable bomb cart. | ||
| + | file:Prototrain1under.png|The prototype rideable bomb cart undercarriage. | ||
| + | file:Prototrain2.png|The prototype rideable bomb cart car. | ||
| + | file:Prototrain2under.png|The prototype rideable bomb cart car undercarriage. | ||
| + | file:Spytechcartbomb.png|Cart bomb model found in game files that resembles concept art. | ||
| + | </gallery> | ||
== Bugs == | == Bugs == | ||
| − | [[ | + | [[File:Payload glitch.jpeg|thumb|The cart spinning bug.]] |
| − | *The cart may sometimes randomly spin vertically. | + | [[File:Derail.jpg|thumb|A cart derailed from the track.]] |
| − | *The capture progress HUD sometimes does not report how many players are pushing the cart. It may also display the cart as being blocked when it is not. | + | * The cart may sometimes randomly spin vertically. |
| − | *Dying due to the cart explosion causes the [[Deathcam]] to focus on a specific point of the map while displaying the name of an opponent, even if no enemy was involved in the player's death. | + | * The capture progress HUD sometimes does not report how many players are pushing the cart. It may also display the cart as being blocked when it is not. |
| + | * Dying due to the cart explosion causes the [[Deathcam]] to focus on a specific point of the map while displaying the name of an opponent, even if no enemy was involved in the player's death. | ||
| + | * It is possible to derail the cart as it is falling by launching it with an explosion. This works because it becomes a physics prop when it reaches the end of the track. | ||
| + | * A very rare glitch occurs when the doors to BLU do not open, and the map stays in Setup Time. The cart slowly pushes itself and cannot be blocked. | ||
| + | * If a player repeatedly picks up weapons on top of the final checkpoint on certain maps, the dropped weapon may slip through the hatch and detonate the final checkpoint early. | ||
| + | * On certain spots the player can be pushed inside of map geometry, such as the tunnel exit before Upward's 2nd point while standing on top of the cart. | ||
| + | ** It is possible to get stuck inside buildings this way.<!-- Needs citation on enemy buildings --> | ||
| + | ** It is also possible to get inside an enemy player's model.<!-- they may also get in enemy spawn by walking in the same step(add this if you think this isn't gamebreaking, since it do need an very cooperative enemy player) --> | ||
== Trivia == | == Trivia == | ||
| − | [[ | + | [[File:GoldrushCart.jpg|thumb|Concept drawing depicting a different style of cart.]] |
| − | * The default Payload takes the shape of a "Fat Man" implosion-style plutonium atomic bomb. This type of bomb was dropped over Nagasaki during World War II | + | * The default Payload takes the shape of a "[[w:Fat Man|Fat Man]]" implosion-style plutonium atomic bomb. This type of bomb was dropped over Nagasaki during World War II. |
| − | |||
* Hoodoo uses a different cart model. The map description reveals the cart to be carrying a "dirty bomb" – a nuclear explosive consisting of little more than radioactive material strapped to conventional explosives, such as TNT. | * Hoodoo uses a different cart model. The map description reveals the cart to be carrying a "dirty bomb" – a nuclear explosive consisting of little more than radioactive material strapped to conventional explosives, such as TNT. | ||
| − | * On | + | * On some of the carts, there is a [[Heavy]] [[Heavy responses|quote]] written into the paintwork: |
** The default cart bears the words 'Cry some more' scratched into the paintwork. | ** The default cart bears the words 'Cry some more' scratched into the paintwork. | ||
| − | ** The Hoodoo cart has the words 'So much blood!' painted in white on the front-most barrel and the word 'Bonk' written in dust underneath one of the straps | + | ** The Hoodoo cart has the words 'So much blood!' painted in white on the front-most barrel and the word 'Bonk' written in dust underneath one of the straps. |
** Lil' Chew-Chew bears the words 'All of you are dead!' scratched into the paintwork in front of the smoke stack. | ** Lil' Chew-Chew bears the words 'All of you are dead!' scratched into the paintwork in front of the smoke stack. | ||
* The light on the Payload cart is the same as the one duct-taped on the [[Combat Mini-Sentry Gun]]. | * The light on the Payload cart is the same as the one duct-taped on the [[Combat Mini-Sentry Gun]]. | ||
| − | + | ||
| − | {{ | + | == Gallery == |
| − | {{Maps | + | === Carts === |
| + | <gallery perrow="4"> | ||
| + | File:BLU Bombcart.png|The [[BLU]] team's bomb cart. | ||
| + | File:RED Bombcart.png|The [[RED]] team's bomb cart, seen only on Payload Race maps. | ||
| + | File:Hoodoo Bombcart.png|The special model for the cart on [[Hoodoo]]. | ||
| + | File:Lil-chewchew.png|The special cart, [[#Lil' Chew Chew|Lil' Chew Chew]], found on [[Frontier]]. | ||
| + | File:RED Helltower Bombcart.png|The RED team's tomb cart for [[Helltower]] and [[Hassle Castle]]. | ||
| + | File:BLU Helltower Bombcart.png|The BLU team's tomb cart for Helltower and [[Brimstone (map)|Brimstone]]. | ||
| + | File:RED EOTL Bombcart.png|The RED team's special [[End of the Line Update|End of the Line]] bomb cart. | ||
| + | File:BLU EOTL Bombcart.png|The BLU team's special End of the Line bomb cart. | ||
| + | File:BLU Snowycoast Bombcart.png|The BLU team's special [[Snowycoast]] bomb cart. | ||
| + | File:Hellstone cart.png|The special model for the cart on [[Hellstone]]. | ||
| + | File:Gravestone Bottle Cart.png|The BLU team's scrumpy bottle cart for [[Gravestone]]. | ||
| + | File:Precipice Cauldron Cart.png|The BLU team's witch's cauldron cart for [[Precipice]]. | ||
| + | File:Bloodwater cart.png|The special model for the cart on [[Bloodwater]]. | ||
| + | File:Rudy.png|The special cart, Rüdy, found on [[Wutville]]. | ||
| + | File:Breadspace cart.png|The special model for the cart on [[Bread Space]]. | ||
| + | File:Chilly Cart.png|The special model for the cart on [[Chilly]]. | ||
| + | File:RED Bonesaw Bombcart.png|The RED team's saw cart on [[Hacksaw]] and [[Bonesaw (map)|Bonesaw]]. | ||
| + | File:BLU Bonesaw Bombcart.png|The BLU team's saw cart on Hacksaw and Bonesaw. | ||
| + | File:GhoulpitPayloadCart.png|The special model for the cart on [[Ghoulpit]]. | ||
| + | File:Frostcliff cart.png|The special model for the cart on [[Frostcliff]]. | ||
| + | File:Rumford cart.png|The special model for the cart on [[Rumford]]. | ||
| + | File:Embargo cart.png|The special model for the cart on [[Embargo]]. | ||
| + | File:RED Cutter Bombcart.png|The RED team's saw cart on [[Cutter]]. | ||
| + | File:BLU Cutter Bombcart.png|The BLU team's saw cart on Cutter. | ||
| + | File:BLU Patagonia Bombcart.png|The special model for the cart on [[Patagonia]]. | ||
| + | </gallery> | ||
| + | |||
| + | === Concept art === | ||
| + | <gallery> | ||
| + | File:Lilchewchew concept01.jpeg|Lil' Chew Chew render | ||
| + | File:Lilchewchew concept02.jpeg|Lil' Chew Chew finished sketch | ||
| + | File:Lilchewchew concept03.png|Lil' Chew Chew draft sketch | ||
| + | File:Lilchewchew concept04.jpeg|Lil' Chew Chew size comparison to older train cart. | ||
| + | </gallery> | ||
| + | |||
| + | === Other === | ||
| + | <!-- | ||
| + | No need to include images of other payload map huds, just the general one from Thunder Mountain and Nightfall is fine! | ||
| + | --> | ||
| + | <gallery> | ||
| + | File:HUD Payload.png|The HUD on Payload. | ||
| + | File:HUD Payload Race.png|The HUD on Payload Race. | ||
| + | File:Gamemode_payload.png|The main menu illustration used for Payload prior to the [[July 7, 2016 Patch]]. | ||
| + | File:Gamemode_payloadrace.png|The main menu illustration used for Payload Race prior to the July 7, 2016 Patch. | ||
| + | File:Beta_pl_blueprints.png|The main menu illustration used for [[Mann Co. Beta Maps|beta Payload maps]]. | ||
| + | |||
| + | </gallery> | ||
| + | |||
| + | {{Goldrush Update Nav}} | ||
| + | {{Maps Nav}} | ||
[[Category:Game modes]] | [[Category:Game modes]] | ||
Latest revision as of 20:38, 5 January 2025

| “ | Onward, great bomb-cart!
Click to listen
— The Heavy
|
” |
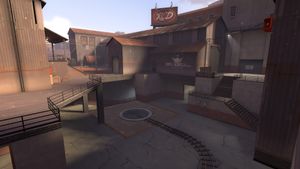
Payload is a game mode in which the BLU team must escort a cart, usually full of explosives, through a series of checkpoints and into the RED team's base within a certain amount of time.
Payload Race is another game mode based on Payload, in which both the RED and BLU teams have an explosive Payload. To win, each team must push their cart through enemy territory to reach the finishing point while preventing the enemy team from doing the same.
Contents
Cart mechanics
General
The cart is pushed by standing next to it – the more people there are, the faster it moves, up to a limit of 3 players. Any additional players beyond 3 do not increase the speed further.
- Scouts and players carrying the Pain Train count for two people.
- If a member of the opposing team stands near the cart, it is blocked, and the cart does not move until the opposing player leaves or is killed.
- Spies disguised as an enemy cannot push their own cart or block the enemy's cart, but will get healed by the enemy's cart. Spies disguised as teammates can push their own cart and block the enemy's cart.
- Disguised Spies do not get bonuses when disguised as Scout, nor if the class they are disguised as is using the Pain Train.
- Different ÜberCharges interact differently with the cart, see the table below.
| Medi Gun | Push | Block |
|---|---|---|
Medi Gun |
No | Yes |
Kritzkrieg |
Yes | Yes |
Quick-Fix |
No | No |
Vaccinator |
Yes | Yes |
If the cart is left unattended, it stops moving forwards and, after 30 seconds, it begins to roll backwards until the previous checkpoint. The cart-pushing team must stand next to it again to once again move it forwards.
On some maps, there are special incline slopes or rollback zones, where an unattended cart rolls backwards. In these zones, the cart-pushing team must continuously stand next to the cart to get it up such hills. These sections of track are marked with chevrons on the progress bar, to help show how far the cart must be pushed to overcome them.
Currently, all Standard Payload maps use the same cart speed. Speeds are measured in Hammer units per second.
| Multiplier | Speed | Rate |
|---|---|---|
| Backwards | -9 | -10% |
| x1 | 50 | 55% |
| x2 | 70 | 77% |
| x3 | 90 | 100% |
If any buildings are placed on the tracks, the building is destroyed as the cart passes through it. The cart works as a Level 1 Dispenser for the team it belongs to, restoring health and ammunition to those pushing it. Unlike Level 1 Dispensers, the cart does not have a limit to the amount of metal it can give to Engineers. It also provides ammo and health to disguised enemy Spies.
As of the Engineer Update, the cart has a glowing, team-colored outline effect that enables its position to be identified through walls and from further away, allowing players to keep an eye on its whereabouts at all times.
Payload
In Payload, the BLU team must push a cart through a series of checkpoints and into the RED team's base within a certain amount of time. Reaching a checkpoint adds time to the timer.
If a BLU player does not push the cart after 30 seconds have passed, the cart starts slowly moving backwards until it reaches a checkpoint/BLU spawn or a BLU player stands next to it again. If the cart is not moving backwards when time runs out, Overtime occurs, which gives the attacking team five seconds to move the bomb until they lose. The timer resets each time the cart is pushed.
Payload Race
In Payload Race, both teams are issued a cart. The teams must simultaneously push their cart through enemy territory while preventing the enemy team from doing the same. Unlike Payload maps, the cart does not move backwards after any length of time (unless it is on an inclined slope) and there is no time limit; the map only ends when one team successfully pushes their cart to the finish point.
Payload Race maps tend to use rolling slopes much more than standard Payload maps. During Overtime, both carts automatically move forward slowly to prevent Stalemates. Pushing one cart stops the other from moving forward by itself. If the carts' tracks cross paths, and both carts arrive at the intersection at the same time, one cart waits for the other to pass by even if players are on both carts.
Li'l Chew Chew
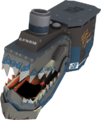
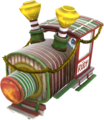
On the Payload map Frontier, a substantially larger mechanized train engine known as Li'l Chew-Chew is used in place of the standard BLU cart. It has movable jaws with razor-sharp teeth and two headlights as eyes, and a rideable platform on the back.
Providing cover from frontal attacks, Li'l Chew Chew is capable of significantly damaging any player of either team in its mouth when it is moving forwards. The damage done increases as more players ride its rear platform; three or more attackers cause the jaws to deal an instant-kill by "swallowing" the victim whole, leaving no corpse. The platform also has a built-in BLU Dispenser; however, those riding on it have trouble seeing directly in front of the cart, as the main body of the train is in the way. It has a noticeably increased pushing range when compared to normal carts. It cannot be blocked by opposing players from RED team standing in front of it, only when opposing players stand near or on top of the train's platform. Rüdy, a modified variant of Li'l Chew Chew, appears in Wutville.
Strategy
Maps
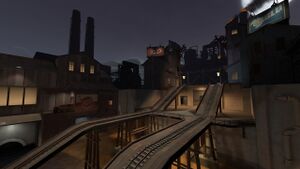
Payload maps may be split into multiple rounds, such as Gold Rush, Hoodoo, and Thunder Mountain. These are split into three stages that the BLU team must advance through and win. Stages one and two have two checkpoints and stage three has three checkpoints (two for Hoodoo), counting the final point as such.
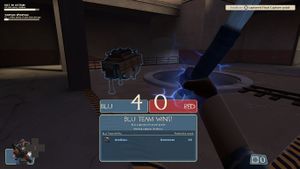
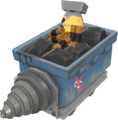
Certain maps, like Badwater Basin and Upward, have a single round with four checkpoints, including the final point. Advancing the cart to the next checkpoint gives the BLU team extra time. Advancing the cart to the final point moves the map onto the next stage. When the cart reaches the final point on the final stage, the Payload cart explodes, killing anyone standing too close to it and destroying the RED team's base as well.
Payload Race maps can be single or multi-stage. Pipeline and Nightfall are split into three stages, whereas Hightower consists of only one stage. Winning in each of the first two stages gives an advantage to the winning team in the next stage (the cart starts slightly forward from the starting point).
Payload
Payload maps carry the pl_ prefix; community maps are identified with an italic font.
| Name | Picture | File name |
|---|---|---|
| Badwater Basin | 
|
pl_badwater
|
| Barnblitz | 
|
pl_barnblitz
|
| Bloodwater | 
|
pl_bloodwater
|
| Borneo | 
|
pl_borneo
|
| Bread Space | 
|
pl_breadspace
|
| Brimstone | 
|
pl_fifthcurve_event
|
| Cactus Canyon | 
|
pl_cactuscanyon
|
| Camber | 
|
pl_camber
|
| Cashworks | 
|
pl_cashworks
|
| Chilly | 
|
pl_chilly
|
| Corruption | 
|
pl_corruption
|
| Embargo | 
|
pl_embargo
|
| Emerge | 
|
pl_emerge
|
| Enclosure | 
|
pl_enclosure_final
|
| Frontier | 
|
pl_frontier_final
|
| Frostcliff | 
|
pl_frostcliff
|
| Ghoulpit | 
|
pl_sludgepit_event
|
| Gold Rush | 
|
pl_goldrush
|
| Gravestone | 
|
pl_rumble_event
|
| Hassle Castle | 
|
pl_hasslecastle
|
| Hellstone | 
|
pl_millstone_event
|
| Hoodoo | 
|
pl_hoodoo_final
|
| Odyssey | 
|
pl_odyssey
|
| Patagonia | 
|
pl_patagonia
|
| Phoenix | 
|
pl_phoenix
|
| Pier | 
|
pl_pier
|
| Polar | 
|
pl_coal_event
|
| Precipice | 
|
pl_precipice_event_final
|
| Rumford | 
|
pl_rumford_event
|
| Snowycoast | 
|
pl_snowycoast
|
| Spineyard | 
|
pl_spineyard
|
| Swiftwater | 
|
pl_swiftwater
|
| Terror | 
|
pl_terror_event
|
| Thunder Mountain | 
|
pl_thundermountain
|
| Upward | 
|
pl_upward
|
| Venice | 
|
pl_venice
|
| Wutville | 
|
pl_wutville_event
|
Payload Race
Payload Race maps carry the plr_ prefix; Community maps are identified with an italic font.
| Name | Picture | File name |
|---|---|---|
| Banana Bay | 
|
plr_bananabay
|
| Bonesaw | 
|
plr_hacksaw_event
|
| Cutter | 
|
plr_cutter
|
| Hacksaw | 
|
plr_hacksaw
|
| Helltower | 
|
plr_hightower_event
|
| Hightower | 
|
plr_hightower
|
| Nightfall | 
|
plr_nightfall_final
|
| Pipeline | 
|
plr_pipeline
|
Related achievements
 Scout
Scout
|
 Soldier
|
|
 Demoman
|
|
 Heavy
Heavy
|
|
 Engineer
|
 Spy
Spy
|
Update history
- Added Payload mode.
- Added map: Gold Rush.
August 19, 2008 Patch (Heavy Update)
- Added map: Badwater Basin.
- Added proper handling of cart blocking recognition to Payload maps
- Fixed Engineers being able to upgrade the bomb cart's dispenser found in Payload levels
- Fixed bomb cart's dispenser being solid to players and projectiles
May 21, 2009 Patch (Sniper vs. Spy Update)
- Added Payload Race mode.
- Added maps: Hoodoo and Pipeline.
July 8, 2010 Patch (Engineer Update)
- Added maps: Hightower, Thunder Mountain, and Upward.
February 24, 2011 Patch (Community Map Pack Update)
- Added maps: Frontier and Nightfall.
June 23, 2011 Patch (Über Update)
- Added map: Barnblitz.
- [Undocumented] Payload carts no longer maintain player overheal.
- Added Enabled/Disabled inputs for the
mapobj_cart_dispenserentity.
- Fixed cases where the Payload HUD looked like the cart is still on a hill when it isn't.
- Fixed exploit where players could be pushed into enemy spawn rooms by the Payload cart.
June 18, 2014 Patch (Love & War Update)
- Fixed physics debris triggering the Payload cart's finale explosion in
pl_upward. - [Undocumented] Added new voice lines for the Administrator for Payload Race.
December 8, 2014 Patch (End of the Line Update)
- [Undocumented] Added Payload carts, with bombs from the End of the Line movie.
July 2, 2015 Patch #1 (Gun Mettle Update)
- Added map: Borneo.
- Fixed an exploit related to taunting and then dying on the final control point of Payload maps.
- Fixed an exploit related to the final control point and dropped weapons on Badwater Basin, Barnblitz, Borneo, and Gold Rush.
October 28, 2015 Patch #1 (Scream Fortress 2015)
- Added map: Hellstone.
December 17, 2015 Patch #1 (Tough Break Update)
- Added map: Snowycoast.
July 7, 2016 Patch (Meet Your Match Update)
- Added map: Swiftwater.
October 21, 2016 Patch (Scream Fortress 2016)
- Added map: Brimstone.
October 20, 2017 Patch (Jungle Inferno Update)
- Added maps: Banana Bay and Enclosure.
October 19, 2018 Patch (Scream Fortress 2018)
- Added map: Gravestone.
October 10, 2019 Patch (Scream Fortress 2019)
- Added map: Precipice.
October 1, 2020 Patch (Scream Fortress 2020)
- Added maps: Bloodwater and Hassle Castle.
December 3, 2020 Patch (Smissmas 2020)
- Added maps: Pier and Wutville.
October 5, 2021 Patch (Scream Fortress 2021)
- Added map: Terror.
December 2, 2021 Patch (Smissmas 2021)
- Added maps: Bread Space, Chilly, and Polar.
- Fixed Payload cart not rolling back.
October 5, 2022 Patch (Scream Fortress 2022)
- Added maps: Bonesaw and Ghoulpit.
December 5, 2022 Patch (Smissmas 2022)
- Added maps: Frostcliff and Rumford.
July 12, 2023 Patch (Summer 2023 Update)
- Added maps: Cashworks, Phoenix, and Venice.
October 9, 2023 Patch #1 (Scream Fortress 2023)
- Added maps: Corruption and Spineyard.
December 7, 2023 Patch (Smissmas 2023)
- Added maps: Camber, Emerge, and Hacksaw.
July 18, 2024 Patch #1 (Summer 2024 Update)
- Added maps: Embargo and Odyssey.
December 11, 2024 Patch (Smissmas 2024)
- Added maps: Cutter and Patagonia.
Unused content
The following models are present in the game files.
Bugs
- The cart may sometimes randomly spin vertically.
- The capture progress HUD sometimes does not report how many players are pushing the cart. It may also display the cart as being blocked when it is not.
- Dying due to the cart explosion causes the Deathcam to focus on a specific point of the map while displaying the name of an opponent, even if no enemy was involved in the player's death.
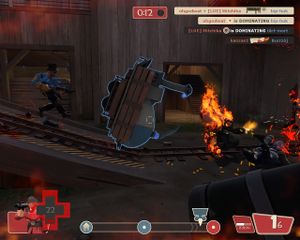
- It is possible to derail the cart as it is falling by launching it with an explosion. This works because it becomes a physics prop when it reaches the end of the track.
- A very rare glitch occurs when the doors to BLU do not open, and the map stays in Setup Time. The cart slowly pushes itself and cannot be blocked.
- If a player repeatedly picks up weapons on top of the final checkpoint on certain maps, the dropped weapon may slip through the hatch and detonate the final checkpoint early.
- On certain spots the player can be pushed inside of map geometry, such as the tunnel exit before Upward's 2nd point while standing on top of the cart.
- It is possible to get stuck inside buildings this way.
- It is also possible to get inside an enemy player's model.
Trivia
- The default Payload takes the shape of a "Fat Man" implosion-style plutonium atomic bomb. This type of bomb was dropped over Nagasaki during World War II.
- Hoodoo uses a different cart model. The map description reveals the cart to be carrying a "dirty bomb" – a nuclear explosive consisting of little more than radioactive material strapped to conventional explosives, such as TNT.
- On some of the carts, there is a Heavy quote written into the paintwork:
- The default cart bears the words 'Cry some more' scratched into the paintwork.
- The Hoodoo cart has the words 'So much blood!' painted in white on the front-most barrel and the word 'Bonk' written in dust underneath one of the straps.
- Lil' Chew-Chew bears the words 'All of you are dead!' scratched into the paintwork in front of the smoke stack.
- The light on the Payload cart is the same as the one duct-taped on the Combat Mini-Sentry Gun.
Gallery
Carts
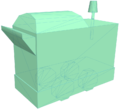
The BLU team's bomb cart.
The RED team's bomb cart, seen only on Payload Race maps.
The special model for the cart on Hoodoo.
The special cart, Lil' Chew Chew, found on Frontier.
The RED team's tomb cart for Helltower and Hassle Castle.
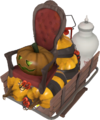
The BLU team's tomb cart for Helltower and Brimstone.
The RED team's special End of the Line bomb cart.
The BLU team's special Snowycoast bomb cart.
The special model for the cart on Hellstone.
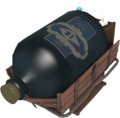
The BLU team's scrumpy bottle cart for Gravestone.
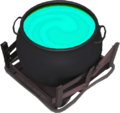
The BLU team's witch's cauldron cart for Precipice.
The special model for the cart on Bloodwater.
The special cart, Rüdy, found on Wutville.
The special model for the cart on Bread Space.
The special model for the cart on Chilly.
The special model for the cart on Ghoulpit.
The special model for the cart on Frostcliff.
The special model for the cart on Rumford.
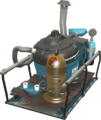
The special model for the cart on Embargo.
The RED team's saw cart on Cutter.
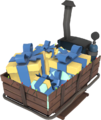
The special model for the cart on Patagonia.
Concept art
Other
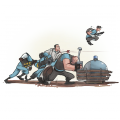
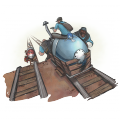
The main menu illustration used for Payload prior to the July 7, 2016 Patch.
The main menu illustration used for beta Payload maps.
| ||||||||||||||||||||
