Difference between revisions of "Snowplow"
I, AlexBot (talk | contribs) (→Trivia) |
I, AlexBot (talk | contribs) (→Gallery) |
||
| Line 267: | Line 267: | ||
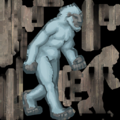
File:Snowplow Yeti cutout.png|The Yeti cutout from Stage 1. | File:Snowplow Yeti cutout.png|The Yeti cutout from Stage 1. | ||
File:Snowplow Trainhud 50.png|The Train HUD used to show the current health on the BLU team's train. | File:Snowplow Trainhud 50.png|The Train HUD used to show the current health on the BLU team's train. | ||
| + | File:Pigeon Bomb.jpg|The Pigeon Bomb on cp_snowplow. Reference to the End Of The Line Update Video | ||
</gallery> | </gallery> | ||
Revision as of 03:30, 10 July 2015
| Snowplow | |
|---|---|

| |
| Basic Information | |
| Developer(s): | Unknown |
| Map Info | |
| Environment: | Alpine / Snow |
| Setting: | Daylight, sunset |
| Hazards: | Train, pitfall |
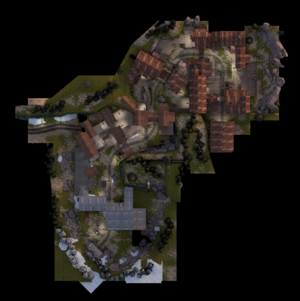
Snowplow is an Attack/Defense map which was intended to be released alongside the End of the Line Update, but wasn't included, as Valve deemed it "too confusing and challenging for new players".[1] Snowplow was later added in the Gun Mettle Update. A portion of the money made from the sales of the Gun Mettle Campaign Pass goes to the authors of the map.
The map is a reenactment of the End of the Line video. The RED team has to deal with BLU sending a train towards their base. The fight is centered on RED putting up obstacles on the track that BLU has to clear by capturing the points. Every time BLU captures a control point, the train movies down the railroad track towards the RED base, if the train reaches RED base, the BLU team is victorious. For every 30 seconds that RED prevents BLU from capturing a point, the train is hit by a large device which reduces its health by 10% per hit. RED wins if they successfully reduce the train's health to 0%.
Contents
Video
Locations
Directions are described from BLU's perspective.
Stage 1, Point A
- BLU Spawn: There are three exits, left, middle, and right. The right exit has two entrances outside in the front and right side.
- Train Tracks: From the left side of the BLU Spawn is a train tunnel where the train carrying the bomb will appear from. Crossing Guards will lower to indicate when it's coming. The train track path leads straight to Control Point A. Make sure you're not near the tracks when the train comes.
- Left exit Building: Next to the left door, a large structure by the left side of the tracks contains a medium Health and Ammo kit. Entrances to the structure on on the left side up a snowy incline. To the right is several openings to jump down from as well as a ramp to the other structure. The forward path of the structure leads straight to Control Point A.
- Right side Building: A small structure overlooks Control Point A. Inside is a small Health and Ammo kit.
- Control Point A: Control Point A is on a small train platform to the left of the train trap.
Stage 1, Point B
- Secondary BLU Spawn: Along the right side of the track near Point A is a small resupply room with a lone cabinet. Upon capture of Point B, this room becomes the new BLU Spawn.
- Left hallway: There's an interior path to the left that can be used as a shortcut to the Point. The hallway contains a one way door though, so use caution before passing. Inside is a Max Ammo kit and medium Health kit.
- Right side path: Through a small wooden structure is a path straight to Point B. Inside are medium Health and Ammo kits.
- Structural Path: To the left of the Control Point is an entrance into the large structure. The area around that entrance contains a medium Health Kit, and a second floor vantage point for Snipers.
- Control Point B: Point B is inside a small shack above the train trap. The shack has several large openings, and entrance is from the left side, and right.
Stage 1, Point C
- Structural Path: A large structure is used as a pathway for the train. There is a medium Health and Ammo kit to the left of the tracks. On the second floor are several Health and Ammo kits as well as a resupply room for RED. The third floor has a lookout for Snipers.
- Control Point C: To the right of the train trap is the final control point of the area. Point C has two entrances into the red structure, allowing for ambushes on unaware players capturing the point.
- RED Spawn: RED's primary spawn located in a small barn behind the control point. There are two exits in the front and right, and a second floor balcony exit.
Stage 2, Point A
- BLU Spawn: There are two exits, on the left and right.
- Supply Shed: A small supply shed on the left side of the train tracks contain a small Health and Ammo kit.
- Left Platform: After exiting the left exit of the BLU spawn, there is a concrete platform path that will lead you straight to Point A. Along the path is a medium Ammo and small Health kit.
- Control Point A: To the left of the train trap is Point A. Near the point is a medium Health and Ammo kit.
Stage 2, Point B
- Secondary BLU Spawn: To the left of the train trap is a second spawn/resupply room for BLU.
- Battlements: There is a two story structure over the train tracks that has a few balconies for a vantage point.
- RED Resupply Room: To the right of the town is a small resupply room for the RED team.
- Control Point B: Point B is on a catwalk above the train trap. Access can be gained from the left and right structures.
Stage 2, Point C
- Left path structure: A long red structure lays to the left of the train tracks. It contains several Health and Ammo kits, as well as several openings. The path leads straight to the final Point.
- Control Point C: The point is adjacent to the train trap. Behind the point and to the right are entrances into the RED spawn.
- RED Spawn: To the right of the train trap is the RED spawn. There are three exits: To the left, the middle, and a balcony exit to the right.
Control Point timing
| Control Point | Multiplier | Seconds | ||
|---|---|---|---|---|
| Control Point 1-1 | ×1 |
| ||
| ×2 |
| |||
| ×3 |
| |||
| ×4 |
| |||
| Control Point 1-2 | ×1 |
| ||
| ×2 |
| |||
| ×3 |
| |||
| ×4 |
| |||
| Control Point 1-3 | ×1 |
| ||
| ×2 |
| |||
| ×3 |
| |||
| ×4 |
| |||
| Control Point 2-1 | ×1 |
| ||
| ×2 |
| |||
| ×3 |
| |||
| ×4 |
| |||
| Control Point 2-2 | ×1 |
| ||
| ×2 |
| |||
| ×3 |
| |||
| ×4 |
| |||
| Control Point 2-3 | ×1 |
| ||
| ×2 |
| |||
| ×3 |
| |||
| ×4 |
|
Update history
The following changelogs are directly quoted from the map developer Fr0Z3n.
- First public beta release
August 13th, 2014 (B2)
- Ammo/HP condensed or moved around.
- Simplified layout in a building by Stage 1, point 2.
- Moved Red resupply locker back in Stage 1, point 3 spawn.
- Removed secondary Red spawn room from Stage 2, point 3.
- Adjusted stage 2, point 3 respawn times for both teams.
- Fixed clipping exploit stage 1, point 1.
- Added A/B/C signs for points in both stages.
- Increased light level stage 1, point 2.
- Opened skybridge over stage 1, point 3, into a balcony.
- Adjusted spawn times for stage 2, point 3.
- Increased setup time for both stages.
- Replace Glass with temporary easier-to-see textures.
- Moved stage 2, point 1 onto the bridge.
- Increased height of several capture point areas.
August 18th, 2014 (B3)
- Revised stage 2 point 1.
- Adjusted stage 2, Primary BLU Spawn exit to be wider. It is know that the doors clip through walls. + This will be revised in later versions.
- Reverted stage 2 point 2 to a pre-beta version.
- Minor adjustments to spawn times.
- [Hopefully] fixed some blu players spawning inside each other.
- Pointed players in the right direction when spawning in blu forward, stage 2.
- Added some cover before point 2 in stage 1.
- Adjusted door overlooking point 3 in stage 1.
- Increased quantity of arrows.
- Tracks.
- Log clipping and crush trigger.
- ???
- Added gates to warn those of an incoming runaway train
August 22nd, 2014 (B4)
- Added Overtime.
- Removed train slowing with damage.
- Train now 'stuns' the traps on initial impact with barricade.
- New upper path on point 2 in stage 2, giving access to the roof.
- Train warning gates now animate properly.
- Hopefully fixed some bells playing when they shouldn't.
- Lengthened Red respawn time on stage 2, point 2.
- Various poles have been clipped.
- Updated Localization Files.
- Added one or two health kits and ammo packs.
August 22nd, 2014 (B4b)
- Removed standard Overtime and made it so that the device will not fire while blu is onpoint, regardless of reds contention. This is only in affect during the final 10% of the trains health.
- Train warning gates by 1-1 won't stay down as long
- Slowed the train down so that it doesn't break the sound barrier every time it moves (speed reduced by 40%, but still an increase of 50% from b3)
August 27th, 2014 (B5)
- Added exterior route to upper left level of Stage 2, Point 2.
- The building between Stage 1, Point 2 and 3 has been made to look not weird.
- Added extra doorway through buildings separating points 2 and 3 in stage 1.
- Minor detailing added.
- Removed a boulder between Stage 1 Point 1 and 2. Replaced it with something else. Spoiler: It's crates.
- Increased the distance between Stage 1, Point 1 and 2.
- Increased the distance between Stage 2, Point 1 and 2.
- Widened the area infront of Stage 1, point 3.
- Removed a bug where the trigger_hurt on the train would still be active during the time the trap was stunned.
- Added a nice awning by Stage 2, point 3. It's actually quite nice. Can keep the porch cool during the day, but catch the nice evening breeze. Barring the toxic sludge barrels, it'd be a nice place to have supper, or a read a newspaper.
August 31st, 2014 (B6)
- Fade distances!
- Blood curdling screams!
- Adjusted a doorway (Fancy, right?)
- Red now use their forward spawn in stage 1 until after point 2 has been capped. We'll be keeping an eye on this change and how it affects the difficulty of 1-2. If you have feedback on, please tell us!
- Red's respawn time for 1-1 and 1-2 has been adjusted to reflect the above change
- Rebuilt secondary spawn for red's final point, stage 2.
- Reworked trap timer entities to show the time until impact on the HUD.
- Added Overtime back in. The final 10% of train health still has the same effect as it does in b5, blu can stop the trap, but red can only stop point capture progression, not restart the trap.
- Roughly halved delay before initial trap activation. (That is, the trap doesn't get stunned as long. All times were basically halved)
- Changed snow surfaceprop to dirt (Removes footprint and snow puff effect)
- All pickup overlays now match existing white-health, red-ammo conventions.
- Adjusted HP/Ammo in some locations so they weren't as dense.
September 5th, 2014 (B7)
- Fixed some chimneys not spinning. (Amazing what some WD40 can do!)
- Continued detailing work in various places.
- Removed instant spawn for red players dying shortly after a blu capture*
- Removed the delay between the train impacting a trap and the trap being activated.*
- Blu ÜberCharges on a point no longer pause the trap. Red ÜberCharges still resume.
- Removed a nobuild on some crates by point 1 in stage 1.
- Swapped "We're running out of time" (heard only by blu) with "Mission ends in 30 seconds" (heard by both teams)
- Added a stairwell on the cross-over between Stage 2, point 1 and 2 that goes from the bridge to upper balcony overlooking Stage 2, point 2.
Bugs
- It's possible to get stuck on Control Point traps by simply jumping on it, though, the player will automatically escape after few seconds. However, when the traps starts to elevate and the player jumps on it, the player will be stuck until he dies or wait the trap going all the way down again.
Trivia
- Given how BLU's base is destroyed in the background, it would seem that the map would have taken place after the End of the Line video.
- In stage 1, a cardboard cutout of a yeti can be seen next to a cliff. The Yeti is wearing J.Axer's Dapper Topper
- In stage 1, near the second point, a series of doors can be found. Behind 2 are rubber ducks. Behind the left door contains Hat of Undeniable Wealth And Respect
- In stage 1, some Pigeons flying with a bomb can be seen above the trees in the skybox next to the cliff. This is a reference to the last scene in the movie End of the Line
- In stage 1, the first device used by RED for damaging the train is a minivan, suspended by the rear bumper, with an Eyelander attached to the front bumper ("Sword Van"[2]). The second device is a collection of anvils, and the third is a collection of pianos.
- In stage 2, the first device is a collection of refrigerators, the second is a grouping of large logs, and the third is a laser cannon, similar to the one atop the final Control Point on Gravel Pit.
- Snowplow was available for public Beta testing prior to being pulled from the End of the Line Update.
- In the BLU spawn in both Stage 1 & 2, there are a pile of toy ducks over by Pyro's locker space.
- In the resupply room at BLU spawn, there is a colored drawing by the Pyro on the wall. The drawing is him wearing the Wartime Warmth with a kitten, as a reference to the ending of End of the Line.
- Above the wooden lockers in the Stage 2 BLU spawn, there is a drawing presumably made by the Spy. The drawing is Spy hitting Scout with a car, and Scout has rainbows coming out of him. This is a reference to a similar drawing that Scout made of the Spy in Expiration Date, and the rainbows are presumably a reference to Spy's Scout domination line "This is Scout! Rainbows make me cry!"
Gallery
See also
External links
References
- ↑ http://forums.tf2maps.net/showpost.php?p=315021&postcount=67 – Post by Joe "Fruity Snacks" Radak upon TF2Maps.net regarding the 'End of the Line' update.
- ↑ KC Green's Custom Comix
| ||||||||||||||||||||||||||||||||||||||||


