Difference between revisions of "Sniper vs. Spy Update/fr"
m |
(→Ajouts) |
||
| Line 24: | Line 24: | ||
== Ajouts == | == Ajouts == | ||
| − | === Armes === | + | === Armes === |
| − | {| class="wikitable | + | {| class="wikitable collapsible" cellpadding=2 style="text-align:center;" |
| + | | width="60px" style="background-color:#F3A957;" rowspan=3 | {{Class link|sniper|br=yes}} | ||
| + | | align="center" style="background-color:#F9D483;" | {{Icon item|item=Huntsman|icon-size=75px}} | ||
| + | | width="100px" | [[Huntsman/fr|Huntsman]] | ||
|- | |- | ||
| − | + | | align="center" style="background-color:#F9D483;" | {{Icon item|item=Razorback|icon-size=75px}} | |
| − | + | | width="100px" | [[Razorback/fr|Razorback]] | |
| − | |||
|- | |- | ||
| − | | rowspan= | + | | align="center" style="background-color:#F9D483;" | {{Icon item|item=Jarate|icon-size=75px}} |
| − | | {{item icon | + | | width="100px" | [[Jarate/fr|Jaraté]] |
| − | | | + | |- |
| + | | width="60px" style="background-color:#F3A957;" rowspan=3 | {{Class link|spy|br=yes}} | ||
| + | | align="center" style="background-color:#F9D483;" | {{Icon item|item=Ambassador|icon-size=75px}} | ||
| + | | width="100px" | [[Ambassador/fr|Ambassadeur]] | ||
|- | |- | ||
| − | | {{item icon | + | | align="center" style="background-color:#F9D483;" | {{Icon item|item=Dead Ringer|icon-size=75px}} |
| − | | | + | | width="100px" | [[Dead Ringer/fr|Dead Ringer]] |
|- | |- | ||
| − | | | + | | align="center" style="background-color:#F9D483;" | {{Icon item|item=Cloak and Dagger|icon-size=75px}} |
| − | + | | width="100px" | [[Cloak and Dagger/fr|Cloak and Dagger]] | |
| − | + | |- | |
| − | |||
| − | | | ||
| − | |||
| − | |||
| − | |||
| − | | | ||
| − | |||
| − | |||
| − | |||
|} | |} | ||
=== Chapeau === | === Chapeau === | ||
| − | {| class="wikitable | + | {| class="wikitable collapsible" cellpadding=2 style="text-align:center;" |
| + | | width="60px" style="background-color:#F3A957;" | {{Class link|scout|br=yes}} | ||
| + | | align="center" style="background-color:#F9D483;" | {{Icon item|item=Batter's Helmet|icon-size=75px}} | ||
| + | | width="100px" | [[Batter's Helmet/fr|Casque de Batteur]] | ||
|- | |- | ||
| − | + | | width="60px" style="background-color:#F3A957;" | {{Class link|soldier|br=yes}} | |
| − | + | | align="center" style="background-color:#F9D483;" | {{Icon item|item=Soldier's Stash|icon-size=75px}} | |
| − | + | | width="100px" | [[Soldier's Stash/fr|Planque du Soldier]] | |
|- | |- | ||
| − | | | + | | width="60px" style="background-color:#F3A957;" | {{Class link|pyro|br=yes}} |
| − | | {{item | + | | align="center" style="background-color:#F9D483;" | {{Icon item|item=Pyro's Beanie|icon-size=75px}} |
| − | | | + | | width="100px" | [[Pyro's Beanie/fr|Bonnet du Pyro]] |
|- | |- | ||
| − | | | + | | width="60px" style="background-color:#F3A957;" | {{Class link|demoman|br=yes}} |
| − | | {{item | + | | align="center" style="background-color:#F9D483;" | {{Icon item|item=Demoman's Fro|icon-size=75px}} |
| − | | | + | | width="100px" | [[Demoman's Fro/fr|Coupe Afro du Demoman]] |
|- | |- | ||
| − | | | + | | width="60px" style="background-color:#F3A957;" | {{Class link|heavy|br=yes}} |
| − | | {{item icon | + | | align="center" style="background-color:#F9D483;" | {{Icon item|item=Football Helmet|icon-size=75px}} |
| − | | | + | | width="100px" | [[Football Helmet/fr|Casque de Football]] |
|- | |- | ||
| − | | | + | | width="60px" style="background-color:#F3A957;" | {{Class link|engineer|br=yes}} |
| − | | {{item icon | + | | align="center" style="background-color:#F9D483;" | {{Icon item|item=Mining Light|icon-size=75px}} |
| − | | | + | | width="100px" | [[Mining Light/fr|Lampe de Mineur]] |
|- | |- | ||
| − | | | + | | width="60px" style="background-color:#F3A957;" | {{Class link|medic|br=yes}} |
| − | | {{item icon | + | | align="center" style="background-color:#F9D483;" | {{Icon item|item=Prussian Pickelhaube|icon-size=75px}} |
| − | | | + | | width="100px" | [[Prussian Pickelhaube/fr|Casque à Pointe Prussien]] |
|- | |- | ||
| − | | | + | | width="60px" style="background-color:#F3A957;" | {{Class link|sniper|br=yes}} |
| − | | {{item icon | + | | align="center" style="background-color:#F9D483;" | {{Icon item|item=Trophy Belt|icon-size=75px}} |
| − | | | + | | width="100px" | [[Trophy Belt/fr|Ceinture Trophée]] |
|- | |- | ||
| − | | | + | | width="60px" style="background-color:#F3A957;" | {{Class link|spy|br=yes}} |
| − | | | + | | align="center" style="background-color:#F9D483;" | {{Icon item|item=Fancy Fedora|icon-size=75px}} |
| − | + | | width="100px" | [[Fancy Fedora/fr|Fedora Élégant]] | |
| − | |||
| − | |||
| − | | | ||
| − | | | ||
| − | |||
| − | |||
| − | |||
| − | |||
|} | |} | ||
| − | |||
=== Cartes === | === Cartes === | ||
| − | {| class="wikitable | + | {| class="wikitable" cellpadding=2 style="text-align:center;" |
| − | + | |- style="height: 20px;" | |
| − | !class="header" | + | ! class="header" |Nom |
| − | !class="header" | + | ! class="header" |Image |
| − | !class="header" | + | ! class="header" |Mode de Jeu |
| − | !class="header" | + | ! class="header" |Nom de Fichier |
|- | |- | ||
| − | | | + | |style="background-color:#F9D483;" |'''[[Pipeline/fr|Pipeline]]''' |
| − | | [[File:Pipeline.jpg| | + | | width="100px" |[[File:Pipeline.jpg|160px|link=Pipeline/fr]] |
| − | | '''[[ | + | | align="center" |'''[[Payload Race/fr|Course à la charge utile]]'''<br>[[File:RED Bombcart.png|30px|link=Payload Race/fr]][[File:BLU Bombcart.png|30px|link=Payload Race/fr]] |
| − | | plr_pipeline | + | | width="60px" |{{code|plr_pipeline}} |
|- | |- | ||
| − | | | + | |style="background-color:#F9D483;" |'''[[Sawmill/fr|Sawmill]]''' |
| − | | [[File:Sawmill.PNG| | + | | width="100px" |[[File:Sawmill.PNG|160px|link=Sawmill/fr]] |
| − | | '''[[ | + | | align="center" |'''[[Arena/fr|Arena]]'''<br>[[File:Controlpoint.png|50px|link=Arena/fr]] |
| − | | arena_sawmill | + | | width="60px" |{{code|arena_sawmill}} |
|- | |- | ||
| − | | [[File: | + | |style="background-color:#F9D483;" |'''[[Nucleus/fr|Nucleus]]''' |
| − | | '''[[ | + | | width="100px" |[[File:arenanucleus.jpg|160px|link=Nucleus/fr]] |
| − | | arena_nucleus | + | | align="center" |'''[[Arena/fr|Arena]]'''<br>[[File:Controlpoint.png|50px|link=Arena/fr]] |
| + | | width="60px" |{{code|arena_nucleus}} | ||
|- | |- | ||
| − | | | + | |style="background-color:#F9D483;" |'''[[Hoodoo/fr|Hoodoo]]''' |
| − | | [[File:Plhoodoo.jpg| | + | | width="100px" |[[File:Plhoodoo.jpg|160px|link=Hoodoo/fr]] |
| − | | '''[[ | + | | align="center" |'''[[Payload/fr|Charge Utile]]'''<br>[[File:BLU Bombcart.png|50px|link=Payload/fr]] |
| − | | | + | | width="60px" |{{code|pl_hoodoo}} |
|} | |} | ||
Revision as of 14:29, 4 April 2011

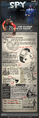
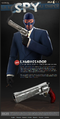
| « | The Adelaide Assassin, The High Lama of Head Trauma, The Sniper vs. The Duke of Spook, The Prime Minister of Sinister, The Spy.
— Blood Feud in the Badlands Poster
|
» |
La Mise à jour du Sniper vs. Spy était la première mise à jour incluant 2 classes, et fût la cinquième publication majeure de contenu. La mise à jour fût annoncée le 1er avril 2009, et fût publiée le 21 mai 2009.
On a cru initialement que la mise à jour était uniquement pour le Sniper, mais le 4ème jour on annonça qu'il s'agissait aussi de celle du Spy.
Sommaire
Annonces
La mise à jour Sniper vs. Spy commença officiellement le 12 mai 2009, avec l'annonce dans le Blog Officiel avec le post "G'day" (en anglais). La mise à jour fût publiée le 21 mai.
- Jour 1: Annonce du Huntsman.
- Jour 2: Annonce de la carte Course à la Charge Utile Pipeline, la première de ce mode de jeu, et aussi de 2 nouvelles cartes Arena, Sawmill et Nucleus.
- Jour 3: Annonce du Razorback.
- Jour 4: Révélation que le Spy est aussi mis à jour. Le Dead Ringer et la Cloak and Dagger furent mentionnés avec quelques détails via une commande du Spy.
Il y a un trou de 2 jours pour cause de weekend. Les annonces reprirent normalement le 18 mai.
- Jour 5: Les Succès de Spy sont révélés ainsi que À la rencontre du Spy étant annoncé officiellement. La vidéo avait précédemment fuitée (le 17 mai) sur YouTube à cause d'un bug qui permettait aux utilisateurs de iPhone de voir les vidéos privées.
- Jour 6: Annonce de l'Ambassadeur.
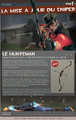
- Jour 7: Annonce du Jaraté ainsi que des Succès de Sniper.
- Jour 8: Publication de la Mise à jour Sniper vs. Spy.
- Jour 9 (Bonus): La carte de la communauté Hoodoo est officialisée, ajout aussi de nouveaux chapeaux.
Ajouts
Armes
| Huntsman | ||
| Razorback | ||
| Jaraté | ||
| Ambassadeur | ||
| Dead Ringer | ||
| Cloak and Dagger |
Chapeau
| Casque de Batteur | ||
| Planque du Soldier | ||
| Bonnet du Pyro | ||
| Coupe Afro du Demoman | ||
| Casque de Football | ||
| Lampe de Mineur | ||
| Casque à Pointe Prussien | ||
| Ceinture Trophée | ||
| Fedora Élégant |
Cartes
| Nom | Image | Mode de Jeu | Nom de Fichier |
|---|---|---|---|
| Pipeline | 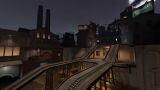
|
Course à la charge utile |
plr_pipeline
|
| Sawmill | 
|
Arena |
arena_sawmill
|
| Nucleus | 160px | Arena |
arena_nucleus
|
| Hoodoo | 160px | Charge Utile
|
pl_hoodoo
|
Références Pré-Publication
Bien qu'officiellement annoncée le 2 mai 2009, Valve avait donné des indices avant la mise à jour.
Le Poster du "Jaraté: Le Karaté à base de Bocaux"
Le 1er avril 2009, Valve publia un post sur le Blog Officiel, A sneak preview of the next class update! (en anglais), montrant une commande pour une nouvelle arme de Sniper, le Jaraté. Pourtant, à cause de la date de post (Template:W), beaucoup crurent qu'il s'agissait d'une blague.

Conformité dans la Mise à jour du Sniper
Le lendemain, 2 avril 2009, Valve publia encore un autre post sur le blog, Wave goodbye to yer head, wanker (en anglais), confirmant que le Sniper serait bien la prochaine classe à obtenir une mise à jour. Le post donna aussi un indice pour 2 autres mise à jours, une qui serait complétée avant la publication de la Mise à jour du Sniper, et une autre qui allait inclure du nouveaux contenu pour certaines classes. Elles se révélèrent être respectivement la Mise à Jour du Spy et l'ajout des nouveaux chapeaux.
L'exploration de l'are Sniper Primary Weapon Exploration
Le 5 mai 2009, Valve écrivit un post intitulé You better hold onto your head, mate (en anglais) exposant le raisonnement sur comment ils créèrent la nouvelle arme primaire du Sniper. Il y été discuté qu'une des raison de cett arme débloquable était la haine vis à vis des Snipers qui causaient trop de mort hors de la zone de combat. L'article se conclue en disant que la nouvelle arme permettra de déplacer le Sniper plus vers l'avant, donnant à ces ennemis une chance de combattre.
Anecdotes
- La Mise à Jour Sniper vs. Spy apporta aussi l'implémentation du Système de drop. Pour une brève période, les nouvelles armes pouvaient être obtenues par drop aléatoire, quelque soit le nombre de succès réussit. Ce qui fut changé une semaine plus tard lors du Patch du 29 mai 2099 qui ramena le système d'Étapes en plus du système de drop.
- Sawmill (Arena) fut la première carte pour TF2, créée et publiée par Valve, qui contenait un effet atmosphérique, avec l'introduction de la pluie ambiante. Ainsi qu'avec Pipeline, qui fût la première carte à se dérouler la nuit.
Chronologie
Jours 1. Sortie de Huntsman
Jours 2. Sortie du Mode de Jeu Course à la Charge Utile et des cartes Pipeline, Nucleus et Sawmill.

Jours 3. Sortie du Razorback
Jours 4. Le Spy prend le contrôle. Sortie de la Cloak and Dagger et de la Dead Ringer

Jours 5. Sortie de À la Rencontre du Spy, et des Succès de Spy
Jours 6. Sortie de l'Ambassador
Jours 7. Sortie du Jaraté et des Succès de Sniper

Jours 8. Sortie de la Mise à Jours complète


Liens Externes
| ||||||||||||||||||||||||||||||||
| |||||||||||||||||||||||||||||||||||||||||||||||||||||||||||||||||||||||||||||||||||||||||||||||
| ||||||||||||||||||||||||||||||||||||||||||||||