Difference between revisions of "Capture the Flag"
(Created Strategy section, including general strategy and class-specific sub-sections. Please proofread and review!) |
m (Minor spelling mistake.) |
||
| (189 intermediate revisions by 96 users not shown) | |||
| Line 1: | Line 1: | ||
| − | [[ | + | [[File:Ctf 2fort bridge ss.png|thumb|right|300px|The bridge area in the center of [[2Fort]].]] |
| − | |||
| − | |||
| − | |||
| − | |||
| − | + | [[File:CTF DoubleCross RedBase.png|thumb|right|300px|The bridge area over the crevasse on [[Double Cross]].]] | |
| − | |||
| − | |||
| − | |||
| − | { | + | {{Quotation|'''The Scout''' capturing the Intelligence|I got it, I got it, I got it!|sound=Scout_autocappedintelligence03.wav}} |
| − | |||
| − | |||
| − | |||
| − | |||
| − | |||
| − | | ''' | ||
| − | |||
| − | |||
| − | |||
| − | |||
| − | |||
| − | |||
| − | |||
| − | | | ||
| − | |||
| − | |||
| − | |||
| − | |||
| − | |||
| − | |||
| − | |||
| − | |||
| − | |||
| − | |||
| − | + | '''Capture the Flag''' (commonly abbreviated as '''CTF''') is a [[List of game modes|game mode]] which features both [[RED]] and [[BLU]] teams with their own [[#Intelligence|Intelligence]] briefcase (known as the flag). The goal for both teams is to capture their enemy's Intelligence continuously until they have reached the game's capture limit (default limit is 3) whilst preventing their enemy from achieving the same. If no team completes the capture limit before time runs out, the match enters [[Sudden Death]] mode (unless either Intelligence has been taken and is still in play, in which case [[Overtime]] occurs until both teams' Intelligence are secured again). | |
== Intelligence == | == Intelligence == | ||
| − | [[File:Carried Intel.png|thumb| | + | [[File:Carried Intel.png|thumb|220px|right|A RED [[Scout]] carrying the Intelligence.]] |
| − | The Intelligence, also known as the "{{botignore|intel}}," " | + | The Intelligence, also known as the "{{botignore|intel}}", "flag", or "briefcase", is the eponymous flag and objective of the Capture the Flag game mode. It is a team-colored briefcase sporting a complicated numbered lock pad on the front and papers protruding out of its joints. Once picked up by an enemy, the case begins to glow in the carrier's team color and will emit paper particles and a long team-colored trail. |
| − | == | + | == Gameplay == |
| − | During a Capture the Flag round, each team is given their own Intelligence | + | During a Capture the Flag round, each team is given their own Intelligence located within their section of the map. It must be retrieved from this location by the opposite team and returned to a defined point, usually the opposing team's capture zone where their Intelligence is stored. |
| − | The Intelligence can be taken by any enemy player that walks up onto it. | + | The Intelligence can be taken by any enemy player that walks up onto it, but can not be interfered or moved by a friendly player. Once picked up by a player, the Intelligence then appears on their back and the [[Announcer]] notifies both teams that the Intelligence has been taken. The Intelligence indicator located on the [[Heads-up display|HUD]] then points in the direction of the carrier, who must make their way out of the enemy base and back to their own. Carriers are visible to their respective team players as they emit a green, yellow, or red glow (based on their current health) that can be seen through walls. |
| − | While carrying the | + | While carrying the Intelligence, players become more vulnerable. Additionally, certain conditions may result in the player being unable to pick up and carry the Intelligence. |
| + | * Intelligence carriers cannot use [[Teleporters]]. | ||
| + | * The [[ÜberCharge]] of the [[Medi Gun]] cannot be used on or by the Intelligence carrier, nor can a player pick up the Intelligence while ÜberCharged by this weapon (the charges from all other Medi Guns can be activated and work on both the Medic and the patient, even if one of them is carrying the Intelligence). | ||
| + | * [[Scout]]s are unable to drink [[Bonk! Atomic Punch]] while holding the Intelligence, and may not pick it up while under its effects. | ||
| + | * [[Soldier]]s equipped with the [[Rocket Jumper]] and [[Demoman|Demomen]] equipped with the [[Sticky Jumper]] are unable to carry the Intelligence. | ||
| + | * [[Spy|Spies]] are unable to carry the Intelligence while [[cloak]]ed, but can pick it up while in [[disguise]], removing their disguise. They cannot disguise or Cloak while carrying the Intelligence. | ||
| + | * The Intelligence is dropped if the carrier is killed or enters a [[resupply area]]. | ||
| + | * [[Engineer]]s that use the [[Eureka Effect]] can teleport via the weapon's taunt, but the Intelligence drops at the spot the Engineer teleported from. | ||
| − | Once the Intelligence is | + | Once the Intelligence is taken to a capture point, the successful team gains one point shown in the Intelligence indicator, and receives ten seconds of [[Critical hits#Crit boost|Crit boost]]. There is no need for the capturing team's own Intelligence to be on their capture point at the time of the capture. |
| − | The Intelligence can be dropped manually if the player carrying it presses the drop-item button. Once dropped, a clock-like timer ring | + | The Intelligence can be dropped manually if the player carrying it presses the drop-item button {{DK|L}}. Once dropped, a clock-like timer ring appears over the Intelligence. If the default 60 seconds pass without an ally picking it up again, it is automatically returned to its original position in the team's base. If an ally picks up and subsequently drops the Intelligence, this timer resets. Teams are required to defend the dropped Intelligence during this period or face losing it. |
| − | + | If the Intelligence carrier is killed by an environmental hazard that prevents the dropped Intelligence from being touched, like a [[pitfall]], it is forcibly returned to its original position. This functionality is not inherent to the intelligence itself, but must be added to the map manually by its creator. While [[Valve]] [[List of maps|official maps]] all share this for specific bottomless hazards, not all [[custom maps]] may utilize this function. | |
| − | |||
| − | + | Certain maps depart from the standard formula of Capture the Flag. For example, on [[Crasher]], players must carry the flag from their own base to a capture zone located inside the base of the opposing team. | |
| − | |||
| − | |||
| − | |||
| − | |||
| − | |||
| − | |||
| − | |||
| − | |||
| − | |||
| − | |||
| − | |||
| − | == | + | == Strategy == |
| − | { | + | {{main|Community Capture the Flag strategy}} |
| − | |||
| − | |||
| − | |||
| − | |||
| − | |||
| − | |||
| − | |||
| − | |||
| − | |||
| − | |||
| − | |||
| − | |||
| − | |||
| − | |||
| − | |||
| − | |||
| − | |||
| − | |||
| − | |||
| − | |||
| − | |||
| − | |||
| − | |||
| − | |||
| − | |||
| − | | | ||
| − | |||
| − | |||
| − | |||
| − | |||
| + | == {{anchor|CTF maps|Capture the Flag maps|maps}} Maps == | ||
| + | {{main|List of maps}} | ||
| − | + | Capture the Flag maps carry the '''ctf_''' prefix; community maps are identified with italic font. | |
| − | + | {{Maps table|Capture the Flag}} | |
| − | |||
| − | |||
| − | |||
| − | |||
| − | |||
| − | |||
| − | |||
| − | |||
| − | |||
| − | |||
| − | |||
| − | |||
| − | + | == Related achievements == | |
| − | + | ==={{Class link|Scout}}=== | |
| − | |||
| − | |||
| − | ==Related | ||
| − | ===Scout=== | ||
{{Achievement table | {{Achievement table | ||
| 1 = {{Show achievement|Scout|Belittled Beleauger}} | | 1 = {{Show achievement|Scout|Belittled Beleauger}} | ||
| Line 132: | Line 52: | ||
}} | }} | ||
| − | ===Pyro=== | + | |
| + | ==={{Class link|Pyro}}=== | ||
{{Show achievement|Pyro|Cooking the Books|width=50%}} | {{Show achievement|Pyro|Cooking the Books|width=50%}} | ||
| − | ===Heavy=== | + | |
| + | ==={{Class link|Heavy}}=== | ||
{{Show achievement|Heavy|Crime and Punishment|width=50%}} | {{Show achievement|Heavy|Crime and Punishment|width=50%}} | ||
| − | ===Engineer=== | + | |
| + | ==={{Class link|Engineer}}=== | ||
{{Show achievement|Engineer|Trade Secrets|width=50%}} | {{Show achievement|Engineer|Trade Secrets|width=50%}} | ||
| − | ===Sniper=== | + | |
| + | ==={{Class link|Sniper}}=== | ||
{{Achievement table | {{Achievement table | ||
| 1 = {{Show achievement|Sniper|Have a Plan}} | | 1 = {{Show achievement|Sniper|Have a Plan}} | ||
| Line 147: | Line 71: | ||
}} | }} | ||
| − | == | + | == Update history == |
| − | * | + | {{Update history | '''{{Patch name|10|8|2007}}''' (Pre-Released) |
| + | * Sudden Death only starts in CTF mode if both flags are at home. | ||
| + | |||
| + | '''{{Patch name|10|10|2007|date-only=yes}}''' ([[Team Fortress 2|Initial Game Release]]) | ||
| + | * Added Capture the Flag mode. | ||
| + | * Added map: 2Fort. | ||
| + | |||
| + | '''{{Patch name|11|7|2007}}''' | ||
| + | * Fixed exploit that allowed players to teleport with the intelligence. | ||
| + | |||
| + | '''{{Patch name|11|20|2007}}''' | ||
| + | * Updated server log entries for flag captures to detail the number of captures and the {{code|tf_flag_caps_per_round}} value. | ||
| + | |||
| + | '''{{Patch name|1|25|2008}}''' | ||
| + | * Added map: Well (Capture the Flag). | ||
| + | |||
| + | '''{{Patch name|3|20|2008}}''' | ||
| + | * Updated CTF mode to remember the player who stole the intelligence from the enemy base and reward that player if the flag is captured by someone else. | ||
| + | |||
| + | '''{{Patch name|6|19|2008}}''' ([[Pyro Update]]) | ||
| + | * Added map: Turbine. | ||
| + | |||
| + | '''{{Patch name|2|24|2009}}''' ([[Scout Update]]) | ||
| + | * Fixed obscure bug where spectators were able to carry the flag. | ||
| + | |||
| + | '''{{Patch name|4|20|2009}}''' | ||
| + | * Scouts now drop the Intelligence if they're carrying it when they start phasing. | ||
| + | |||
| + | '''{{Patch name|8|13|2009}}''' ([[Classless Update]]) | ||
| + | * Added map: Sawmill (Capture the Flag). | ||
| + | * Capturing the flag in a CTF game mode now gives the entire capturing team 10 seconds of [[Critical hits#Crit-boost|Crit-boost]]. | ||
| − | + | '''{{Patch name|12|17|2009}}''' ([[WAR! Update]]) | |
| − | * | + | * Added map: Double Cross. |
| − | * | + | |
| − | * There is an option that allows servers to specify the length of a Crit | + | '''{{Patch name|10|6|2010}}''' |
| − | + | * Your Eternal Reward no longer disguises the Spy if they are carrying the flag. | |
| − | + | ||
| + | '''{{Patch name|1|19|2011}}''' | ||
| + | * Added a glow effect to the team intelligence entities when they're not being carried. | ||
| + | |||
| + | '''{{Patch name|4|15|2011}}''' | ||
| + | * {{Undocumented}} Intelligence no longer appears on the backs of players who are carrying it. | ||
| + | |||
| + | '''{{Patch name|5|5|2011}}''' ([[Replay Update]]) | ||
| + | * Fixed the briefcase not being drawn on players when it's being carried in CTF maps. | ||
| + | |||
| + | '''{{Patch name|6|27|2012}}''' ([[Pyromania Update]]) | ||
| + | * Friendly players glow when carrying the flag. | ||
| + | * Fixed rare cases where flag could fall out of the world. | ||
| + | |||
| + | '''{{Patch name|7|25|2014}}''' | ||
| + | * Fixed a client crash related to the CTF HUD. | ||
| + | * Fixed the CTF HUD not updating properly. | ||
| + | |||
| + | '''{{Patch name|1|15|2015}} #1''' | ||
| + | * Fixed the [[Medic]] not being able to deploy a [[Quick-Fix]]/[[Vaccinator]] [[ÜberCharge|charge]] while carrying the flag. | ||
| + | |||
| + | '''{{Patch name|7|23|2015}} #1''' | ||
| + | * Fixed being able to carry the flag with the Rocket/Sticky Jumpers. | ||
| + | |||
| + | '''{{Patch name|10|6|2015}}''' ([[Invasion Community Update]]) | ||
| + | * Added map: 2Fort Invasion. | ||
| + | |||
| + | '''{{Patch name|12|17|2015}}''' ([[Tough Break Update]]) | ||
| + | * Added map: Landfall. | ||
| + | |||
| + | '''{{Patch name|3|28|2018}} #1''' | ||
| + | * Added {{code|[[Sawmill (Capture the Flag)|ctf_sawmill]]}}, {{code|[[Well (Capture the Flag)|ctf_well]]}}, {{code|[[2Fort Invasion|ctf_2fort_invasion]]}}, and {{code|[[Foundry (Capture the Flag)|ctf_foundry]]}} to Casual Mode. | ||
| + | |||
| + | '''{{Patch name|12|3|2020}}''' ([[Smissmas 2020]]) | ||
| + | * Added map: Snowfall. | ||
| + | |||
| + | '''{{Patch name|12|2|2021}}''' ([[Smissmas 2021]]) | ||
| + | * Added map: Doublefrost. | ||
| + | |||
| + | '''{{Patch name|10|5|2022}}''' ([[Scream Fortress 2022]]) | ||
| + | * Added maps: Crasher and Helltrain. | ||
| + | |||
| + | '''{{Patch name|12|5|2022}}''' ([[Smissmas 2022]]) | ||
| + | * Added map: Frosty. | ||
| + | |||
| + | '''{{Patch name|7|12|2023}}''' ([[Summer 2023 Update]]) | ||
| + | * Added map: Pelican Peak. | ||
| + | |||
| + | '''{{Patch name|12|7|2023}}''' ([[Smissmas 2023]]) | ||
| + | * Added maps: Haarp and Turbine Center. | ||
| + | |||
| + | '''{{Patch name|7|18|2024}} #1''' ([[Summer 2024 Update]]) | ||
| + | * Added map: Applejack. | ||
| + | * Fixed CTF HUD being visible when no flags are present (Community fix from fellen). | ||
| + | |||
| + | '''{{Patch name|7|18|2024|no-link=yes}} #2''' | ||
| + | * Moved {{code|ctf_haarp}} out of the CTF matchmaking category and into [[Control Point (game mode)#Attack/Defend|Attack/Defend]]. | ||
| + | |||
| + | '''{{Patch name|12|11|2024}}''' ([[Smissmas 2024]]) | ||
| + | * Added map: Penguin Peak. | ||
| + | }} | ||
| + | |||
| + | == Bugs == | ||
| + | [[File:glowingplayernointel.jpg|thumb|300px|A BLU Demoman with an outline as if he were carrying the intel, when he is not.]] | ||
| + | |||
| + | * Occasionally, the status on the bottom center of the HUD does not change when a player takes or drops the Intelligence. | ||
| + | * Rarely, some [[Mann vs. Machine|bomb-related]] responses can be pronounced when a player carrying Intelligence is killed. | ||
| + | * If a player has the Intelligence and then the map is reset, the next round has the player who had the Intelligence continue to glow until another player has picked up the Intelligence or that player has died. | ||
| + | |||
| + | == Notes == | ||
| + | * The Neutral Intelligence briefcase is a white-colored version of the standard briefcase that appears in the game files. It remains unused by Valve in [[List of maps|official maps]]; however, it was included by them for use by Community developers in custom [[List of game modes|game modes]] (such as "Single Flag CTF", [[FortWars]], and "Achievement Servers"). Valve later employed a version of the neutral Intelligence case as the initial pickup for the [[Special Delivery (game mode)|Special Delivery]] game mode, with the intelligence being remodeled into an explosive suitcase. | ||
| + | ** Certain custom flags used in community-made maps, such as [[2Fort Invasion]] and [[Helltrain]], also follow this trend, with matching neutral versions that go unused. | ||
| + | * As placeholders during early stages, Valve used modified versions of ''[[Team Fortress Classic]]'''s [[#Other|flags]], which can be still be seen in the game files, featuring the faces of TF2's development team. The face that appears on the red flag is that of Robin Walker, the co-creator of the ''[[Team Fortress]]'' series, while the blue flag bears Charlie Brown. | ||
| + | * Some [[Achievements]] related to the Intelligence can be obtained in [[Doomsday]], a map for the Special Delivery game mode. | ||
| + | * There is an option that allows servers to specify the length of a Crit boost on a successful capture, or to disable it entirely ({{code|tf_ctf_bonus_time}}). | ||
| + | |||
| + | == Gallery == | ||
| + | === Flags === | ||
| + | <gallery perrow=3> | ||
| + | File:Intel red idle.png|The [[RED]] Intelligence briefcase. | ||
| + | File:Intel blu idle.png|The [[BLU]] Intelligence briefcase. | ||
| + | File:Intel neutral idle.png|The neutral Intelligence briefcase. | ||
| + | File:Intel red pickedup.png|The RED Intelligence briefcase (picked up). | ||
| + | File:Intel blu pickedup.png|The BLU Intelligence briefcase (picked up). | ||
| + | File:Intel neutral pickedup.png|The neutral Intelligence briefcase (picked up). | ||
| + | File:Invasion Intel red idle.png|The RED Intelligence briefcase on [[2Fort Invasion]]. | ||
| + | File:Invasion Intel blu idle.png|The BLU Intelligence briefcase on 2Fort Invasion. | ||
| + | File:Invasion Intel neutral idle.png|The neutral 2Fort Invasion Intelligence briefcase. | ||
| + | File:Invasion Intel red pickedup.png|The RED Intelligence briefcase on 2Fort Invasion (picked up). | ||
| + | File:Invasion Intel blu pickedup.png|The BLU Intelligence briefcase on 2Fort Invasion (picked up). | ||
| + | File:Invasion Intel neutral pickedup.png|The neutral 2Fort Invasion Intelligence briefcase (picked up). | ||
| + | File:Doublefrost Intel RED Idle.png|The RED present on [[Doublefrost]]. | ||
| + | File:Doublefrost Intel BLU Idle.png|The BLU present on Doublefrost. | ||
| + | File:Doublefrost Intel Neutral Idle.png|The neutral Doublefrost present. | ||
| + | File:Doublefrost Intel RED Pickedup.png|The RED present on Doublefrost (picked up). | ||
| + | File:Doublefrost Intel BLU Pickedup.png|The BLU present on Doublefrost (picked up). | ||
| + | File:Doublefrost Intel Neutral Pickedup.png|The neutral Doublefrost present (picked up). | ||
| + | File:Helltrain Coal Flag RED.png|The RED Coal Core on [[Helltrain]]. | ||
| + | File:Helltrain Coal Flag BLU.png|The BLU Coal Core on Helltrain. | ||
| + | File:Helltrain Coal Flag Neutral.png|The neutral Helltrain Coal Core. | ||
| + | File:Crasher Briefcase Barrel.png|The explosive Barrel on [[Crasher]]. | ||
| + | File:Snowfall Intel RED Idle.png|The RED present on [[Snowfall]]. | ||
| + | File:Snowfall Intel BLU Idle.png|The BLU present on Snowfall. | ||
| + | File:Penguin Peak Penguin RED Idle.png|The RED penguin on [[Penguin Peak]]. | ||
| + | File:Penguin Peak Penguin BLU Idle.png|The BLU penguin on Penguin Peak. | ||
| + | </gallery> | ||
| + | |||
| + | === Other === | ||
| + | <gallery perrow=3> | ||
| + | File:Oldredflag.png|The old red team flag. | ||
| + | File:Oldblueflag.png|The old blue team flag. | ||
| + | File:Oldneutralflag.png|The old neutral flag. | ||
| + | File:Intel Carrier Glow.png|Carriers and Intelligence briefcases glow. | ||
| + | File:Intel_carried.png|Carriers emit a stream of paper [[Particle effects#Gameplay effects|particles]]. | ||
| + | File:Gamemode_ctf.png|The main menu illustration used for Capture the Flag prior to the {{update link|Meet Your Match Update}}. | ||
| + | </gallery> | ||
| − | + | {{Maps Nav}} | |
| − | {{Maps | ||
[[Category:Game modes]] | [[Category:Game modes]] | ||
[[Category:Gameplay]] | [[Category:Gameplay]] | ||
| + | [[Category:Strategy]] | ||
Latest revision as of 19:34, 9 January 2025


| “ | I got it, I got it, I got it!
Click to listen
— The Scout capturing the Intelligence
|
” |
Capture the Flag (commonly abbreviated as CTF) is a game mode which features both RED and BLU teams with their own Intelligence briefcase (known as the flag). The goal for both teams is to capture their enemy's Intelligence continuously until they have reached the game's capture limit (default limit is 3) whilst preventing their enemy from achieving the same. If no team completes the capture limit before time runs out, the match enters Sudden Death mode (unless either Intelligence has been taken and is still in play, in which case Overtime occurs until both teams' Intelligence are secured again).
Contents
[hide]Intelligence
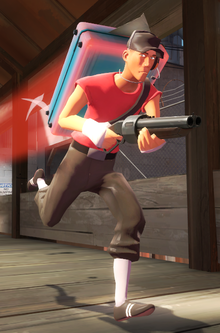
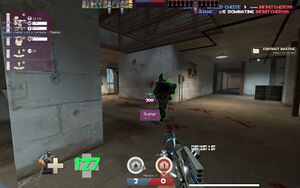
The Intelligence, also known as the "intel", "flag", or "briefcase", is the eponymous flag and objective of the Capture the Flag game mode. It is a team-colored briefcase sporting a complicated numbered lock pad on the front and papers protruding out of its joints. Once picked up by an enemy, the case begins to glow in the carrier's team color and will emit paper particles and a long team-colored trail.
Gameplay
During a Capture the Flag round, each team is given their own Intelligence located within their section of the map. It must be retrieved from this location by the opposite team and returned to a defined point, usually the opposing team's capture zone where their Intelligence is stored.
The Intelligence can be taken by any enemy player that walks up onto it, but can not be interfered or moved by a friendly player. Once picked up by a player, the Intelligence then appears on their back and the Announcer notifies both teams that the Intelligence has been taken. The Intelligence indicator located on the HUD then points in the direction of the carrier, who must make their way out of the enemy base and back to their own. Carriers are visible to their respective team players as they emit a green, yellow, or red glow (based on their current health) that can be seen through walls.
While carrying the Intelligence, players become more vulnerable. Additionally, certain conditions may result in the player being unable to pick up and carry the Intelligence.
- Intelligence carriers cannot use Teleporters.
- The ÜberCharge of the Medi Gun cannot be used on or by the Intelligence carrier, nor can a player pick up the Intelligence while ÜberCharged by this weapon (the charges from all other Medi Guns can be activated and work on both the Medic and the patient, even if one of them is carrying the Intelligence).
- Scouts are unable to drink Bonk! Atomic Punch while holding the Intelligence, and may not pick it up while under its effects.
- Soldiers equipped with the Rocket Jumper and Demomen equipped with the Sticky Jumper are unable to carry the Intelligence.
- Spies are unable to carry the Intelligence while cloaked, but can pick it up while in disguise, removing their disguise. They cannot disguise or Cloak while carrying the Intelligence.
- The Intelligence is dropped if the carrier is killed or enters a resupply area.
- Engineers that use the Eureka Effect can teleport via the weapon's taunt, but the Intelligence drops at the spot the Engineer teleported from.
Once the Intelligence is taken to a capture point, the successful team gains one point shown in the Intelligence indicator, and receives ten seconds of Crit boost. There is no need for the capturing team's own Intelligence to be on their capture point at the time of the capture.
The Intelligence can be dropped manually if the player carrying it presses the drop-item button (default key: L). Once dropped, a clock-like timer ring appears over the Intelligence. If the default 60 seconds pass without an ally picking it up again, it is automatically returned to its original position in the team's base. If an ally picks up and subsequently drops the Intelligence, this timer resets. Teams are required to defend the dropped Intelligence during this period or face losing it.
If the Intelligence carrier is killed by an environmental hazard that prevents the dropped Intelligence from being touched, like a pitfall, it is forcibly returned to its original position. This functionality is not inherent to the intelligence itself, but must be added to the map manually by its creator. While Valve official maps all share this for specific bottomless hazards, not all custom maps may utilize this function.
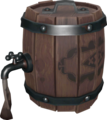
Certain maps depart from the standard formula of Capture the Flag. For example, on Crasher, players must carry the flag from their own base to a capture zone located inside the base of the opposing team.
Strategy
Maps
Capture the Flag maps carry the ctf_ prefix; community maps are identified with italic font.
| Name | Picture | File name |
|---|---|---|
| 2Fort | 
|
ctf_2fort
|
| 2Fort Invasion | 
|
ctf_2fort_invasion
|
| Applejack | 
|
ctf_applejack
|
| Crasher | 
|
ctf_crasher
|
| Double Cross | 
|
ctf_doublecross
|
| Doublefrost | 
|
ctf_doublecross_snowy
|
| Frosty | 
|
ctf_frosty
|
| Helltrain | 
|
ctf_helltrain_event
|
| Landfall | 
|
ctf_landfall
|
| Pelican Peak | 
|
ctf_pelican_peak
|
| Penguin Peak | 
|
ctf_penguin_peak
|
| Sawmill | 
|
ctf_sawmill
|
| Snowfall | 
|
ctf_snowfall_final
|
| Turbine | 
|
ctf_turbine
|
| Turbine Center | 
|
ctf_turbine_winter
|
| Well | 
|
ctf_well
|
Related achievements
 Scout
Scout
|
|
 Pyro
Pyro
| Cooking the Books Ignite 5 enemies carrying your intelligence. |
 Heavy
Heavy
| Crime and Punishment Kill 10 enemies carrying your intelligence. |
 Engineer
| Trade Secrets Kill 20 players carrying the intelligence. |
 Sniper
|
|
Update history
- Sudden Death only starts in CTF mode if both flags are at home.
October 10, 2007 (Initial Game Release)
- Added Capture the Flag mode.
- Added map: 2Fort.
- Fixed exploit that allowed players to teleport with the intelligence.
- Updated server log entries for flag captures to detail the number of captures and the
tf_flag_caps_per_roundvalue.
- Added map: Well (Capture the Flag).
- Updated CTF mode to remember the player who stole the intelligence from the enemy base and reward that player if the flag is captured by someone else.
June 19, 2008 Patch (Pyro Update)
- Added map: Turbine.
February 24, 2009 Patch (Scout Update)
- Fixed obscure bug where spectators were able to carry the flag.
- Scouts now drop the Intelligence if they're carrying it when they start phasing.
August 13, 2009 Patch (Classless Update)
- Added map: Sawmill (Capture the Flag).
- Capturing the flag in a CTF game mode now gives the entire capturing team 10 seconds of Crit-boost.
December 17, 2009 Patch (WAR! Update)
- Added map: Double Cross.
- Your Eternal Reward no longer disguises the Spy if they are carrying the flag.
- Added a glow effect to the team intelligence entities when they're not being carried.
- [Undocumented] Intelligence no longer appears on the backs of players who are carrying it.
May 5, 2011 Patch (Replay Update)
- Fixed the briefcase not being drawn on players when it's being carried in CTF maps.
June 27, 2012 Patch (Pyromania Update)
- Friendly players glow when carrying the flag.
- Fixed rare cases where flag could fall out of the world.
- Fixed a client crash related to the CTF HUD.
- Fixed the CTF HUD not updating properly.
- Fixed the Medic not being able to deploy a Quick-Fix/Vaccinator charge while carrying the flag.
- Fixed being able to carry the flag with the Rocket/Sticky Jumpers.
October 6, 2015 Patch (Invasion Community Update)
- Added map: 2Fort Invasion.
December 17, 2015 Patch (Tough Break Update)
- Added map: Landfall.
- Added
ctf_sawmill,ctf_well,ctf_2fort_invasion, andctf_foundryto Casual Mode.
December 3, 2020 Patch (Smissmas 2020)
- Added map: Snowfall.
December 2, 2021 Patch (Smissmas 2021)
- Added map: Doublefrost.
October 5, 2022 Patch (Scream Fortress 2022)
- Added maps: Crasher and Helltrain.
December 5, 2022 Patch (Smissmas 2022)
- Added map: Frosty.
July 12, 2023 Patch (Summer 2023 Update)
- Added map: Pelican Peak.
December 7, 2023 Patch (Smissmas 2023)
- Added maps: Haarp and Turbine Center.
July 18, 2024 Patch #1 (Summer 2024 Update)
- Added map: Applejack.
- Fixed CTF HUD being visible when no flags are present (Community fix from fellen).
July 18, 2024 Patch #2
- Moved
ctf_haarpout of the CTF matchmaking category and into Attack/Defend.
December 11, 2024 Patch (Smissmas 2024)
- Added map: Penguin Peak.
Bugs
- Occasionally, the status on the bottom center of the HUD does not change when a player takes or drops the Intelligence.
- Rarely, some bomb-related responses can be pronounced when a player carrying Intelligence is killed.
- If a player has the Intelligence and then the map is reset, the next round has the player who had the Intelligence continue to glow until another player has picked up the Intelligence or that player has died.
Notes
- The Neutral Intelligence briefcase is a white-colored version of the standard briefcase that appears in the game files. It remains unused by Valve in official maps; however, it was included by them for use by Community developers in custom game modes (such as "Single Flag CTF", FortWars, and "Achievement Servers"). Valve later employed a version of the neutral Intelligence case as the initial pickup for the Special Delivery game mode, with the intelligence being remodeled into an explosive suitcase.
- Certain custom flags used in community-made maps, such as 2Fort Invasion and Helltrain, also follow this trend, with matching neutral versions that go unused.
- As placeholders during early stages, Valve used modified versions of Team Fortress Classic's flags, which can be still be seen in the game files, featuring the faces of TF2's development team. The face that appears on the red flag is that of Robin Walker, the co-creator of the Team Fortress series, while the blue flag bears Charlie Brown.
- Some Achievements related to the Intelligence can be obtained in Doomsday, a map for the Special Delivery game mode.
- There is an option that allows servers to specify the length of a Crit boost on a successful capture, or to disable it entirely (
tf_ctf_bonus_time).
Gallery
Flags
The RED Intelligence briefcase.
The BLU Intelligence briefcase.
The RED Intelligence briefcase on 2Fort Invasion.
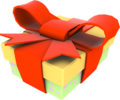
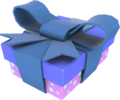
The RED present on Doublefrost.
The RED Coal Core on Helltrain.
The explosive Barrel on Crasher.
The RED present on Snowfall.
The RED penguin on Penguin Peak.
Other
Carriers emit a stream of paper particles.
The main menu illustration used for Capture the Flag prior to the Meet Your Match Update.


