Asteroid
| “Gotta move that gear up!” This article may contain content that is out of date. You can help improve this article by updating the content as necessary. See the wiki style guide. Notes: None added |
| Asteroid | |
|---|---|
| |
| Basic Information | |
| Developer(s): | Unknown |
| Map Info | |
| Environment: | Space |
| Setting: | Space |
| Hazards: | Lasers |
| Map Photos | |
| Map Overview | |
| “ | Gravity? Who gives a crap about gravity?
Click to listen
— The Scout
|
” |
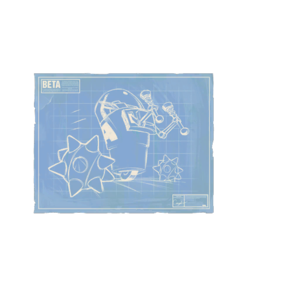
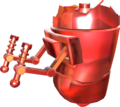
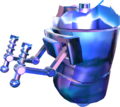
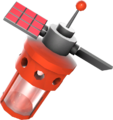
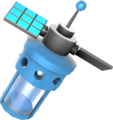
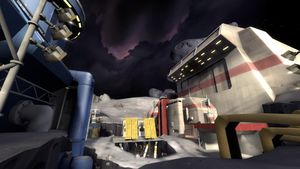
Asteroid is a Robot Destruction beta map, released in the July 8, 2014 patch. The map is set between two space stations. The goal of the map is to be the first team to obtain a total of 300 points which can be collected through two methods: destroying robots wandering in the opposing team's space station or stealing the opposing team's reactor core (similar to the Capture the Flag gamemode). The opposing team's reactor core holds all the points gathered by that team and can be brought back to a base to steal a certain amount of points. The total amount of points tied to the reactor core increases the longer the player stands on the spawn point of the opposing team's reactor core, needing 25 power cores minimum to actually be able to steal anything.
As of the August 7, 2014 patch, it is unfinished and still in development, but the TF2 community is allowed to play-test it and give feedback to Valve on how to balance the map.
Contents
Locations
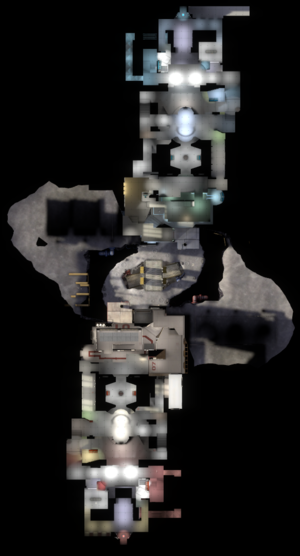
Asteroid is a centrally symmetrical map.
- Mid Bridge – The midpoint between the RED and BLU bases, the Mid Bridge area includes the actual bridge as well as two stone side paths the Lower Bridge. A fall off of the bridges or paths is fatal.
- Entrance or "A Lobby" – An open area that is the first room to each team's base and also houses the A robots. Includes two front-facing entrances to Mid Bridge as well as stairs to the Basement and two exits to the platform that contains the B robots.
- B Bridge – A platform over a large flooded room that connects Spawn to the Entrance area. On the current version of Asteroid, the B robots are found here.
- Spawn – A windowed chamber that exits into the central area, the Reactor, and the Upper Deck.
- Control Room or "Control" – The central choke point that is the meeting point for both sets of stairs down from Spawn, the interior end of the B Bridge, the interior end of the Water Tunnel, and the exterior end of the Vents. It provides access to the three entrances to the Reactor Vault and is the last choke point that an escaping Reactor carrier must necessarily pass through during egress from the base (beyond this point there are multiple routes out).
- Reactor Vault – The Reactor Vault is a semi-secure zone that protects the Reactor Core. The vault is the furthest portion of the level from the enemy base. There are three entrance paths leading directly to the visible Reactor Core in the middle of the vault:
- The Lasers route is directly through the middle and is guarded by three shifting laser beams.
- The Gate route is to the right (when approaching the Vault), and passes through a one-way Gate. The Gate will open for either team, but only opens from the outside.
- The Vents route is to the left, entering through a ventilation duct near the glassed-in control room. Low pipes occlude a portion of the duct, slowing the player significantly and making this the longest route by time.
- Upper Deck or "C Deck" – A platform overlooking the B Bridge. The C Robots are found here. The Upper Deck can be accessed directly from Spawn as well as from the Glass Hallway.
- Basement – An area that exits to the Lower Bridge; the Basement is a small tunnel that connects to a stone path under the Mid Bridge, and allows for a different way into the enemy base.
- Battlements – A small balcony in both bases which serves as a dropdown to the Mid Bridge. It is accessed from the Lobby Deck.
- Middle Deck or "B Deck" – A platform overlooking the B Bridge opposite the Upper Deck, which connects the deck above the Lobby with the Glass Hallway.
- Lobby Deck or "A Deck" – The deck above the Lobby, which connects with the Lobby (either via dropdown or the stairs at the middle of the Lobby), the Battlements and the Middle Deck (from both sides).
- Glass Hallway – The glass-walled path which connects the B and C Decks.
- Lower Bridge – The stone bridge which connects both Basements.
- Water – The flooded area directly beneath B Bridge. Conceals entrance to the Water Tunnel which leads between the B Room and the Control Room. Accessible via dropdown from the B Bridge, the B Deck, the C Deck, and also from the "swimming hole" in the floor of the Lobby.
Robots
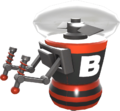
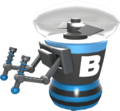
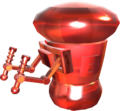
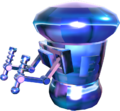
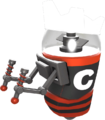
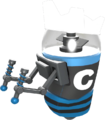
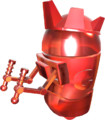
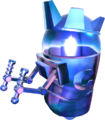
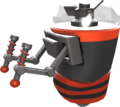
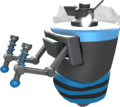
The robots featured on this map serve as scoring targets. Players may attack the robots, which drop Power Cores when destroyed, which may then be collected for points. One point is scored for the player's team for each Power Core collected. Friendly robots will heal their team players if they're close to them.
Robot data
| Group | № Robots | Cores per robot | Health per robot | Respawn time |
|---|---|---|---|---|
| A | 2 | 5 | 300 | 60 |
| B | 2 | 10 | 500 | 90 |
| C | 2 | 25 | 500 | 90 |
Strategy
Update history
- Added Mann Co. Beta Maps - Early Access program.
- Added 2 new beta maps: rd_asteroid and pl_cactuscanyon.
- Beta maps can be accessed via the Quickplay menu by checking the "Play Beta Maps" option.
- Updated rd_asteroid
- Fixed incorrect respawn times for Blu attackers
- Fixed missing kill triggers in pits
- Added blockers to starting gates to prevent Engineers from building outside the base before the round starts
- Added medium health kit near large ammo pack at the front doors of each base
- Removed the ability to create buildings in the lasers
- Removed chair prop from vent access room near vault
July 9, 2014 Patch #2
- Updated rd_asteroid to fix another problem with respawn times for Blu attackers
- Updated rd_asteroid
- Layout has been adjusted with the overall goal of improving visibility of teammates
- Removed spawn teleporter
- Reduced map size by removing the front lobby and cave sections
- Added terrain paths on the sides of the mid bridge
- Increased width of the mid bridge
- Removed doors that locked when A and B robots were active
- Robots have been rearranged:
- A robots now roam the bridge above the water
- B robots now roam around the floor in front of the vault
- C robots now roam around the upper deck
- Added more line of sight blockers to the water room to provide better cover during combat engagements
- Reduced travel time for the water flanking route under the interior bridge
- Added a drop down to enter the water room from the front door staging area
- Increased size of the glass room near C robots to provide flanking cover to use against Sentry Guns that are placed at the corner of the upper deck
- Increased width of vault corridors
- Reworked vent route that leads to the vault, no longer need to crouch jump on exit
- Moved left spawn exit forward to reduce effectiveness of spawn camping
- Added a resupply cabinet to the right side spawn exit
- Re-positioned health and ammo pickup locations
- Added ramp collision to stairs
- Fixed gap in the death pit that allowed players to survive
- [Undocumented] Removed unused paths from rd_asteroid
- Updated rd_asteroid
- Layout has been adjusted with the overall goal of increasing players ability to participate in creating points for their team
- Added terrain path and cave entrance under mid bridge. Exit is located near the large row of windows. Cave contains a medium health pack
- Widened play space near cave exit leading into large row of windows
- Added small ammo pack to underwater flank that leads to enemy reactor vault
- Added small health kit to staging area before the interior battlements
- Reduced ammo pack near vault from full to medium
- Added alcove near front door staging area
- Robots have been rearranged
- A robots now circle the staircase near the front door
- B robots now roam the interior bridge above the water
- Enabled flashing lights when a team's power reactor has been stolen
- Fixed broken stair collision when exiting the water near the bridge. In some cases it would push players back into the water.
- Added player blocker to ledge above exterior battlements
- Widened glass tunnel flank doorway near C robots
- Increased attackers spawn time by 1 second
- Updated rd_asteroid
- Fixed unbalanced ammo kits in Blu base near the vault
- Added flashing light in the vault that will activate when a player is stealing points
- Added larger one way glass windows to spawn exit doors
- Added small ammo pack to top of the stairs at the cave exit
- Shortened length of pipes in vents that require players to crouch
- Increased track length for A robots. This is to provide more angles of attack.
- Extended flat area near left spawn exit for Engineers to build Teleporters
- Lowered the health for the A robots from 500 to 300
- Fixed a bug where the power supply would not disable the flashing alarms when it was captured
- Updated rd_asteroid
- Widened left side spawn exit
- Players can no longer build inside the staircase near A robots
- Fixed sticky stair collision when coming out of the water near B robots
- Changed medium health kit near the C robots to a small health kit
- Removed "alert" from voice over lines that announce your team has dropped the reactor core
- Fixed missing patch overlay under small health near center bridge
- Updated rd_asteroid
- Added line of sight blocker to the front doors to prevent Snipers on battlements from shooting into the bases
- Removed reduced spawn time bonus for players that die in the enemy base
- Moved interior battlements health and ammo further into the base
August 27, 2014 Patch #2
- Rolled back the previous changes to rd_asteroid
Bugs
- The robots sometimes display %HEALTH% instead of a number indicating health, or display nothing at all when moused over, especially if the player backs through them.
- Spawn gates are not configured like standard spawn gates
- When setup ends, spawn gates disappear instead of opening like they do on other maps,
- Spawn gates are not aligned properly
- Spawn gates do not block bullets.
- The pits to the left coming from each battlements has a small area on the far side where players can stand and build.
- It is possible for players to become trapped on Teleporters when the exit is placed on the stairs at the spawn exit (occasionally exploited by griefing Engineers who place the entrance and exit immediately adjacent to eachother on the left spawn exit).
Trivia
- There is commented out I/O to disable the laser trap when all the robots are destroyed.
- The reactor cores are set up for paint, similar to a hat.
- The tube in the spawnroom is hollow and contains a tiny staircase and a team-colored light
- There is an unenterable closet behind the computer wall next to the gate into the vault. Unused paths used to come out of it.
