Difference between revisions of "Jungle Inferno Update"
Z0mbiesrock (talk | contribs) (→Trivia) |
m |
||
| (49 intermediate revisions by 18 users not shown) | |||
| Line 1: | Line 1: | ||
{{patch info|10|20|2017}} | {{patch info|10|20|2017}} | ||
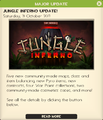
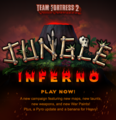
| − | [[File:Jungle Inferno Update.jpg|frameless|right|290px|link= | + | [[File:Jungle Inferno Update.jpg|frameless|right|290px|link=https://www.teamfortress.com/jungleinferno/]] |
{{Quotation|'''TF2 Official Website'''|If Jurassic Park taught us one thing, it's life finds a way. If Jurassic Park taught us two things, it's life finds a way and ''Jurassic Park'' is a good idea to steal for an update. And if Valve's legal team has taught us one thing, it was by screaming at us about not telling you the second thing Jurassic Park taught us.<br><br>If people screaming at us has taught us one thing, it's that loud noises make us so anxious we forget where the backspace key is, so we're just plowing ahead and are happy to announce our wholly original update about deadly animals escaping from a theme park. Because life finds a way, which is the only thing we <s>stole</s> learned from Jurassic Park.}} | {{Quotation|'''TF2 Official Website'''|If Jurassic Park taught us one thing, it's life finds a way. If Jurassic Park taught us two things, it's life finds a way and ''Jurassic Park'' is a good idea to steal for an update. And if Valve's legal team has taught us one thing, it was by screaming at us about not telling you the second thing Jurassic Park taught us.<br><br>If people screaming at us has taught us one thing, it's that loud noises make us so anxious we forget where the backspace key is, so we're just plowing ahead and are happy to announce our wholly original update about deadly animals escaping from a theme park. Because life finds a way, which is the only thing we <s>stole</s> learned from Jurassic Park.}} | ||
| − | The '''Jungle Inferno Update''' was a [[Patches#Major updates|major update]] for ''[[Team Fortress 2]]'' that spanned throughout 4 days, starting on October 16th, 2017 and finally releasing on October 20th, 2017 after a 1-day delay. It introduced 5 new [[Weapons|weapons]], 5 new [[Steam Workshop|community-made]] maps, 1 new [[Valve]]-made map, 7 new [[Taunts|taunts]], 1 new kill taunt, 49 new [[Cosmetic items|cosmetics]] (though 4 all-class items are currently unreleased), and many rebalances for existing weapons as well as the [[Pyro]] | + | The '''Jungle Inferno Update''' was a [[Patches#Major updates|major update]] for ''[[Team Fortress 2]]'' that spanned throughout 4 days, starting on October 16th, 2017 and finally releasing on October 20th, 2017 after a 1-day delay. It introduced 5 new [[Weapons|weapons]], 5 new [[Steam Workshop|community-made]] maps, 1 new [[Valve]]-made map, 7 new [[Taunts|taunts]], 1 new kill taunt, 49 new [[Cosmetic items|cosmetics]] (though 4 all-class items are currently unreleased), and many rebalances for existing weapons as well as the [[Pyro]], [[Engineer]] and [[Heavy]] classes. It also introduced an overhaul to the contract system with the [[ConTracker]], and introduced [[War Paint]] in place of weapon skins. |
== Video == | == Video == | ||
| Line 10: | Line 10: | ||
== Announcements == | == Announcements == | ||
| − | The Jungle Inferno Update page officially began on October 16th, 2017, as announced on the [[TF2 Official Blog]] post "[ | + | The Jungle Inferno Update page officially began on October 16th, 2017, as announced on the [[TF2 Official Blog]] post "[https://www.teamfortress.com/post.php?id=33662 Welcome to... Mercenary Park!]" |
== Update progress == | == Update progress == | ||
The Jungle Inferno Update was released over time through a four-day update. | The Jungle Inferno Update was released over time through a four-day update. | ||
| − | * Day 1 included 7 new taunts, 6 new maps, and a short SFM trailer. | + | *'''Day 1''' included 7 new taunts, 6 new maps, and a short SFM trailer. |
| − | * Day 2 introduced War Paints and a new contract PDA with free and paid contracts, with the free contracts giving out the new weapons and the paid ones giving out Blood Money, War Paints, and cosmetic items. | + | *'''Day 2''' introduced War Paints and a new contract PDA with free and paid contracts, with the free contracts giving out the new weapons and the paid ones giving out Blood Money, War Paints, and cosmetic items. |
| − | * Day 3 showed the new weapons: the [[Dragon's Fury]] (a primary weapon/flamethrower), the [[Thermal Thruster]] (a secondary weapon/jetpack with a unique [[Gas Blast|taunt kill]]), the [[Gas Passer]] (a secondary weapon/toxic gas), the [[Hot Hand]] (a melee weapon/glove), and the only non-Pyro weapon in this update, the [[Second Banana]] (a secondary lunchbox weapon for the [[Heavy]]). | + | *'''Day 3''' showed the new weapons: the [[Dragon's Fury]] (a primary weapon/flamethrower), the [[Thermal Thruster]] (a secondary weapon/jetpack with a unique [[Gas Blast|taunt kill]]), the [[Gas Passer]] (a secondary weapon/toxic gas), the [[Hot Hand]] (a melee weapon/glove), and the only non-Pyro weapon in this update, the [[Second Banana]] (a secondary lunchbox weapon for the [[Heavy]]). |
| − | * Day 4 was the final day, accompanied by a blog post with the complete patch notes and a release date of 1 day away. | + | *'''Day 4''' was the final day, accompanied by a blog post with the complete patch notes and a release date of 1 day away. |
=== Day 1 === | === Day 1 === | ||
| Line 24: | Line 24: | ||
==== Maps ==== | ==== Maps ==== | ||
| + | {{main|List of maps}} | ||
{{hatnote|Community maps are identified in italics.}} | {{hatnote|Community maps are identified in italics.}} | ||
{| class="wikitable" cellpadding=2 style="text-align:center;" | {| class="wikitable" cellpadding=2 style="text-align:center;" | ||
|- style="height: 20px;" | |- style="height: 20px;" | ||
| − | ! class="header" style="background-color:#748c41;color:white;" |Name | + | ! class="header" style="background-color:#748c41;color:white;" |{{common string|Name}} |
| − | ! class="header" style="background-color:#748c41;color:white;" |Picture | + | ! class="header" style="background-color:#748c41;color:white;" |{{common string|Picture}} |
| − | ! class="header" style="background-color:#748c41;color:white;" |Game | + | ! class="header" style="background-color:#748c41;color:white;" |{{common string|Game mode}} |
| − | ! class="header" style="background-color:#748c41;color:white;" |File | + | ! class="header" style="background-color:#748c41;color:white;" |{{common string|File name}} |
|- | |- | ||
| − | | style="background-color:#b5b85c;" |'''''[[Banana Bay|<span style="color: #000;">Banana Bay</span>]]''''' | + | | style="background-color:#b5b85c;" | '''''[[Banana Bay{{if lang}}|<span style="color:#000;">Banana Bay</span>]]''''' |
| − | | style="background-color:#f8d28c;" | + | | style="background-color:#f8d28c;" | [[File:Bananabay_main.jpg|160px|link=Banana Bay{{if lang}}]] |
| − | | style="background-color:#f8d28c; | + | | style="background-color:#f8d28c;" | '''[[Payload{{if lang}}|{{common string|Payload Race}}]]'''<br>[[File:RED Bombcart.png|30px|link=Payload Race{{if lang}}]][[File:BLU Bombcart.png|30px|link=Payload Race]] |
| − | | style="background-color:#f8e2a1;" | + | | style="background-color:#f8e2a1;" | {{code|plr_bananabay}} |
|- | |- | ||
| − | | style="background-color:#b5b85c;" |'''''[[Brazil|<span style="color: #000;">Brazil</span>]]''''' | + | | style="background-color:#b5b85c;" | '''''[[Brazil{{if lang}}|<span style="color:#000;">Brazil</span>]]''''' |
| − | | style="background-color:#f8d28c;" | + | | style="background-color:#f8d28c;" | [[File:Brazil_main.jpg|160px|link=Brazil{{if lang}}]] |
| − | | style="background-color:#f8d28c; | + | | style="background-color:#f8d28c;" | '''[[King of the Hill{{if lang}}|{{common string|King of the Hill}}]]'''<br>[[File:Controlpoint.png|50px|link=King of the Hill{{if lang}}]] |
| − | | style="background-color:#f8e2a1;" | + | | style="background-color:#f8e2a1;" | {{code|koth_brazil}} |
|- | |- | ||
| − | | style="background-color:#b5b85c;" |'''''[[Enclosure|<span style="color: #000;">Enclosure</span>]]''''' | + | | style="background-color:#b5b85c;" | '''''[[Enclosure{{if lang}}|<span style="color:#000;">Enclosure</span>]]''''' |
| − | | style="background-color:#f8d28c;" | + | | style="background-color:#f8d28c;" | [[File:Enclosure_main.jpg|160px|link=Enclosure{{if lang}}]] |
| − | | style="background-color:#f8d28c; | + | | style="background-color:#f8d28c;" | '''[[Payload{{if lang}}|{{common string|Payload}}]]'''<br>[[File:BLU_Bombcart.png|50px|link=Payload{{if lang}}]] |
| − | | style="background-color:#f8e2a1;" | + | | style="background-color:#f8e2a1;" | {{code|pl_enclosure_final}} |
|- | |- | ||
| − | | style="background-color:#b5b85c;" |'''''[[Lazarus|<span style="color: #000;">Lazarus</span>]]''''' | + | | style="background-color:#b5b85c;" | '''''[[Lazarus{{if lang}}|<span style="color:#000;">Lazarus</span>]]''''' |
| − | | style="background-color:#f8d28c;" | + | | style="background-color:#f8d28c;" | [[File:Lazarus_main.jpg|160px|link=Lazarus{{if lang}}]] |
| − | | style="background-color:#f8d28c; | + | | style="background-color:#f8d28c;" | '''[[King of the Hill{{if lang}}|{{common string|King of the Hill}}]]'''<br>[[File:Controlpoint.png|50px|link=King of the Hill{{if lang}}]] |
| − | | style="background-color:#f8e2a1;" | + | | style="background-color:#f8e2a1;" | {{code|koth_lazarus}} |
|- | |- | ||
| − | | style="background-color:#b5b85c;" |'''[[Mercenary Park | + | | style="background-color:#b5b85c;" | '''[[Mercenary Park{{if lang}}|<span style="color:#000;">Mercenary Park</span>]]''' |
| − | | style="background-color:#f8d28c;" | + | | style="background-color:#f8d28c;" | [[File:Yetipark 5.png|160px|link=Mercenary Park (map){{if lang}}]] |
| − | | style="background-color:#f8d28c; | + | | style="background-color:#f8d28c;" | '''[[Control Point (game mode){{if lang}}|{{common string|Attack/Defend}}]]'''<br>[[File:Controlpoint.png|50px|link=Control Point (game mode){{if lang}}]] |
| − | | style="background-color:#f8e2a1;" | + | | style="background-color:#f8e2a1;" | {{code|cp_mercenarypark}} |
|- | |- | ||
| − | | style="background-color:#b5b85c;" |'''''[[Mossrock|<span style="color: #000;">Mossrock</span>]]''''' | + | | style="background-color:#b5b85c;" | '''''[[Mossrock{{if lang}}|<span style="color:#000;">Mossrock</span>]]''''' |
| − | | style="background-color:#f8d28c;" | + | | style="background-color:#f8d28c;" | [[File:Mossrock_main.jpg|160px|link=Mossrock{{if lang}}]] |
| − | | style="background-color:#f8d28c; | + | | style="background-color:#f8d28c;" | '''[[Control Point (game mode){{if lang}}|{{common string|Attack/Defend}}]]'''<br>[[File:Controlpoint.png|50px|link=Control Point (game mode){{if lang}}]] |
| − | | style="background-color:#f8e2a1;" | + | | style="background-color:#f8e2a1;" | {{code|cp_mossrock}} |
|} | |} | ||
==== Taunts ==== | ==== Taunts ==== | ||
| + | {{main|Taunts}} | ||
{| class="wikitable collapsible" cellpadding=2 style="text-align:center;" | {| class="wikitable collapsible" cellpadding=2 style="text-align:center;" | ||
|- | |- | ||
| − | | style="background: #b5b85c | + | | width="90px" style="background:#b5b85c;" rowspan="1" | '''{{class link|Pyro|br=yes|color=black}}''' |
| − | | | + | | style="background:#f8d28c;" | {{Icon item|Headcase|75px}} |
| − | | style="background: #f8e2a1 "| '''{{item link|Headcase}}''' | + | | style="background:#f8e2a1;" | '''{{item link|Headcase}}''' |
|- | |- | ||
| − | | style="background: #b5b85c | + | | style="background:#b5b85c;" rowspan="2" | '''{{class link|Heavy|br=yes|color=black}}''' |
| − | | | + | | style="background:#f8d28c;" | {{Icon item|Russian Arms Race|75px}} |
| − | | style="background: #f8e2a1 "| '''{{item link|Russian Arms Race}}''' | + | | style="background:#f8e2a1;" | '''{{item link|Russian Arms Race}}''' |
|- | |- | ||
| − | | | + | | style="background:#f8d28c;" | {{Icon item|Soviet Strongarm|75px}} |
| − | | style="background: #f8e2a1 "| '''{{item link|Soviet Strongarm}}''' | + | | style="background:#f8e2a1;" | '''{{item link|Soviet Strongarm}}''' |
|- | |- | ||
| − | | style="background: #b5b85c | + | | style="background:#b5b85c;" rowspan="2" | '''{{class link|Engineer|br=yes|color=black}}''' |
| − | | | + | | style="background:#f8d28c;" | {{Icon item|Dueling Banjo|75px}} |
| − | | style="background: #f8e2a1 "| '''{{item link|Dueling Banjo}}''' | + | | style="background:#f8e2a1;" | '''{{item link|Dueling Banjo}}''' |
|- | |- | ||
| − | | | + | | style="background:#f8d28c;" | {{Icon item|Jumping Jack|75px}} |
| − | | style="background: #f8e2a1 "| '''{{item link|Jumping Jack}}''' | + | | style="background:#f8e2a1;" | '''{{item link|Jumping Jack}}''' |
|- | |- | ||
| − | | style="background: #b5b85c | + | | style="background:#b5b85c;" rowspan="2" | '''{{class link|All Classes|br=yes|color=black}}''' |
| − | | | + | | style="background:#f8d28c;" | {{Icon item|Yeti Punch|75px}} |
| − | | style="background: #f8e2a1 "| '''{{item link|Yeti Punch}}''' | + | | style="background:#f8e2a1;" | '''{{item link|Yeti Punch}}''' |
|- | |- | ||
| − | | | + | | style="background:#f8d28c;" | {{Icon item|Yeti Smash|75px}} |
| − | | style="background: #f8e2a1 "| '''{{item link|Yeti Smash}}''' | + | | style="background:#f8e2a1;" | '''{{item link|Yeti Smash}}''' |
|} | |} | ||
=== Day 2 === | === Day 2 === | ||
| − | Day 2 revealed the [[Jungle Inferno Campaign]] and War Paint cases | + | Day 2 revealed the [[Jungle Inferno Campaign]] and War Paint cases that replaced campaign weapon drops and weapon cases, 2 new cosmetic cases, and the new campaign system. This campaign involves 36 new contracts that can be completed in co-op. Completion of the contracts earns either a campaign-specific item or "Blood Money", which can be used to buy War Paints and cases. |
==== Campaign ==== | ==== Campaign ==== | ||
| − | The Jungle Inferno Campaign | + | The Jungle Inferno Campaign required the purchase of a [[Jungle Inferno Campaign Pass]]. The ConTracker PDA was also introduced, which allows customized contract progression and access to the [[Mercenary Park Gift Shop]]. [[Friendly-Fire]] is a new feature accompanied by the campaign and the party system, which allows players to play with/against their friends and help each other in completing contracts if they are on the same Valve server with them. |
| − | ==== | + | ==== Cosmetic items ==== |
{{main|Cosmetic items}} | {{main|Cosmetic items}} | ||
{| class="wikitable collapsible" cellpadding=2 style="text-align:center;" | {| class="wikitable collapsible" cellpadding=2 style="text-align:center;" | ||
| + | | width="90px" style="background:#b5b85c;" rowspan="3" | '''{{class link|Scout|br=yes|color=black}}''' | ||
| + | | style="background:#4B69FF;" | {{Icon item|Forest Footwear|75px}} | ||
| + | | style="background:#f8e2a1;" | '''{{item link|Forest Footwear}}''' | ||
|- | |- | ||
| − | | style="background: # | + | | style="background:#D32CE6;" | {{Icon item|Jungle Jersey|75px}} |
| − | + | | style="background:#f8e2a1;" | '''{{item link|Jungle Jersey}}''' | |
| − | | style="background: #f8e2a1 "| '''{{item link| | ||
|- | |- | ||
| − | | | + | | style="background:#8847FF;" | {{Icon item|Transparent Trousers|75px}} |
| − | | style="background: #f8e2a1 "| '''{{item link| | + | | style="background:#f8e2a1;" | '''{{item link|Transparent Trousers}}''' |
|- | |- | ||
| − | | | + | | style="background:#b5b85c;" rowspan="4" | '''{{class link|Soldier|br=yes|color=black}}''' |
| − | | style="background: #f8e2a1 "| '''{{item link| | + | | style="background:#4B69FF;" | {{Icon item|Attack Packs|75px}} |
| + | | style="background:#f8e2a1;" | '''{{item link|Attack Packs}}''' | ||
|- | |- | ||
| − | | style="background: # | + | | style="background:#8847FF;" | {{Icon item|Crit Cloak|75px}} |
| − | + | | style="background:#f8e2a1;" | '''{{item link|Crit Cloak}}''' | |
| − | | style="background: #f8e2a1 "| '''{{item link| | ||
|- | |- | ||
| − | | | + | | style="background:#4B69FF;" | {{Icon item|Sharp Chest Pain|75px}} |
| − | | style="background: #f8e2a1 "| '''{{item link| | + | | style="background:#f8e2a1;" | '''{{item link|Sharp Chest Pain}}''' |
|- | |- | ||
| − | | | + | | style="background:#4B69FF;" | {{Icon item|Shellmet|75px}} |
| − | | style="background: #f8e2a1 "| '''{{item link| | + | | style="background:#f8e2a1;" | '''{{item link|Shellmet}}''' |
|- | |- | ||
| − | | | + | | style="background:#b5b85c;" rowspan="6" | '''{{class link|Pyro|br=yes|color=black}}''' |
| − | | style="background: #f8e2a1 "| '''{{item link| | + | | style="background:#4B69FF;" | {{Icon item|Deity's Dress|75px}} |
| + | | style="background:#f8e2a1;" | '''{{item link|Deity's Dress}}''' | ||
|- | |- | ||
| − | | style="background: # | + | | style="background:#8847FF;" | {{Icon item|D-eye-monds|75px}} |
| − | + | | style="background:#f8e2a1;" | '''{{item link|D-eye-monds}}''' | |
| − | | style="background: #f8e2a1 "| '''{{item link| | ||
|- | |- | ||
| − | | | + | | style="background:#8847FF;" | {{Icon item|Feathered Fiend|75px}} |
| − | | style="background: #f8e2a1 "| '''{{item link| | + | | style="background:#f8e2a1;" | '''{{item link|Feathered Fiend}}''' |
|- | |- | ||
| − | | | + | | style="background:#4B69FF;" | {{Icon item|Fireman's Essentials|75px}} |
| − | | style="background: #f8e2a1 "| '''{{item link| | + | | style="background:#f8e2a1;" | '''{{item link|Fireman's Essentials}}''' |
|- | |- | ||
| − | | | + | | style="background:#8847FF;" | {{Icon item|Hot Huaraches|75px}} |
| − | | style="background: #f8e2a1 "| '''{{item link| | + | | style="background:#f8e2a1;" | '''{{item link|Hot Huaraches}}''' |
|- | |- | ||
| − | | | + | | style="background:#D32CE6;" | {{Icon item|Sacrificial Stone|75px}} |
| − | | style="background: #f8e2a1 "| '''{{item link| | + | | style="background:#f8e2a1;" | '''{{item link|Sacrificial Stone}}''' |
|- | |- | ||
| − | | | + | | style="background:#b5b85c;" rowspan="5" | '''{{class link|Heavy|br=yes|color=black}} |
| − | | style="background: #f8e2a1 "| '''{{item link| | + | | style="background:#D32CE6;" | {{Icon item|Aztec Aggressor|75px}} |
| + | | style="background:#f8e2a1;" | '''{{item link|Aztec Aggressor}}''' | ||
|- | |- | ||
| − | | style="background: # | + | | style="background:#4B69FF;" | {{Icon item|Commando Elite|75px}} |
| − | + | | style="background:#f8e2a1;" | '''{{item link|Commando Elite}}''' | |
| − | | style="background: #f8e2a1 "| '''{{item link| | ||
|- | |- | ||
| − | | | + | | style="background:#4B69FF;" | {{Icon item|Fat Man's Field Cap|75px}} |
| − | | style="background: #f8e2a1 "| '''{{item link| | + | | style="background:#f8e2a1;" | '''{{item link|Fat Man's Field Cap}}''' |
|- | |- | ||
| − | | | + | | style="background:#4B69FF;" | {{Icon item|Heavy Harness|75px}} |
| − | | style="background: #f8e2a1 "| '''{{item link| | + | | style="background:#f8e2a1;" | '''{{item link|Heavy Harness}}''' |
|- | |- | ||
| − | | | + | | style="background:#4B69FF;" | {{Icon item|Siberian Tigerstripe|75px}} |
| − | | style="background: #f8e2a1 "| '''{{item link| | + | | style="background:#f8e2a1;" | '''{{item link|Siberian Tigerstripe}}''' |
|- | |- | ||
| − | | | + | | style="background:#b5b85c;" rowspan="2" | '''{{class link|Engineer|br=yes|color=black}}''' |
| − | | style="background: #f8e2a1 "| '''{{item link| | + | | style="background:#4B69FF;" | {{Icon item|Conaghers' Utility Idol|75px}} |
| + | | style="background:#f8e2a1;" | '''{{item link|Conaghers' Utility Idol}}''' | ||
|- | |- | ||
| − | | | + | | style="background:#D32CE6;" | {{Icon item|Tropical Toad|75px}} |
| − | | style="background: #f8e2a1 "| '''{{item link| | + | | style="background:#f8e2a1;" | '''{{item link|Tropical Toad}}''' |
|- | |- | ||
| − | | | + | | style="background:#b5b85c;" rowspan="2" | '''{{class link|Medic|br=yes|color=black}}''' |
| − | | style="background: #f8e2a1 "| '''{{item link| | + | | style="background:#4B69FF;" | {{Icon item|Battle Boonie|75px}} |
| + | | style="background:#f8e2a1;" | '''{{item link|Battle Boonie}}''' | ||
|- | |- | ||
| − | | | + | | style="background:#4B69FF;" | {{Icon item|Vitals Vest|75px}} |
| − | | style="background: #f8e2a1 "| '''{{item link| | + | | style="background:#f8e2a1;" | '''{{item link|Vitals Vest}}''' |
|- | |- | ||
| − | | style="background: #b5b85c | + | | style="background:#b5b85c;" rowspan="6" | '''{{class link|Sniper|br=yes|color=black}}''' |
| − | | | + | | style="background:#4B69FF;" | {{Icon item|Bait and Bite|75px}} |
| − | | style="background: #f8e2a1 "| '''{{item link| | + | | style="background:#f8e2a1;" | '''{{item link|Bait and Bite}}''' |
|- | |- | ||
| − | | | + | | style="background:#4B69FF;" | {{Icon item|Cammy Jammies|75px}} |
| − | | style="background: #f8e2a1 "| '''{{item link| | + | | style="background:#f8e2a1;" | '''{{item link|Cammy Jammies}}''' |
|- | |- | ||
| − | | style="background: # | + | | style="background:#4B69FF;" | {{Icon item|Classy Capper|75px}} |
| − | + | | style="background:#f8e2a1;" | '''{{item link|Classy Capper}}''' | |
| − | | style="background: #f8e2a1 "| '''{{item link| | ||
|- | |- | ||
| − | | | + | | style="background:#8847FF;" | {{Icon item|Conspicuous Camouflage|75px}} |
| − | | style="background: #f8e2a1 "| '''{{item link| | + | | style="background:#f8e2a1;" | '''{{item link|Conspicuous Camouflage}}''' |
|- | |- | ||
| − | | style="background: # | + | | style="background:#4B69FF;" | {{Icon item|Most Dangerous Mane|75px}} |
| − | + | | style="background:#f8e2a1;" | '''{{item link|Most Dangerous Mane}}''' | |
| − | | style="background: #f8e2a1 "| '''{{item link| | ||
|- | |- | ||
| − | | | + | | style="background:#8847FF;" | {{Icon item|Rifleman's Regalia|75px}} |
| − | | style="background: #f8e2a1 "| '''{{item link| | + | | style="background:#f8e2a1;" | '''{{item link|Rifleman's Regalia}}''' |
|- | |- | ||
| − | | align=" | + | | align="left" style="background:#b5b85c;" | '''{{Class link|Scout|color=black}}'''<br/>'''{{Class link|Engineer|color=black}}'''<br/>'''{{Class link|Spy|color=black}}''' |
| − | | style="background: #f8e2a1 "| '''{{item link| | + | | style="background:#4B69FF;" | {{Icon item|Aloha Apparel|75px}} |
| + | | style="background:#f8e2a1;" | '''{{item link|Aloha Apparel}}''' | ||
|- | |- | ||
| − | | align=" | + | | align="left" style="background:#b5b85c;"| '''{{Class link|Soldier|color=black}}'''<br/>'''{{Class link|Pyro|color=black}}'''<br/>'''{{Class link|Demoman|color=black}}''' |
| − | | style="background: #f8e2a1 "| '''{{item link| | + | | style="background:#D32CE6;" | {{Icon item|Bananades|75px}} |
| + | | style="background:#f8e2a1;" | '''{{item link|Bananades}}''' | ||
|- | |- | ||
| − | | align=" | + | | align="left" style="background:#b5b85c;" | '''{{Class link|Soldier|color=black}}'''<br/>'''{{Class link|Demoman|color=black}}'''<br/>'''{{Class link|Heavy|color=black}}''' |
| − | | style="background: #f8e2a1 "| '''{{item link| | + | | style="background:#EB4B4B;" | {{Icon item|War Eagle|75px}} |
| + | | style="background:#f8e2a1;" | '''{{item link|War Eagle}}''' | ||
|- | |- | ||
| − | | align=" | + | | align="left" style="background:#b5b85c;" | '''{{Class link|Soldier|color=black}}'''<br/>'''{{Class link|Heavy|color=black}}''' |
| − | | style="background: #f8e2a1 "| '''{{item link| | + | | style="background:#4B69FF;" | {{Icon item|Nuke|75px}} |
| + | | style="background:#f8e2a1;" | '''{{item link|Nuke}}''' | ||
|- | |- | ||
| − | | style="background: #b5b85c; | + | | style="background:#b5b85c;" rowspan="14" | '''{{class link|All Classes|br=yes|color=black}}''' |
| − | | | + | | style="background:#EB4B4B;" | {{Icon item|Aztec Warrior|75px}} |
| − | | style="background: #f8e2a1; " | '''{{item link| | + | | style="background:#f8e2a1;" | '''{{item link|Aztec Warrior}}''' |
|- | |- | ||
| − | | style="background: # | + | | style="background:#8847FF;" | {{Icon item|Croaking Hazard|75px}} |
| − | + | | style="background:#f8e2a1;" | '''{{item link|Croaking Hazard}}''' | |
| − | | style="background: #f8e2a1; " | '''{{item link| | ||
|- | |- | ||
| − | | style="background: # | + | | style="background:#8847FF;" | {{Icon item|Hunter in Darkness|75px}} |
| − | + | | style="background:#f8e2a1;" | '''{{item link|Hunter in Darkness}}''' | |
| − | | style="background: #f8e2a1; " | '''{{item link| | ||
|- | |- | ||
| − | | style="background: # | + | | style="background:#D32CE6;" | {{Icon item|Jungle Wreath|75px}} |
| − | + | | style="background:#f8e2a1;" | '''{{item link|Jungle Wreath}}''' | |
| − | | style="background: #f8e2a1; " | '''{{item link| | ||
|- | |- | ||
| − | | style="background: # | + | | style="background:#FFD700;" | {{Icon item|Monstrous Memento|75px}} |
| − | + | | style="background:#f8e2a1;" | '''{{item link|Monstrous Memento}}''' | |
| − | | style="background: #f8e2a1 "| '''{{item link| | ||
|- | |- | ||
| − | | | + | | style="background:#4B69FF;" | {{Icon item|Pithy Professional|75px}} |
| − | | style="background: #f8e2a1 "| '''{{item link| | + | | style="background:#f8e2a1;" | '''{{item link|Pithy Professional}}''' |
|- | |- | ||
| − | | | + | | style="background:#8847FF;" | {{Icon item|Pocket Saxton|75px}} |
| − | | style="background: #f8e2a1 "| '''{{item link| | + | | style="background:#f8e2a1;" | '''{{item link|Pocket Saxton}}''' |
|- | |- | ||
| − | | | + | | style="background:#EB4B4B;" | {{Icon item|Quizzical Quetzal|75px}} |
| − | | style="background: #f8e2a1 "| '''{{item link| | + | | style="background:#f8e2a1;" | '''{{item link|Quizzical Quetzal}}''' |
|- | |- | ||
| − | | | + | | style="background:#FFD700;" | {{Icon item|Saxton|75px}} |
| − | | style="background: #f8e2a1 "| '''{{item link| | + | | style="background:#f8e2a1;" | '''{{item link|Saxton}}''' |
|- | |- | ||
| − | | | + | | style="background:#EB4B4B;" | {{Icon item|Slithering Scarf|75px}} |
| − | + | | style="background:#f8e2a1;" | '''{{item link|Slithering Scarf}}''' | |
| − | |||
| − | |||
| − | |||
| − | |||
| − | |||
| − | |||
| − | |||
| − | |||
| − | |||
| − | |||
| − | |||
| − | |||
| − | |||
| − | |||
| − | |||
| − | |||
| − | |||
| − | |||
| − | |||
| − | |||
| − | | style="background: #f8e2a1 "| '''{{item link|Slithering Scarf | ||
| − | |||
| − | |||
| − | |||
|} | |} | ||
==== Sets ==== | ==== Sets ==== | ||
| + | {{main|Item sets}} | ||
{| class="wikitable collapsible" cellpadding="2" style="text-align:center;" | {| class="wikitable collapsible" cellpadding="2" style="text-align:center;" | ||
| − | | style="background: #b5b85c | + | | width="90px" style="background:#b5b85c;" rowspan="3" | '''{{class link|Heavy|br=yes|color=black}}''' |
| − | | style="background: #f8e2a1;" rowspan="3" | ''' | + | | style="background:#f8e2a1;" rowspan="3" | '''{{item link|Monster Mash-Up Pack}}'''<br/> |
| − | | | + | | style="background:#f8d28c;" | {{icon item|Kathman-Hairdo|80px}} |
| − | | style="background: #f8e2a1;" | '''{{item link|Kathman-Hairdo}}''' | + | | style="background:#f8e2a1;" | '''{{item link|Kathman-Hairdo}}''' |
|- | |- | ||
| − | | | + | | style="background:#f8d28c;" | {{item icon|Himalayan Hair Shirt|80px}} |
| − | | style="background: #f8e2a1;" | '''{{item link|Himalayan Hair Shirt | + | | style="background:#f8e2a1;" | '''{{item link|Himalayan Hair Shirt}}''' |
| − | |||
| − | |||
| − | |||
|- | |- | ||
| + | | style="background:#f8d28c;" | {{item icon|Abominable Snow Pants|80px}} | ||
| + | | style="background:#f8e2a1;" | '''{{item link|Abominable Snow Pants}}''' | ||
|} | |} | ||
| + | |||
| + | ==== War Paints ==== | ||
| + | {{main|War Paint}} | ||
| + | |||
| + | ===== {{decorated name|Jungle Jackpot Collection}} ===== | ||
| + | <gallery> | ||
| + | File:Backpack Park Pigmented War Paint Factory New.png|<div class="warpaint item-grade elite">{{Decorated name|park pigmented}}</div> | ||
| + | File:Backpack Sax Waxed War Paint Factory New.png|<div class="warpaint item-grade assassin">{{Decorated name|sax waxed}}</div> | ||
| + | File:Backpack Yeti Coated War Paint Factory New.png|<div class="warpaint item-grade assassin">{{Decorated name|yeti coated}}</div> | ||
| + | File:Backpack Croc Dusted War Paint Factory New.png|<div class="warpaint item-grade commando">{{Decorated name|croc dusted}}</div> | ||
| + | File:Backpack Macaw Masked War Paint Factory New.png|<div class="warpaint item-grade commando">{{Decorated name|macaw masked}}</div> | ||
| + | File:Backpack Piña Polished War Paint Factory New.png|<div class="warpaint item-grade commando">{{Decorated name|piña polished}}</div> | ||
| + | File:Backpack Anodized Aloha War Paint Factory New.png|<div class="warpaint item-grade mercenary">{{Decorated name|anodized aloha}}</div> | ||
| + | File:Backpack Bamboo Brushed War Paint Factory New.png|<div class="warpaint item-grade mercenary">{{Decorated name|bamboo brushed}}</div> | ||
| + | File:Backpack Leopard Printed War Paint Factory New.png|<div class="warpaint item-grade mercenary">{{Decorated name|leopard printed}}</div> | ||
| + | File:Backpack Mannana Peeled War Paint Factory New.png|<div class="warpaint item-grade mercenary">{{Decorated name|mannana peeled}}</div> | ||
| + | File:Backpack Tiger Buffed War Paint Factory New.png|<div class="warpaint item-grade mercenary">{{Decorated name|tiger buffed}}</div> | ||
| + | </gallery> | ||
| + | |||
| + | ===== {{decorated name|Infernal Reward Collection}} ===== | ||
| + | <gallery> | ||
| + | File:Backpack Fire Glazed War Paint Factory New.png|<div class="warpaint item-grade elite">{{Decorated name|fire glazed}}</div> | ||
| + | File:Backpack Bonk Varnished War Paint Factory New.png|<div class="warpaint item-grade assassin">{{Decorated name|bonk varnished}}</div> | ||
| + | File:Backpack Dream Piped War Paint Factory New.png|<div class="warpaint item-grade assassin">{{Decorated name|dream piped}}</div> | ||
| + | File:Backpack Freedom Wrapped War Paint Factory New.png|<div class="warpaint item-grade assassin">{{Decorated name|freedom wrapped}}</div> | ||
| + | File:Backpack Bank Rolled War Paint Factory New.png|<div class="warpaint item-grade commando">{{Decorated name|bank rolled}}</div> | ||
| + | File:Backpack Clover Camo'd War Paint Factory New.png|<div class="warpaint item-grade commando">{{Decorated name|clover camo'd}}</div> | ||
| + | File:Backpack Kill Covered War Paint Factory New.png|<div class="warpaint item-grade commando">{{Decorated name|kill covered}}</div> | ||
| + | File:Backpack Pizza Polished War Paint Factory New.png|<div class="warpaint item-grade commando">{{Decorated name|pizza polished}}</div> | ||
| + | File:Backpack Bloom Buffed War Paint Factory New.png|<div class="warpaint item-grade mercenary">{{Decorated name|bloom buffed}}</div> | ||
| + | File:Backpack Cardboard Boxed War Paint Factory New.png|<div class="warpaint item-grade mercenary">{{Decorated name|cardboard boxed}}</div> | ||
| + | File:Backpack Merc Stained War Paint Factory New.png|<div class="warpaint item-grade mercenary">{{Decorated name|merc stained}}</div> | ||
| + | File:Backpack Quack Canvassed War Paint Factory New.png|<div class="warpaint item-grade mercenary">{{Decorated name|quack canvassed}}</div> | ||
| + | File:Backpack Star Crossed War Paint Factory New.png|<div class="warpaint item-grade mercenary">{{Decorated name|star crossed}}</div> | ||
| + | </gallery> | ||
| + | |||
| + | ===== {{decorated name|Decorated War Hero Collection}} ===== | ||
| + | <gallery> | ||
| + | File:Backpack Carpet Bomber Mk.II War Paint Factory New.png|<div class="warpaint item-grade commando">{{Decorated name|carpet bomber mk.ii}}</div> | ||
| + | File:Backpack Woodland Warrior Mk.II War Paint Factory New.png|<div class="warpaint item-grade commando">{{Decorated name|woodland warrior mk.ii}}</div> | ||
| + | File:Backpack Wrapped Reviver Mk.II War Paint Factory New.png|<div class="warpaint item-grade commando">{{Decorated name|wrapped reviver mk.ii}}</div> | ||
| + | File:Backpack Forest Fire Mk.II War Paint Factory New.png|<div class="warpaint item-grade mercenary">{{Decorated name|forest fire mk.ii}}</div> | ||
| + | File:Backpack Night Owl Mk.II War Paint Factory New.png|<div class="warpaint item-grade mercenary">{{Decorated name|night owl mk.ii}}</div> | ||
| + | File:Backpack Woodsy Widowmaker Mk.II War Paint Factory New.png|<div class="warpaint item-grade mercenary">{{Decorated name|woodsy widowmaker mk.ii}}</div> | ||
| + | File:Backpack Autumn Mk.II War Paint Factory New.png|<div class="warpaint item-grade freelance">{{Decorated name|autumn mk.ii}}</div> | ||
| + | File:Backpack Plaid Potshotter Mk.II War Paint Factory New.png|<div class="warpaint item-grade freelance">{{Decorated name|plaid potshotter mk.ii}}</div> | ||
| + | File:Backpack Civil Servant Mk.II War Paint Factory New.png|<div class="warpaint item-grade civilian">{{Decorated name|civil servant mk.ii}}</div> | ||
| + | File:Backpack Civic Duty Mk.II War Paint Factory New.png|<div class="warpaint item-grade civilian">{{Decorated name|civic duty mk.ii}}</div> | ||
| + | </gallery> | ||
| + | |||
| + | ===== {{decorated name|Contract Campaigner Collection}} ===== | ||
| + | <gallery> | ||
| + | File:Backpack Bovine Blazemaker Mk.II War Paint Factory New.png|<div class="warpaint item-grade commando">{{Decorated name|bovine blazemaker mk.ii}}</div> | ||
| + | File:Backpack Dead Reckoner Mk.II War Paint Factory New.png|<div class="warpaint item-grade commando">{{Decorated name|dead reckoner mk.ii}}</div> | ||
| + | File:Backpack Backwoods Boomstick Mk.II War Paint Factory New.png|<div class="warpaint item-grade mercenary">{{Decorated name|backwoods boomstick mk.ii}}</div> | ||
| + | File:Backpack Masked Mender Mk.II War Paint Factory New.png|<div class="warpaint item-grade mercenary">{{Decorated name|masked mender mk.ii}}</div> | ||
| + | File:Backpack Iron Wood Mk.II War Paint Factory New.png|<div class="warpaint item-grade freelance">{{Decorated name|iron wood mk.ii}}</div> | ||
| + | File:Backpack Macabre Web Mk.II War Paint Factory New.png|<div class="warpaint item-grade freelance">{{Decorated name|macabre web mk.ii}}</div> | ||
| + | File:Backpack Nutcracker Mk.II War Paint Factory New.png|<div class="warpaint item-grade civilian">{{Decorated name|nutcracker mk.ii}}</div> | ||
| + | File:Backpack Smalltown Bringdown Mk.II War Paint Factory New.png|<div class="warpaint item-grade civilian">{{Decorated name|smalltown bringdown mk.ii}}</div> | ||
| + | </gallery> | ||
| + | |||
| + | ===== {{decorated name|Saxton Select Collection}} ===== | ||
| + | <gallery> | ||
| + | File:Backpack Dragon Slayer War Paint Factory New.png|<div class="warpaint item-grade elite">{{Decorated name|dragon slayer}}</div> | ||
| + | </gallery> | ||
==== Tools ==== | ==== Tools ==== | ||
{{main|Tools}} | {{main|Tools}} | ||
{| class="wikitable collapsible" cellpadding="3" style="text-align:center;" | {| class="wikitable collapsible" cellpadding="3" style="text-align:center;" | ||
| − | | | + | | width="90px" style="background:#f8d28c;" | {{Icon item|Abominable Cosmetic Case|75px}} |
| − | | style="background: #f8e2a1 "| '''{{item link|Abominable Cosmetic Case}}''' | + | | style="background:#f8e2a1;" | '''{{item link|Abominable Cosmetic Case}}''' |
|- | |- | ||
| − | | | + | | style="background:#f8d28c;" | {{Icon item|Abominable Cosmetic Key|75px}} |
| − | | style="background: #f8e2a1 "| '''{{item link|Abominable Cosmetic Key}}''' | + | | style="background:#f8e2a1;" | '''{{item link|Abominable Cosmetic Key}}''' |
|- | |- | ||
| − | | | + | | style="background:#f8d28c;" | {{Icon item|Unleash the Beast Cosmetic Case|75px}} |
| − | | style="background: #f8e2a1 "| '''{{item link|Unleash the Beast Cosmetic Case}}''' | + | | style="background:#f8e2a1;" | '''{{item link|Unleash the Beast Cosmetic Case}}''' |
|- | |- | ||
| − | | | + | | style="background:#f8d28c;" | {{Icon item|Unleash the Beast Cosmetic Key|75px}} |
| − | | style="background: #f8e2a1 "| '''{{item link|Unleash the Beast Cosmetic Key}}''' | + | | style="background:#f8e2a1;" | '''{{item link|Unleash the Beast Cosmetic Key}}''' |
|- | |- | ||
| − | | | + | | style="background:#f8d28c;" | {{Icon item|Jungle Inferno Campaign Pass|75px}} |
| − | | style="background: #f8e2a1 "| '''{{item link|Jungle Inferno Campaign Pass}}''' | + | | style="background:#f8e2a1;" | '''{{item link|Jungle Inferno Campaign Pass}}''' |
|- | |- | ||
| − | | | + | | style="background:#f8d28c;" | {{Icon item|Infernal Reward War Paint Case|75px}} |
| − | | style="background: #f8e2a1 "| '''{{item link| | + | | style="background:#f8e2a1;" | '''{{item link|Infernal Reward War Paint Case}}''' |
|- | |- | ||
| − | | | + | | style="background:#f8d28c;" | {{Icon item|Infernal Reward War Paint Key|75px}} |
| − | | style="background: #f8e2a1 "| '''{{item link|Infernal Reward War Paint | + | | style="background:#f8e2a1;" | '''{{item link|Infernal Reward War Paint Key}}''' |
|- | |- | ||
| − | | | + | | style="background:#f8d28c;" | {{Icon item|Jungle Jackpot War Paint Case|75px}} |
| − | | style="background: #f8e2a1 "| '''{{item link| | + | | style="background:#f8e2a1;" | '''{{item link|Jungle Jackpot War Paint Case}}''' |
|- | |- | ||
| − | | | + | | style="background:#f8d28c;" | {{Icon item|Jungle Jackpot War Paint Key|75px}} |
| − | | style="background: #f8e2a1 "| '''{{item link|Jungle Jackpot War Paint | + | | style="background:#f8e2a1;" | '''{{item link|Jungle Jackpot War Paint Key}}''' |
| − | |- | + | |} |
| − | | | + | |
| − | | style="background: #f8e2a1 "| '''{{item link|Jungle | + | ==== Action items ==== |
| + | {{main|Action items}} | ||
| + | {| class="wikitable collapsible" cellpadding="3" style="text-align:center;" | ||
| + | | width="90px" style="background:#f8d28c;" | {{Icon item|Jungle Inferno ConTracker|75px}} | ||
| + | | style="background:#f8e2a1;" | '''{{item link|Jungle Inferno ConTracker}}''' | ||
| + | |} | ||
| + | |||
| + | ==== Unobtainable items ==== | ||
| + | The following items were also added in the update, but are currently impossible to acquire in-game. | ||
| + | {| class="wikitable collapsible" cellpadding=2 style="text-align:center;" | ||
| + | | width="90px" style="background:#b5b85c;" rowspan="14" | '''{{class link|All Classes|br=yes|color=black}}''' | ||
| + | | style="background:#FFD700;" | {{Icon item|Mannanas Hat|75px}} | ||
| + | | style="background:#f8e2a1;" | '''{{item link|Mannanas Hat}}''' | ||
| + | |- | ||
| + | | style="background:#FFD700;" | {{Icon item|Mercenary Park (hat)|75px}} | ||
| + | | style="background:#f8e2a1;" | '''{{item link|Mercenary Park (cosmetic item)}}''' | ||
| + | |- | ||
| + | | style="background:#FFD700;" | {{Icon item|Never Forget Hat|75px}} | ||
| + | | style="background:#f8e2a1;" | '''{{item link|Never Forget Hat}}''' | ||
| + | |- | ||
| + | | style="background:#FFD700;" | {{Icon item|Yeti Park Hardhat|75px}} | ||
| + | | style="background:#f8e2a1;" | '''{{item link|Yeti Park Hardhat}}''' | ||
|} | |} | ||
=== Day 3 === | === Day 3 === | ||
| − | Day 3 revealed 4 new weapons for the Pyro, a kill taunt for one of the new Pyro weapons (the Thermal Thruster), a lunchbox item for the Heavy, and changes to the | + | Day 3 revealed 4 new weapons for the Pyro, a kill taunt for one of the new Pyro weapons (the Thermal Thruster), a lunchbox item for the Heavy, and changes to the Flame Thrower, [[compression blast|airblast]] and [[Fire#Afterburn|afterburn]]. |
==== Weapons ==== | ==== Weapons ==== | ||
| + | {{main|Weapons}} | ||
{| class="wikitable collapsible" cellpadding=2 style="text-align:center;" | {| class="wikitable collapsible" cellpadding=2 style="text-align:center;" | ||
| + | | width="90px" style="background:#b5b85c;" rowspan="4" | '''{{class link|Pyro|br=yes|color=black}}''' | ||
| + | | style="background:#f8d28c;" | {{Icon item|Dragon's Fury|75px}} | ||
| + | | style="background:#f8e2a1;" | '''{{item link|Dragon's Fury}}''' | ||
|- | |- | ||
| − | | style="background: # | + | | style="background:#f8d28c;" | {{Icon item|Gas Passer|75px}} |
| − | + | | style="background:#f8e2a1;" | '''{{item link|Gas Passer}}''' | |
| − | | style="background: #f8e2a1 "| '''{{item link| | ||
|- | |- | ||
| − | | | + | | style="background:#f8d28c;" | {{Icon item|Hot Hand|75px}} |
| − | | style="background: #f8e2a1 "| '''{{item link| | + | | style="background:#f8e2a1;" | '''{{item link|Hot Hand}}''' |
|- | |- | ||
| − | | | + | | style="background:#f8d28c;" | {{Icon item|Thermal Thruster|75px}} |
| − | | style="background: #f8e2a1 "| '''{{item link| | + | | style="background:#f8e2a1;" | '''{{item link|Thermal Thruster}}''' |
|- | |- | ||
| − | | | + | | style="background:#b5b85c;" rowspan="1" | '''{{class link|Heavy|br=yes|color=black}}''' |
| − | + | | style="background:#f8d28c;" | {{Icon item|Second Banana|75px}} | |
| − | | | + | | style="background:#f8e2a1;" | '''{{item link|Second Banana}}''' |
| − | | | ||
| − | | | ||
| − | | style="background: #f8e2a1 "| '''{{item link|Second Banana}}''' | ||
|} | |} | ||
| − | ==== Tweaked | + | ==== Tweaked classes ==== |
{| class="wikitable" | {| class="wikitable" | ||
| − | ! style="background: #748c41;" class="header" | + | ! class="header" style="background:#748c41; color:#FFFFFF" | Class |
| − | + | ! class="header" style="background:#748c41; color:#FFFFFF" | Changes | |
|- | |- | ||
| − | ! style="background: #b5b85c;" rowspan="6"| {{ | + | ! width="90px" style="background:#b5b85c;" rowspan="6" | {{class link|Pyro|br=yes|color=black}} |
| − | | style="background: #f8e2a1" | {{c|+|Changed:}} Airblast hit detection for both players and projectiles is now a consistent cone | + | | style="background:#f8e2a1;" | {{c|+|Changed:}} Airblast hit detection for both players and projectiles is now a consistent cone |
|- | |- | ||
| − | | style="background: #f8e2a1" | {{c|+|Changed:}} Airblast strength increased | + | | style="background:#f8e2a1;" | {{c|+|Changed:}} Airblast strength increased |
|- | |- | ||
| − | | style="background: #f8e2a1" | {{c|-|Changed:}} Airblast now causes the target player to have reduced footing and air control for a short period, rather than losing all control | + | | style="background:#f8e2a1;" | {{c|-|Changed:}} Airblast now causes the target player to have reduced footing and air control for a short period, rather than losing all control |
|- | |- | ||
| − | | style="background: #f8e2a1" | {{c|=|Changed:}} Airblast now factors in the momentum of the Pyro and target, giving both more control over the interaction | + | | style="background:#f8e2a1;" | {{c|=|Changed:}} Airblast now factors in the momentum of the Pyro and target, giving both more control over the interaction |
|- | |- | ||
| − | | style="background: #f8e2a1" | {{c|=|Changed:}} Airblast now factors in the upward angle of the airblast, rather than having a fixed upward force | + | | style="background:#f8e2a1;" | {{c|=|Changed:}} Airblast now factors in the upward angle of the airblast, rather than having a fixed upward force |
| − | |||
| − | |||
|- | |- | ||
| + | | style="background:#f8e2a1;" | {{c|=|Changed:}} Afterburn duration now based on how long the flamethrower was actively hitting an enemy | ||
|} | |} | ||
| − | ==== Tweaked | + | ==== Tweaked weapons ==== |
{| class="wikitable" | {| class="wikitable" | ||
| − | ! style="background: #748c41;" class="header" | + | ! class="header" style="background:#748c41; color:#FFFFFF" | Class |
| − | + | ! class="header" style="background:#748c41; color:#FFFFFF" | Weapon | |
| − | + | ! class="header" style="background:#748c41; color:#FFFFFF" | Changes | |
|- | |- | ||
| − | ! style="background: #b5b85c;" rowspan=7| {{ | + | ! width="90px" style="background:#b5b85c;" rowspan=7 | {{class link|Pyro|br=yes|color=black}} |
| − | ! style="background: #f8d28c;" rowspan=2 | {{Icon item|Flame Thrower|icon-size=75px}} <br /> {{item link|Flame Thrower}} + Variants | + | ! style="background:#f8d28c;" rowspan=2 | {{Icon item|Flame Thrower|icon-size=75px}}<br/>{{item link|Flame Thrower}} + Variants |
| − | | style="background: #f8e2a1;" | {{c|=|Changed:}} Better visual sync, more consistent (no visuals/damage mismatch) | + | | style="background:#f8e2a1;" | {{c|=|Changed:}} Better visual sync, more consistent (no visuals/damage mismatch) |
|- | |- | ||
| − | | style="background: #f8e2a1;" | {{c|=|Changed:}} New particle effects | + | | style="background:#f8e2a1;" | {{c|=|Changed:}} New particle effects |
|} | |} | ||
| Line 371: | Line 437: | ||
Day 4 released the patch notes for the Jungle Inferno Update, including various weapon changes, information about the new weapons, multiple bug fixes and changes to the matchmaking system. It also introduced the first-person inspection mechanic to all weapons. | Day 4 released the patch notes for the Jungle Inferno Update, including various weapon changes, information about the new weapons, multiple bug fixes and changes to the matchmaking system. It also introduced the first-person inspection mechanic to all weapons. | ||
| − | ====Tweaked | + | ==== Tweaked classes ==== |
{| class="wikitable" | {| class="wikitable" | ||
| − | ! | + | ! class="header" style="background:#748c41; color:#FFFFFF" | Class |
| − | + | ! class="header" style="background:#748c41; color:#FFFFFF" | Changes | |
| − | | | ||
| − | ! | ||
| − | |||
|- | |- | ||
| − | | style="background: #f8e2a1;" | {{c|+|Changed:}} | + | ! width="90px" style="background:#b5b85c;" rowspan="2" | {{class link|Heavy|br=yes|color=black}} |
| + | | style="background:#f8e2a1;" | {{c|+|Changed:}} The 1-second damage and accuracy penalty now applies to the first second of spun-up time, whether or not the Heavy is firing. Previously, the 1-second damage penalty only be removed after 1 second of firing. | ||
|- | |- | ||
| − | + | | style="background:#f8e2a1;" | {{c|+|Changed:}} Accuracy and damage penalties now reset when the Heavy spins down, rather than when the Heavy stops firing. This means if you stay spun up beyond one second, and fire in bursts, damage and accuracy will remain at 100%. | |
| − | | style="background: #f8e2a1;" | {{c|+| | ||
|- | |- | ||
| + | ! style="background:#b5b85c;" | {{class link|Engineer|br=yes|color=black}} | ||
| + | | style="background:#f8e2a1;" | {{c|+|Added:}} Doubled the amount of metal applied (per {{botignore|wrench}} hit) when upgrading buildings during the "Setup" period. | ||
|} | |} | ||
| − | ==== Tweaked | + | ==== Tweaked weapons ==== |
| + | Most of these changes were showed in a [https://www.teamfortress.com/post.php?id=30147 sneak peak] posted by the TF2 Team in the [[TF2 Official Blog]]. | ||
{| class="wikitable" | {| class="wikitable" | ||
| − | ! | + | ! class="header" style="background:#748c41; color:#FFFFFF" colspan=1 | Class |
| − | + | ! class="header" style="background:#748c41; color:#FFFFFF" colspan=2 | Weapon | |
| − | ! | + | ! class="header" style="background:#748c41; color:#FFFFFF" colspan=1 | Changes |
| − | |||
| − | |||
| − | ! | ||
| − | |||
|- | |- | ||
| − | | style="background: #f8e2a1;" | {{c| | + | ! width="90px" style="background:#b5b85c;" rowspan=25 | {{class link|Scout|br=yes|color=black}} |
| + | ! style="background:#f8d28c;" colspan=2 rowspan=2 | {{Icon item|Bonk! Atomic Punch|icon-size=75px}}<br/>{{item link|Bonk! Atomic Punch}} | ||
| + | | style="background:#f8e2a1;" | {{c|-|Added:}} Apply a slow effect to the player after phasing wears off, based on the amount of damage they absorbed, from -25% at low damage, to -50% at 200+ damage. | ||
|- | |- | ||
| − | + | | style="background:#f8e2a1;" | {{c|=|Note:}} The slow effect lasts 5 seconds | |
| − | | style="background: #f8e2a1;" | {{c| | ||
|- | |- | ||
| − | | style="background: #f8e2a1;" | {{c|+|Removed:}} | + | ! style="background:#f8d28c;" colspan=2 rowspan=4 | {{Icon item|Crit-A-Cola|icon-size=75px}}<br/>{{item link|Crit-A-Cola}} |
| + | | style="background:#f8e2a1;" | {{c|+|Removed:}} Marked-For-Death when effect expires | ||
|- | |- | ||
| − | | style="background: #f8e2a1;" | {{c| | + | | style="background:#f8e2a1;" | {{c|+|Removed:}} +10% damage taken penalty |
|- | |- | ||
| − | | style="background: #f8e2a1;" | {{c|-| | + | | style="background:#f8e2a1;" | {{c|-|Added:}} Each attack while active adds Marked-For-Death debuff for 5 seconds (does not stack) |
|- | |- | ||
| − | + | | style="background:#f8e2a1;" | {{c|-|Removed:}} +25% move speed bonus | |
| − | | style="background: #f8e2a1;" | {{c| | ||
|- | |- | ||
| − | | style="background: #f8e2a1;" | {{c|+|Changed:}} | + | ! style="background:#f8d28c;" colspan=2 rowspan=5 | {{Icon item|Pretty Boy's Pocket Pistol|icon-size=75px}}<br/>{{item link|Pretty Boy's Pocket Pistol}} |
| + | | style="background:#f8e2a1;" | {{c|+|Changed:}} +15% firing speed (from 25% slower firing speed) | ||
|- | |- | ||
| − | | style="background: #f8e2a1;" | {{c|+| | + | | style="background:#f8e2a1;" | {{c|+|Changed:}} Increased max health on hit to +7 (from +5) |
|- | |- | ||
| − | | style="background: #f8e2a1;" | {{c| | + | | style="background:#f8e2a1;" | {{c|+|Removed:}} 20% damage vulnerability on wearer |
|- | |- | ||
| − | | style="background: #f8e2a1;" | {{c|-| | + | | style="background:#f8e2a1;" | {{c|-|Removed:}} Wearer never takes falling damage |
|- | |- | ||
| − | + | | style="background:#f8e2a1;" | {{c|-|Added:}} -25% clip size penalty | |
| − | | style="background: #f8e2a1;" | {{c| | ||
|- | |- | ||
| − | | style="background: #f8e2a1;" | {{c|+| | + | ! style="background:#f8d28c;" colspan=2 rowspan=4 | {{Icon item|Flying Guillotine|icon-size=75px}}<br/>{{item link|Flying Guillotine}} |
| + | | style="background:#f8e2a1;" | {{c|+|Added:}} Long range hits reduce recharge time (by 1.5 seconds) | ||
|- | |- | ||
| − | | style="background: #f8e2a1;" | {{c| | + | | style="background:#f8e2a1;" | {{c|+|Changed:}} Distance considered "long range" reduced by half of the previous value when determining mini-crits |
|- | |- | ||
| − | | style="background: #f8e2a1;" | {{c|-|Removed:}} | + | | style="background:#f8e2a1;" | {{c|-|Removed:}} Crit vs stunned players |
|- | |- | ||
| − | + | | style="background:#f8e2a1;" | {{c|-|Removed:}} Mini-crits at long range | |
| − | | style="background: #f8e2a1;" | {{c| | ||
|- | |- | ||
| − | | style="background: #f8e2a1;" | {{c|+|Changed:}} | + | ! style="background:#f8d28c;" colspan=2 rowspan=4 | {{Icon item|Sandman|icon-size=75px}}<br/>{{item link|Sandman}} |
| + | | style="background:#f8e2a1;" | {{c|+|Changed:}} Max range balls now do 50% increased damage (from a base of 15) | ||
|- | |- | ||
| − | | style="background: #f8e2a1;" | {{c|+|Changed:}} | + | | style="background:#f8e2a1;" | {{c|+|Changed:}} The flight time required to trigger the "max" effect has been reduced by 20% |
|- | |- | ||
| − | | style="background: #f8e2a1;" | {{c| | + | | style="background:#f8e2a1;" | {{c|+|Changed:}} Ball regeneration time reduced to 10 seconds (from 15)<ref>This also affected the [[Wrap Assassin]]'s recharge rate, changing it from around 11 seconds to 7.5 seconds.</ref> |
|- | |- | ||
| − | + | | style="background:#f8e2a1;" | {{c|-|Changed:}} Long-range ball impacts no longer remove the victim's ability to fire their weapons (but the victim is still slowed) | |
| − | | style="background: #f8e2a1;" | {{c| | ||
|- | |- | ||
| − | | style="background: #f8e2a1;" | {{c|+| | + | ! style="background:#f8d28c;" colspan=2 rowspan=6 | {{Icon item|Atomizer|icon-size=75px}}<br/>{{item link|Atomizer}} |
| + | | style="background:#f8e2a1;" | {{c|+|Added:}} Melee attacks done while airborne mini-crit | ||
|- | |- | ||
| − | | style="background: #f8e2a1;" | {{c|+| | + | | style="background:#f8e2a1;" | {{c|+|Changed:}} Reduce damage penalty vs players to -15% (from -20%) |
|- | |- | ||
| − | | style="background: #f8e2a1;" | {{c|+|Removed:}} | + | | style="background:#f8e2a1;" | {{c|+|Removed:}} Self-inflicted damage when performing a triple jump |
|- | |- | ||
| − | | style="background: #f8e2a1;" | {{c| | + | | style="background:#f8e2a1;" | {{c|+|Removed:}} Attack speed penalty |
|- | |- | ||
| − | | style="background: #f8e2a1;" | {{c|-| | + | | style="background:#f8e2a1;" | {{c|-|Added:}} 50% slower deploy speed penalty |
|- | |- | ||
| − | + | | style="background:#f8e2a1;" | {{c|-|Changed:}} Triple-jump is now only possible while the {{botignore|bat}} is deployed | |
| − | |||
| − | |||
|- | |- | ||
| − | | style="background: #f8e2a1;" | {{c| | + | ! style="background:#b5b85c;" rowspan=8 | {{class link|Soldier|br=yes|color=black}} |
| + | ! style="background:#f8d28c;" colspan=2 rowspan=2 | {{Icon item|Cow Mangler 5000|icon-size=75px}}<br/>{{item link|Cow Mangler 5000}} | ||
| + | | style="background:#f8e2a1;" | {{c|+|Removed:}} Cannot be crit boosted | ||
|- | |- | ||
| − | + | | style="background:#f8e2a1;" | {{c|-|Added:}} Granted/earned crits will converted to mini-crits instead | |
| − | | style="background: #f8e2a1;" | {{c| | ||
|- | |- | ||
| − | | style="background: #f8e2a1;" | {{c|+| | + | ! style="background:#f8d28c;" colspan=2 rowspan=2 | {{Icon item|Mantreads|icon-size=75px}}<br/>{{item link|Mantreads}} |
| + | | style="background:#f8e2a1;" | {{c|+|Added:}} +200% air control when blast jumping | ||
|- | |- | ||
| − | + | | style="background:#f8e2a1;" | {{c|+|Changed:}} +75% push-force reduction now includes airblast | |
| − | | style="background: #f8e2a1;" | {{c| | ||
|- | |- | ||
| − | | style="background: #f8e2a1;" | {{c| | + | ! style="background:#f8d28c;" colspan=2 rowspan=4 | {{Icon item|Righteous Bison|icon-size=75px}}<br/>{{item link|Righteous Bison}} |
| + | | style="background:#f8e2a1;" | {{c|=|Note:}} This weapon has been reverted to its previous design | ||
|- | |- | ||
| − | | style="background: #f8e2a1;" | {{c|+|Changed:}} | + | | style="background:#f8e2a1;" | {{c|+|Changed:}} Projectiles are no longer limited on the number of times they can hit the same target(s) |
|- | |- | ||
| − | | style="background: #f8e2a1;" | {{c| | + | | style="background:#f8e2a1;" | {{c|+|Changed:}} Projectile velocity increased to 1200hu (from 840hu) |
|- | |- | ||
| − | + | | style="background:#f8e2a1;" | {{c|-|Changed:}} Reduced damage per tick to 20 (from 45) | |
| − | |||
| − | | style="background: #f8e2a1;" | {{c| | ||
|- | |- | ||
| − | | style="background: #f8e2a1;" | {{c| | + | ! style="background:#b5b85c;" rowspan=3 | {{class link|Demoman|br=yes|color=black}} |
| + | ! style="background:#f8d28c;" colspan=2 rowspan=3 | {{Icon item|Claidheamh Mòr|icon-size=75px}}<br/>{{item link|Claidheamh Mòr}} | ||
| + | | style="background:#f8e2a1;" | {{c|=|Note:}} This weapon has been reverted to its previous design | ||
|- | |- | ||
| − | | style="background: #f8e2a1;" | {{c| | + | | style="background:#f8e2a1;" | {{c|+|Added:}} 0.5 second increase in charge duration |
|- | |- | ||
| − | + | | style="background:#f8e2a1;" | {{c|-|Removed:}} +25 health on kill | |
| − | |||
| − | |||
| − | | style="background: #f8e2a1;" | {{c| | ||
|- | |- | ||
| − | | style="background: #f8e2a1;" | {{c|+|Removed:}} | + | ! style="background:#b5b85c;" rowspan=11 | {{class link|Heavy|br=yes|color=black}} |
| + | ! style="background:#f8d28c;" rowspan=5 width=128px | {{Icon item|Gloves of Running Urgently|icon-size=75px}}<br/>{{item link|Gloves of Running Urgently}} | ||
| + | ! style="background:#f8d28c;" rowspan=5 width=128px | {{Icon item|Bread Bite|icon-size=75px}}<br/>{{item link|Bread Bite}} | ||
| + | | style="background:#f8e2a1;" | {{c|+|Removed:}} Marked-For-Death effect while active | ||
|- | |- | ||
| − | | style="background: #f8e2a1;" | {{c| | + | | style="background:#f8e2a1;" | {{c|+|Removed:}} 25% damage penalty |
|- | |- | ||
| − | | style="background: #f8e2a1;" | {{c| | + | | style="background:#f8e2a1;" | {{c|-|Added:}} Max health is drained while item is active (-10/sec), and regenerated while holstered |
|- | |- | ||
| − | | style="background: #f8e2a1;" | {{c|=|Note:}} | + | | style="background:#f8e2a1;" | {{c|=|Note:}} Health will regenerate only the amount drained while active - minus any damage taken during that time |
|- | |- | ||
| − | + | | style="background:#f8e2a1;" | {{c|=|Note:}} Each time the gloves are deployed, the drain rate is accelerated for a brief period of time. | |
| − | | style="background: #f8e2a1;" | {{c| | ||
|- | |- | ||
| − | | style="background: #f8e2a1;" | {{c|-|Added:}} 40% | + | ! style="background:#f8d28c;" colspan=2 rowspan=2 | {{Icon item|Fists of Steel|icon-size=75px}}<br/>{{item link|Fists of Steel}} |
| + | | style="background:#f8e2a1;" | {{c|-|Added:}} 40% overheal reduction while active | ||
|- | |- | ||
| − | + | | style="background:#f8e2a1;" | {{c|-|Added:}} 40% healing rate penalty while active | |
| − | | style="background: #f8e2a1;" | {{c| | ||
|- | |- | ||
| − | | style="background: #f8e2a1;" | {{c| | + | ! style="background:#f8d28c;" colspan=2 rowspan=4 | {{Icon item|Eviction Notice|icon-size=75px}}<br/>{{item link|Eviction Notice}} |
| + | | style="background:#f8e2a1;" | {{c|+|Removed:}} 20% damage vulnerability | ||
|- | |- | ||
| − | | style="background: #f8e2a1;" | {{c| | + | | style="background:#f8e2a1;" | {{c|-|Added:}} Max health is drained while item is active (-5/sec), and regenerated while holstered |
|- | |- | ||
| − | | style="background: #f8e2a1;" | {{c|=|Note:}} | + | | style="background:#f8e2a1;" | {{c|=|Note:}} Health will regenerate only the amount drained while active - minus any damage taken during that time |
|- | |- | ||
| − | + | | style="background:#f8e2a1;" | {{c|=|Note:}} Each time the gloves are deployed, the drain rate is accelerated for a brief period of time. | |
| − | |||
| − | | style="background: #f8e2a1;" | {{c| | ||
|- | |- | ||
| − | ! style="background: #b5b85c;" | + | ! style="background:#b5b85c;" | {{class link|Engineer|br=yes|color=black}} |
| − | ! style="background: #f8d28c;" colspan | + | ! style="background:#f8d28c;" colspan=2 | {{Icon item|Rescue Ranger|icon-size=75px}}<br/>{{item link|Rescue Ranger}} |
| − | | style="background: #f8e2a1;" | {{c|-|Changed:}} | + | | style="background:#f8e2a1;" | {{c|-|Changed:}} Ranged repairs now consume metal (at a 4-to-1 health-to-metal ratio) |
|- | |- | ||
| − | | style="background: #f8e2a1;" | {{c| | + | ! style="background:#b5b85c;" rowspan=5 | {{class link|Medic|br=yes|color=black}} |
| + | ! style="background:#f8d28c;" colspan=2 rowspan=2 | {{Icon item|Crusader's Crossbow|icon-size=75px}}<br/>{{item link|Crusader's Crossbow}} | ||
| + | | style="background:#f8e2a1;" | {{c|-|Changed:}} ÜberCharge gain rate reduced in the same way that the Medi Gun's healing (and therefore, ÜberCharge build rate) is - based on the last time the target was in combat | ||
|- | |- | ||
| − | + | | style="background:#f8e2a1;" | {{c|=|Note:}} Reduced by a third when 1 - 10 seconds outside of combat, and scales up to normal over 10 - 15 seconds | |
| − | | style="background: #f8e2a1;" | {{c| | ||
|- | |- | ||
| − | | style="background: #f8e2a1;" | {{c|+|Added:}} | + | ! style="background:#f8d28c;" colspan=2 rowspan=3 | {{Icon item|Vita-Saw|icon-size=75px}}<br/>{{item link|Vita-Saw}} |
| + | | style="background:#f8e2a1;" | {{c|+|Added:}} Each hit with the Vita-Saw harvests the victim's organs (shown on the HUD) | ||
|- | |- | ||
| − | | style="background: #f8e2a1;" | {{c| | + | | style="background:#f8e2a1;" | {{c|+|Added:}} On-death, preserve 15% ÜberCharge per Organ harvested. This effect caps at 60%. |
|- | |- | ||
| − | + | | style="background:#f8e2a1;" | {{c|-|Removed:}} On death up to 20% of your stored ÜberCharge is retained | |
| − | |||
| − | | style="background: #f8e2a1;" | {{c| | ||
|- | |- | ||
| − | | style="background: #f8e2a1;" | {{c| | + | ! style="background:#b5b85c;" rowspan=7 | {{class link|Sniper|br=yes|color=black}} |
| + | ! style="background:#f8d28c;" colspan=2 rowspan=2 | {{Icon item|Razorback|icon-size=75px}}<br/>{{item link|Razorback}} | ||
| + | | style="background:#f8e2a1;" | {{c|+|Added:}} Shield regenerated after 30 seconds | ||
|- | |- | ||
| − | + | | style="background:#f8e2a1;" | {{c|-|Added:}} -100% overheal penalty | |
| − | | style="background: #f8e2a1;" | {{c| | ||
|- | |- | ||
| − | | style="background: #f8e2a1;" | {{c|+|Added:}} | + | ! style="background:#f8d28c;" colspan=2 rowspan=5 | {{Icon item|Darwin's Danger Shield|icon-size=75px}}<br/>{{item link|Darwin's Danger Shield}} |
| + | | style="background:#f8e2a1;" | {{c|+|Added:}} Afterburn immunity on wearer | ||
|- | |- | ||
| − | | style="background: #f8e2a1;" | {{c|+| | + | | style="background:#f8e2a1;" | {{c|+|Added:}} +50% fire resistance on wearer |
|- | |- | ||
| − | | style="background: #f8e2a1;" | {{c| | + | | style="background:#f8e2a1;" | {{c|+|Removed:}} 20% explosive damage vulnerability on wearer |
|- | |- | ||
| − | | style="background: #f8e2a1;" | {{c|-|Removed:}} + | + | | style="background:#f8e2a1;" | {{c|-|Removed:}} +25 max health on wearer |
|- | |- | ||
| − | + | | style="background:#f8e2a1;" | {{c|-|Removed:}} +15% bullet damage resistance on wearer | |
| − | |||
| − | | style="background: #f8e2a1;" | {{c|-| | ||
|- | |- | ||
| − | | style="background: #f8e2a1;" | {{c|-|Changed:}} | + | ! style="background:#b5b85c;" rowspan=8 | {{class link|Spy|br=yes|color=black}} |
| + | ! style="background:#f8d28c;" colspan=2 rowspan=2 | {{Icon item|Ambassador|icon-size=75px}}<br/>{{item link|Ambassador}} | ||
| + | | style="background:#f8e2a1;" | {{c|-|Changed:}} Headshot damage is now subjected to distance falloff effects | ||
|- | |- | ||
| − | + | | style="background:#f8e2a1;" | {{c|-|Changed:}} Headshots beyond 1200 world units do normal (non-crit) damage | |
| − | |||
| − | | style="background: #f8e2a1;" | {{c| | ||
|- | |- | ||
| − | | style="background: #f8e2a1;" | {{c| | + | ! style="background:#f8d28c;" rowspan=3 | {{Icon item|Your Eternal Reward|icon-size=75px}}<br/>{{item link|Your Eternal Reward}} |
| + | ! style="background:#f8d28c;" rowspan=3 | {{Icon item|Wanga Prick|icon-size=75px}}<br/>{{item link|Wanga Prick}} | ||
| + | | style="background:#f8e2a1;" | {{c|+|Removed:}} Cannot disguise penalty | ||
|- | |- | ||
| − | | style="background: #f8e2a1;" | {{c|-|Added:}} | + | | style="background:#f8e2a1;" | {{c|-|Added:}} Non-kill disguises require (and consume) a full cloak meter |
|- | |- | ||
| − | + | | style="background:#f8e2a1;" | {{c|-|Added:}} +33% faster cloak drain rate | |
| − | | style="background: #f8e2a1;" | {{c| | ||
|- | |- | ||
| − | | style="background: #f8e2a1;" | {{c|+|Removed:}} | + | ! style="background:#f8d28c;" colspan=2 rowspan=3 | {{Icon item|Dead Ringer|icon-size=75px}}<br/>{{item link|Dead Ringer}} |
| + | | style="background:#f8e2a1;" | {{c|+|Removed:}} No cloak meter from ammo boxes when invisible | ||
|- | |- | ||
| − | | style="background: #f8e2a1;" | {{c| | + | | style="background:#f8e2a1;" | {{c|+|Removed:}} -35% cloak meter from ammo boxes |
|- | |- | ||
| − | + | | style="background:#f8e2a1;" | {{c|-|Added:}} Ammo kits and dispensers no longer refill the Spy's cloak meter | |
| − | |||
| − | | style="background: #f8e2a1;" | {{c| | ||
|- | |- | ||
| − | | style="background: #f8e2a1;" | {{c| | + | ! style="background:#b5b85c; text-align:left;" rowspan=2 | {{class link|Soldier|color=black}}<br/>{{class link|Pyro|color=black}} |
| + | ! style="background:#f8d28c;" colspan=2 rowspan=2 | {{Icon item|Reserve Shooter|icon-size=75px}}<br/>{{item link|Reserve Shooter}} | ||
| + | | style="background:#f8e2a1;" | {{c|+|Added:}} Attacks on targets flying via the Thermal Thruster mini-crit | ||
|- | |- | ||
| − | + | | style="background:#f8e2a1;" | {{c|-|Changed:}} Attacks on targets knocked into the air by Pyro airblast no longer mini-crit | |
| − | |||
| − | | style="background: #f8e2a1;" | {{c|-|Changed:}} | ||
|- | |- | ||
| − | | style="background: #f8e2a1;" | {{c|-|Changed:}} | + | ! style="background:#b5b85c; text-align:left;" rowspan=2 | {{class link|Soldier|color=black}}<br/>{{class link|Demoman|color=black}} |
| + | ! style="background:#f8d28c;" colspan=2 rowspan=2 | {{Icon item|B.A.S.E. Jumper|icon-size=75px}}<br/>{{item link|B.A.S.E. Jumper}} | ||
| + | | style="background:#f8e2a1;" | {{c|-|Changed:}} Reduced amount of air control while deployed by 50% | ||
|- | |- | ||
| − | + | | style="background:#f8e2a1;" | {{c|-|Changed:}} Removed the ability to re-deploy the parachute once retracted (until the player lands on the ground again) | |
| − | |||
| − | | style="background: #f8e2a1;" | {{c| | ||
|- | |- | ||
| − | | style="background: #f8e2a1;" | {{c|+|Added:}} | + | ! style="background:#b5b85c; text-align:left;" rowspan=8 | {{class link|Soldier|color=black}}<br/>{{class link|Pyro|color=black}}<br/>{{class link|Heavy|color=black}}<br/>{{class link|Engineer|color=black}} |
| + | ! style="background:#f8d28c;" colspan=2 rowspan=8 | {{Icon item|Panic Attack|icon-size=75px}}<br/>{{item link|Panic Attack}} | ||
| + | | style="background:#f8e2a1;" | {{c|+|Added:}} +50% more pellets per shot | ||
|- | |- | ||
| − | | style="background: #f8e2a1;" | {{c|+| | + | | style="background:#f8e2a1;" | {{c|+|Added:}} Fires a wide, fixed shot pattern (regardless of server settings) |
|- | |- | ||
| − | | style="background: #f8e2a1;" | {{c|-|Removed:}} 50% faster reload speed | + | | style="background:#f8e2a1;" | {{c|-|Removed:}} 50% faster reload speed |
|- | |- | ||
| − | | style="background: #f8e2a1;" | {{c|-|Added:}} -30% damage penalty | + | | style="background:#f8e2a1;" | {{c|-|Added:}} -30% damage penalty |
|- | |- | ||
| − | | style="background: #f8e2a1;" | {{c|-|Removed:}} Fire rate increases as health decreases | + | | style="background:#f8e2a1;" | {{c|-|Removed:}} Fire rate increases as health decreases |
|- | |- | ||
| − | | style="background: #f8e2a1;" | {{c|=|Changed:}} Shot pattern grows with successive shots, but resets after you stop firing or reload (previously, weapon spread increased as health decreased) | + | | style="background:#f8e2a1;" | {{c|=|Changed:}} Shot pattern grows with successive shots, but resets after you stop firing or reload (previously, weapon spread increased as health decreased) |
| − | |||
| − | |||
|- | |- | ||
| + | | style="background:#f8e2a1;" | {{c|=|Removed:}} Hold fire to load up to 4 shells | ||
|} | |} | ||
==== Update Delay ==== | ==== Update Delay ==== | ||
| − | On the expected day for the update's release, Day 4, a [ | + | On the expected day for the update's release, Day 4, a [https://www.teamfortress.com/post.php?id=33776 blog post] gave notice of a delay of one day for the update in order for the TF team to do additional stress testing. |
== Trivia == | == Trivia == | ||
| − | * | + | * A [[Spy]] can be seen doing the [[Box Trot]] taunt to the right of Saxton Hale on day 4. |
| − | |||
| − | |||
* Several new weapons were teased in the days prior to their reveal: | * Several new weapons were teased in the days prior to their reveal: | ||
** At the bottom of the Day 1 Update Page, there is a Gas Passer lying on the ground, and in the background, the Pyro can be seen flying with the Thermal Thruster. | ** At the bottom of the Day 1 Update Page, there is a Gas Passer lying on the ground, and in the background, the Pyro can be seen flying with the Thermal Thruster. | ||
** On the Day 2 Update Page, in the pile of weapons shown that War Paint can be applied to, there is a Dragon's Fury in the background. Also, in the lineup of the team showing off new cosmetics, the Pyro is seen holding the Dragon's Fury and the Heavy is holding the Second Banana. | ** On the Day 2 Update Page, in the pile of weapons shown that War Paint can be applied to, there is a Dragon's Fury in the background. Also, in the lineup of the team showing off new cosmetics, the Pyro is seen holding the Dragon's Fury and the Heavy is holding the Second Banana. | ||
| − | * At the bottom of the Day 2 Update Page, [[Saxton Hale]] is seen holding a ConTracker. On the screen, there are two names. One says "Mercenary Park", and the other says "Pyroland". It was later revealed that through the "Pyroland" option, players would be able to earn all of the four new Pyro weapons and the Heavy weapon via completing six free contracts. Additionally, on Saxton Hale's shoulder, a parrot can be seen. Three red lasers are shining near the parrot's head. Moving the cursor near the parrot causes its head to explode, leaving a comical bone sticking out, some blood on Hale's shoulder, and feathers floating in the air. The triple laser sight is a reference to the [[w: | + | * At the bottom of the Day 2 Update Page, [[Saxton Hale]] is seen holding a ConTracker. On the screen, there are two names. One says "Mercenary Park", and the other says "Pyroland". It was later revealed that through the "Pyroland" option, players would be able to earn all of the four new Pyro weapons and the Heavy weapon via completing six free contracts. Additionally, on Saxton Hale's shoulder, a parrot can be seen. Three red lasers are shining near the parrot's head. Moving the cursor near the parrot causes its head to explode, leaving a comical bone sticking out, some blood on Hale's shoulder, and feathers floating in the air. The triple laser sight is a reference to the [[w:Predator (franchise)|''Predator'' film series]], as the eponymous alien hunters use a similar sight to aim their [[wikia:w:c:avp:Plasmacaster|Plasmacasters]]. The first ''Predator'' movie involves people being hunted in a jungle. Using inspect element on the website shows the image's name as "parroter". |
== Gallery == | == Gallery == | ||
<gallery> | <gallery> | ||
File:News item 2017-10-21 Jungle Inferno Update.png|In-game notification about the release of the update. | File:News item 2017-10-21 Jungle Inferno Update.png|In-game notification about the release of the update. | ||
| − | File:Jungle Inferno | + | File:Jungle Inferno Update Steam Ad.jpg|Steam popup advertising the Jungle Inferno Update. <!-- Translators: please use "File:Jungle Inferno Update Steam Ad {lang_code}.jpg" --> |
| − | File:Jungle Inferno | + | File:Jungle Inferno Update Day 1.jpg|'''Day 1.''' [https://www.teamfortress.com/jungleinferno/ Maps and taunts]. |
| − | File:Jungle Inferno | + | File:Jungle Inferno Update Day 2.jpg|'''Day 2.''' [https://www.teamfortress.com/jungleinferno/campaign.php Campaign Pass and cosmetics]. |
| − | File:Jungle Inferno | + | File:Jungle Inferno Update Day 3.jpg|'''Day 3.''' [https://www.teamfortress.com/jungleinferno/pyro.php Pyro's new class pack and subcampaign]. |
| − | File: | + | File:Jungle Inferno Update Day 4.jpg|'''Day 4.''' [https://www.teamfortress.com/jungleinferno/notes.php Final Patch-notes]. |
| + | File:Scream Fortress IX.jpg|Jungle Inferno title during the Halloween event. | ||
</gallery> | </gallery> | ||
| + | |||
| + | == See also == | ||
| + | * [[Jungle Inferno Contracts Pass]] | ||
== External links == | == External links == | ||
| − | * [ | + | * [https://www.teamfortress.com/post.php?id=33662 Welcome to... Mercenary Park!] |
| − | * [ | + | * [https://www.teamfortress.com/post.php?id=33689 Hit the Campaign Trail!] |
| − | * [ | + | * [https://www.teamfortress.com/post.php?id=33731 Hot Stuff!] |
| − | * [ | + | * [https://www.teamfortress.com/post.php?id=33776 We're Almost Live!] |
| − | * [ | + | * [https://www.teamfortress.com/post.php?id=33847 Jungle Inferno is Live!] |
| − | * [ | + | * [https://www.teamfortress.com/jungleinferno/ Jungle Inferno Update Day 1] |
| − | * [ | + | * [https://www.teamfortress.com/jungleinferno/campaign.php Update Day 2] |
| − | * [ | + | * [https://www.teamfortress.com/jungleinferno/pyro.php Update Day 3] |
| − | * [ | + | * [https://www.teamfortress.com/jungleinferno/notes.php Update Day 4] |
| + | |||
| + | == References == | ||
| + | <references/> | ||
| + | |||
{{Jungle Inferno Update Nav}} | {{Jungle Inferno Update Nav}} | ||
| − | {{Major | + | {{Major Updates Nav}} |
{{Pyro Nav}} | {{Pyro Nav}} | ||
[[Category:Events]] | [[Category:Events]] | ||
[[Category:Major updates]] | [[Category:Major updates]] | ||
Latest revision as of 11:54, 28 October 2024
| “ | If Jurassic Park taught us one thing, it's life finds a way. If Jurassic Park taught us two things, it's life finds a way and Jurassic Park is a good idea to steal for an update. And if Valve's legal team has taught us one thing, it was by screaming at us about not telling you the second thing Jurassic Park taught us.
If people screaming at us has taught us one thing, it's that loud noises make us so anxious we forget where the backspace key is, so we're just plowing ahead and are happy to announce our wholly original update about deadly animals escaping from a theme park. Because life finds a way, which is the only thing we — TF2 Official Website
|
” |
The Jungle Inferno Update was a major update for Team Fortress 2 that spanned throughout 4 days, starting on October 16th, 2017 and finally releasing on October 20th, 2017 after a 1-day delay. It introduced 5 new weapons, 5 new community-made maps, 1 new Valve-made map, 7 new taunts, 1 new kill taunt, 49 new cosmetics (though 4 all-class items are currently unreleased), and many rebalances for existing weapons as well as the Pyro, Engineer and Heavy classes. It also introduced an overhaul to the contract system with the ConTracker, and introduced War Paint in place of weapon skins.
Contents
Video
Announcements
The Jungle Inferno Update page officially began on October 16th, 2017, as announced on the TF2 Official Blog post "Welcome to... Mercenary Park!"
Update progress
The Jungle Inferno Update was released over time through a four-day update.
- Day 1 included 7 new taunts, 6 new maps, and a short SFM trailer.
- Day 2 introduced War Paints and a new contract PDA with free and paid contracts, with the free contracts giving out the new weapons and the paid ones giving out Blood Money, War Paints, and cosmetic items.
- Day 3 showed the new weapons: the Dragon's Fury (a primary weapon/flamethrower), the Thermal Thruster (a secondary weapon/jetpack with a unique taunt kill), the Gas Passer (a secondary weapon/toxic gas), the Hot Hand (a melee weapon/glove), and the only non-Pyro weapon in this update, the Second Banana (a secondary lunchbox weapon for the Heavy).
- Day 4 was the final day, accompanied by a blog post with the complete patch notes and a release date of 1 day away.
Day 1
The Jungle Inferno Update revealed 1 new Valve map and 5 new community-created maps, along with 2 new Valve taunts and 5 new community-created taunts.
Maps
| Name | Picture | Game mode | File name |
|---|---|---|---|
| Banana Bay | 
|
Payload Race |
plr_bananabay
|
| Brazil | 
|
King of the Hill |
koth_brazil
|
| Enclosure | 
|
Payload
|
pl_enclosure_final
|
| Lazarus | 
|
King of the Hill |
koth_lazarus
|
| Mercenary Park | 
|
Attack/Defend |
cp_mercenarypark
|
| Mossrock | 
|
Attack/Defend |
cp_mossrock
|
Taunts
| Headcase | ||
| Russian Arms Race | ||
| Soviet Strongarm | ||
| Dueling Banjo | ||
| Jumping Jack | ||
| Yeti Punch | ||
| Yeti Smash |
Day 2
Day 2 revealed the Jungle Inferno Campaign and War Paint cases that replaced campaign weapon drops and weapon cases, 2 new cosmetic cases, and the new campaign system. This campaign involves 36 new contracts that can be completed in co-op. Completion of the contracts earns either a campaign-specific item or "Blood Money", which can be used to buy War Paints and cases.
Campaign
The Jungle Inferno Campaign required the purchase of a Jungle Inferno Campaign Pass. The ConTracker PDA was also introduced, which allows customized contract progression and access to the Mercenary Park Gift Shop. Friendly-Fire is a new feature accompanied by the campaign and the party system, which allows players to play with/against their friends and help each other in completing contracts if they are on the same Valve server with them.
Cosmetic items
Sets
| The Monster Mash-Up Pack |
Kathman-Hairdo | ||
| Himalayan Hair Shirt | |||
| Abominable Snow Pants |
War Paints
Jungle Jackpot Collection
Infernal Reward Collection
Decorated War Hero Collection
Contract Campaigner Collection
Saxton Select Collection
Tools
Action items
| Jungle Inferno ConTracker |
Unobtainable items
The following items were also added in the update, but are currently impossible to acquire in-game.
| Mannanas Hat | ||
| Mercenary Park | ||
| Never Forget Hat | ||
| Yeti Park Hardhat |
Day 3
Day 3 revealed 4 new weapons for the Pyro, a kill taunt for one of the new Pyro weapons (the Thermal Thruster), a lunchbox item for the Heavy, and changes to the Flame Thrower, airblast and afterburn.
Weapons
| Dragon's Fury | ||
| Gas Passer | ||
| Hot Hand | ||
| Thermal Thruster | ||
| Second Banana |
Tweaked classes
| Class | Changes |
|---|---|
Tweaked weapons
| Class | Weapon | Changes |
|---|---|---|
Flame Thrower + Variants |
||
Day 4
Day 4 released the patch notes for the Jungle Inferno Update, including various weapon changes, information about the new weapons, multiple bug fixes and changes to the matchmaking system. It also introduced the first-person inspection mechanic to all weapons.
Tweaked classes
| Class | Changes |
|---|---|
Tweaked weapons
Most of these changes were showed in a sneak peak posted by the TF2 Team in the TF2 Official Blog.
| Class | Weapon | Changes | |
|---|---|---|---|
Bonk! Atomic Punch |
|||
Crit-a-Cola |
|||
Pretty Boy's Pocket Pistol |
|||
Flying Guillotine |
|||
Sandman |
|||
Atomizer |
|||
Cow Mangler 5000 |
|||
Mantreads |
|||
Righteous Bison |
|||
Claidheamh Mòr |
|||
Gloves of Running Urgently |
Bread Bite |
||
Fists of Steel |
|||
Eviction Notice |
|||
Rescue Ranger |
|||
Crusader's Crossbow |
|||
Vita-Saw |
|||
Razorback |
|||
Darwin's Danger Shield |
|||
Ambassador |
|||
Your Eternal Reward |
Wanga Prick |
||
Dead Ringer |
|||
Reserve Shooter |
|||
B.A.S.E. Jumper |
|||
Panic Attack |
|||
Update Delay
On the expected day for the update's release, Day 4, a blog post gave notice of a delay of one day for the update in order for the TF team to do additional stress testing.
Trivia
- A Spy can be seen doing the Box Trot taunt to the right of Saxton Hale on day 4.
- Several new weapons were teased in the days prior to their reveal:
- At the bottom of the Day 1 Update Page, there is a Gas Passer lying on the ground, and in the background, the Pyro can be seen flying with the Thermal Thruster.
- On the Day 2 Update Page, in the pile of weapons shown that War Paint can be applied to, there is a Dragon's Fury in the background. Also, in the lineup of the team showing off new cosmetics, the Pyro is seen holding the Dragon's Fury and the Heavy is holding the Second Banana.
- At the bottom of the Day 2 Update Page, Saxton Hale is seen holding a ConTracker. On the screen, there are two names. One says "Mercenary Park", and the other says "Pyroland". It was later revealed that through the "Pyroland" option, players would be able to earn all of the four new Pyro weapons and the Heavy weapon via completing six free contracts. Additionally, on Saxton Hale's shoulder, a parrot can be seen. Three red lasers are shining near the parrot's head. Moving the cursor near the parrot causes its head to explode, leaving a comical bone sticking out, some blood on Hale's shoulder, and feathers floating in the air. The triple laser sight is a reference to the Predator film series, as the eponymous alien hunters use a similar sight to aim their Plasmacasters. The first Predator movie involves people being hunted in a jungle. Using inspect element on the website shows the image's name as "parroter".
Gallery
Day 1. Maps and taunts.
Day 2. Campaign Pass and cosmetics.
Day 4. Final Patch-notes.
See also
External links
- Welcome to... Mercenary Park!
- Hit the Campaign Trail!
- Hot Stuff!
- We're Almost Live!
- Jungle Inferno is Live!
- Jungle Inferno Update Day 1
- Update Day 2
- Update Day 3
- Update Day 4
References
- ↑ This also affected the Wrap Assassin's recharge rate, changing it from around 11 seconds to 7.5 seconds.
| ||||||||||||||||||||||||||||||||||||||||||||||||||||
| ||||||||||||||||||||||||||||||||||||||||||||||||||||||||||||||||||||||||||||||||||||||||||||||||||
