Difference between revisions of "Mercenary Park"
m (→Processing) |
GrampaSwood (talk | contribs) (→Gallery: Removed the helicopter file linking it otiself in the caption) |
||
| (20 intermediate revisions by 13 users not shown) | |||
| Line 1: | Line 1: | ||
| − | {{ | + | {{Other uses|this=the map|Mercenary Park (disambiguation)}} |
{{Map infobox | {{Map infobox | ||
| + | | map-status = official | ||
| name = Mercenary Park | | name = Mercenary Park | ||
| − | | game-type | + | | map-game-type = Control Point (attack/defend) |
| − | | file-name | + | | map-file-name = cp_mercenarypark |
| map-image = Yetipark 5.png | | map-image = Yetipark 5.png | ||
| − | | | + | | map-released = {{Patch name|10|20|2017}} |
| − | | | + | | map-released-major = Jungle Inferno Update |
| map-environment = Jungle | | map-environment = Jungle | ||
| map-setting = Daylight, overcast | | map-setting = Daylight, overcast | ||
| − | | map-deep-water | + | | map-has-deep-water = yes |
| map-hazards = [[Environmental death#Crocodiles|Crocodiles]], [[Pitfall]]s | | map-hazards = [[Environmental death#Crocodiles|Crocodiles]], [[Pitfall]]s | ||
| − | | map-health | + | | map-pickups-health-small = 2 |
| − | | map-health | + | | map-pickups-health-medium = 14 |
| − | | map-ammo | + | | map-pickups-ammo-small = 1 |
| − | | map-ammo | + | | map-pickups-ammo-medium = 11 |
| − | | map-ammo | + | | map-pickups-ammo-large = 5 |
| − | | map-bots = | + | | map-has-bots = yes |
}} | }} | ||
| − | {{Quotation|'''Saxton Hale'''|Welcome...to Mercenary Park! | + | {{Quotation|'''Saxton Hale'''|Welcome... to Mercenary Park!}} |
| + | |||
'''Mercenary Park''' is an [[Control Point (game mode)#Attack/Defend|Attack/Defend Control Point]] map released during the [[Jungle Inferno Update]] and featured in the [[Jungle Inferno (Video)|Jungle Inferno]] video. It is a biological research facility and weapons factory that was repurposed as "Yeti Park", but was changed hastily to just a fighting park after [[Saxton Hale]] killed the [[Non-player characters#Yeti|last Yeti in existence]]. | '''Mercenary Park''' is an [[Control Point (game mode)#Attack/Defend|Attack/Defend Control Point]] map released during the [[Jungle Inferno Update]] and featured in the [[Jungle Inferno (Video)|Jungle Inferno]] video. It is a biological research facility and weapons factory that was repurposed as "Yeti Park", but was changed hastily to just a fighting park after [[Saxton Hale]] killed the [[Non-player characters#Yeti|last Yeti in existence]]. | ||
| − | Certain features of the map depict a bloody running battle with a large, escaped beast, the result of experimentation on large (and peaceful)<ref>[[A Fate Worse Than Chess]], [ | + | Certain features of the map depict a bloody running battle with a large, escaped beast, the result of experimentation on large (and peaceful)<ref>[[A Fate Worse Than Chess]], [[:File:AFateWorseThanChess1.jpg|cover page]].</ref> animals by the Yti-Hale corporation, enhancing them for strength, aggression,<ref>Barrels of [[w:Anabolic steroid#Neuropsychiatric|anabolic steroids]] in the Mann Co. warehouse building and elsewhere around the map.</ref> and escape ''("That was the whole bloody point!")''<ref>[[Jungle Inferno (Video)]], 2:16.</ref>. |
== Locations == | == Locations == | ||
| − | + | {{HelpfulOverviewNote}} | |
| − | |||
=== Visitor Center === | === Visitor Center === | ||
* Monorail station: First BLU spawn. | * Monorail station: First BLU spawn. | ||
| Line 44: | Line 45: | ||
* Transport cages: Yti-Hale Shipping. Two-level flanking of the Capture point. The highest can be reached by jumping. | * Transport cages: Yti-Hale Shipping. Two-level flanking of the Capture point. The highest can be reached by jumping. | ||
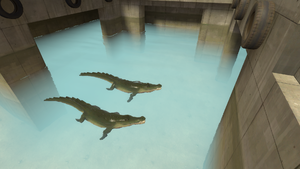
* Dock: [[Environmental death#Crocodiles|crocodile]]-infested water. | * Dock: [[Environmental death#Crocodiles|crocodile]]-infested water. | ||
| − | [[ | + | [[File:Mercenary Park Crocodiles.png|thumb|Crocodiles on Mercenary Park]] |
=== Processing === | === Processing === | ||
| − | * BLU Second Forward Spawn : Located right before control point B. Unlocked when control point B is captured. | + | * BLU Second Forward Spawn: Located right before control point B. Unlocked when control point B is captured. |
* Capture point B -- '''Lab''' -- (hidden beneath the point are three inaccessible stories of fluid tanks). | * Capture point B -- '''Lab''' -- (hidden beneath the point are three inaccessible stories of fluid tanks). | ||
* Monorail station: First RED spawn, which closes when the Receiving Bay is captured. | * Monorail station: First RED spawn, which closes when the Receiving Bay is captured. | ||
| − | * BLU Third Forward Spawn : Located before the staircases leading to the YTI room. Unlocked when control point B is captured. | + | * BLU Third Forward Spawn: Located before the staircases leading to the YTI room. Unlocked when control point B is captured. |
| − | * Loading bay : There is a small elevated loading bay positioned right next to the point B | + | * Loading bay: There is a small elevated loading bay positioned right next to the point B |
| − | * Staircase : Leading from the Lab's second floor is a set of stairs | + | * Staircase: Leading from the Lab's second floor is a set of stairs that go directly to the Red's first spawn. |
| − | * Server Room : A compact room filled with servers located directly above the Loading Bay on the Lab's second floor. Leading out of the Server Room is a gate | + | * Server Room: A compact room filled with servers located directly above the Loading Bay on the Lab's second floor. Leading out of the Server Room is a gate that leads out to a section of platforms positioned above the first point and attached to the wall next to it. |
=== Research and Captivity === | === Research and Captivity === | ||
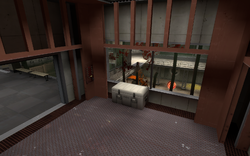
| − | [[ | + | [[File:Cp mercenaryparkglasshole.png|thumb|250px|The broken window in the elevator cage, which faces the control point C.]] |
* YTI: Institute for Research and Development: Rally room for BLU pushes on final. | * YTI: Institute for Research and Development: Rally room for BLU pushes on final. | ||
* Elevator shaft: (final choke) This elevator was used to transfer specimens between the ten cages, the Lab, and the Test Pit. | * Elevator shaft: (final choke) This elevator was used to transfer specimens between the ten cages, the Lab, and the Test Pit. | ||
| Line 62: | Line 63: | ||
** Access to Research and Captivity is through the lower and upper-level elevator doors. | ** Access to Research and Captivity is through the lower and upper-level elevator doors. | ||
** These doors are blocked to both sides until the Receiving Bay (A) is captured. | ** These doors are blocked to both sides until the Receiving Bay (A) is captured. | ||
| + | * Platform: An elevated position just behind the C point, the usual location of the Red's defenses. | ||
* Cave: A flank through ventilation and a cave to the rear corner of both levels of the Test Pit. | * Cave: A flank through ventilation and a cave to the rear corner of both levels of the Test Pit. | ||
* Rear Vents: A subtle sneak path back to the corner under RED's Spawn gates. | * Rear Vents: A subtle sneak path back to the corner under RED's Spawn gates. | ||
| Line 68: | Line 70: | ||
* Monorail station: Final RED spawn, which opens when the Receiving Bay is captured. | * Monorail station: Final RED spawn, which opens when the Receiving Bay is captured. | ||
| − | {{ | + | {{clr}} |
| − | ==Helpful overview== | + | == Helpful overview == |
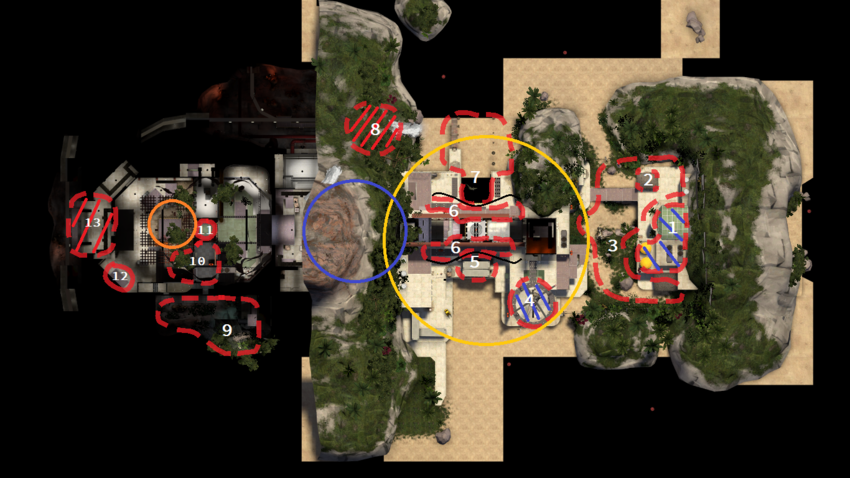
| − | [[ | + | [[File:Mercenary Park with lines.png|Mercenary Park's locations|left|850px]] |
| − | <small>Yellow circle: Control point A and the Mann. | + | <small>Yellow circle: Control point A and the Mann Co. building ('''Note''' that the Mann Co. building is split into two parts which are connected by a pair of catwalks) |
Blue circle: General location of the control point B (Not visible) | Blue circle: General location of the control point B (Not visible) | ||
Orange circle: Control point C and the pit | Orange circle: Control point C and the pit | ||
| Line 94: | Line 96: | ||
13.Final Red spawnroom</small> | 13.Final Red spawnroom</small> | ||
| − | {{ | + | {{clr}} |
| − | |||
== Strategy == | == Strategy == | ||
| − | {{ | + | {{map strategy link|Mercenary Park|main=yes|stub=yes}} |
== Control Point timing == | == Control Point timing == | ||
| − | { | + | {{Control Point Timing/Official Map|MAP = mercenary park}} |
| − | |||
| − | |||
| − | |||
| − | |||
| − | |||
| − | |||
| − | |||
| − | |||
| − | |||
| − | |||
| − | |||
| − | |||
| − | |||
| − | |||
| − | |||
| − | |||
== Update history == | == Update history == | ||
| − | {{Update history | '''{{Patch name|10|20|2017}} #1''' ([[Jungle Inferno Update]]) | + | {{Update history| |
| + | '''{{Patch name|10|20|2017}} #1''' ([[Jungle Inferno Update]]) | ||
* Added Mercenary Park to the game. | * Added Mercenary Park to the game. | ||
'''{{Patch name|10|23|2017}}''' | '''{{Patch name|10|23|2017}}''' | ||
* Fixed enemy players being able to enter opposing spawn rooms. | * Fixed enemy players being able to enter opposing spawn rooms. | ||
| − | * Fixed an area near cap B where {{botignore| | + | * Fixed an area near cap B where {{botignore|Engineers}} could build in an inaccessible area. |
* Fixed spawn room doors sometimes becoming blocked. | * Fixed spawn room doors sometimes becoming blocked. | ||
| Line 134: | Line 120: | ||
'''{{Patch name|3|28|2018}} #1''' | '''{{Patch name|3|28|2018}} #1''' | ||
* Fixed RED being able to shoot through the roof of BLU's starting spawn. | * Fixed RED being able to shoot through the roof of BLU's starting spawn. | ||
| − | * Changes to control point C | + | * Changes to control point C. |
** BLU's spawn time has been slightly lowered. | ** BLU's spawn time has been slightly lowered. | ||
** The upper-mid route window now has a small opening for attackers to use. | ** The upper-mid route window now has a small opening for attackers to use. | ||
| Line 143: | Line 129: | ||
** Bullets no longer go through the chain fence wall at the ramp connecting lower and upper. | ** Bullets no longer go through the chain fence wall at the ramp connecting lower and upper. | ||
}} | }} | ||
| + | |||
== Unused content == | == Unused content == | ||
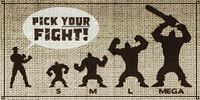
| − | [[ | + | [[File:Yeti fight selection.jpg|thumb|200px|right|"Pick your fight!" poster.]] |
| − | * There are | + | * There are three unused rooms in Mercenary Park: |
** To the left of the first Control Point and behind the fence, there is a mostly empty, dimly lit room with two floors and a dropdown between the two. | ** To the left of the first Control Point and behind the fence, there is a mostly empty, dimly lit room with two floors and a dropdown between the two. | ||
** Directly underneath the second Control Point is a partially lit area that has walls lined with cages and cylindrical containers. | ** Directly underneath the second Control Point is a partially lit area that has walls lined with cages and cylindrical containers. | ||
| − | * Additionally, there are | + | ** On the lower right-most path leading to the first Control Point, there is a small empty room behind a wall with a single light illuminating it. |
| + | * Additionally, there are several unused models and textures in the game files: | ||
** This includes a speedboat, older variants of the atrium and alligator models, blue and yellow corroded metal, a low-quality white yeti cell, a poster which reads "pick your fight!", different sign letters that together read "Yeti Island", and other miscellaneous content. | ** This includes a speedboat, older variants of the atrium and alligator models, blue and yellow corroded metal, a low-quality white yeti cell, a poster which reads "pick your fight!", different sign letters that together read "Yeti Island", and other miscellaneous content. | ||
*** One such unused model is a guard tower with a turret gun model mounted to it with improper texturing. The turret model is the model that the "[[:File:Turretguns.png|turretguns]]" texture is for. This was meant to be TF2's spawnroom turret before the idea was cut. | *** One such unused model is a guard tower with a turret gun model mounted to it with improper texturing. The turret model is the model that the "[[:File:Turretguns.png|turretguns]]" texture is for. This was meant to be TF2's spawnroom turret before the idea was cut. | ||
== Bugs == | == Bugs == | ||
| − | + | * Just above the first point is a clip brush that does not extend to the ceiling, allowing for players who can reach the invisible perch to output damage while being almost entirely hidden from view. | |
| − | * Just above the first point is a clip brush that | ||
** It is not possible to build on this perch. | ** It is not possible to build on this perch. | ||
| − | * On the third point, for | + | * On the third point, it is possible for certain classes to jump on a certain part of the metal bars above.<ref>[https://youtu.be/--cb5LFfYIM Video showing off metal bars spot].</ref> |
| − | ** | + | * When in [[Pyroland]], certain doorways turn visually solid. The player is still able to walk and shoot through these doorways as normal. |
| + | * Engineers can build Sentry Guns and Dispensers in the first RED spawn. | ||
| + | |||
| + | == Notes == | ||
| + | * After BLU has captured point A, all the health and ammo pickups leading up to that point will be disabled. Meanwhile, a small ammo pack and a medium health kit will become available near the original RED spawn. | ||
| + | * After BLU has captured point B, the health and ammo pickups near their final spawn will be disabled, and a no-build zone for RED will be enabled on the stairs near the BLU spawn. | ||
== Trivia == | == Trivia == | ||
| Line 163: | Line 155: | ||
** Similarly, both plots revolve around the parks containing dangerous experimental animals for the public, which eventually escape. | ** Similarly, both plots revolve around the parks containing dangerous experimental animals for the public, which eventually escape. | ||
* The [[:File:Mercenary Park H-34 01.png|park's helicopter]] has several unique characteristics of the [[w:Sikorsky H-34|Sikorsky H-34]] (albeit of much shortened length), which saw extensive naval and jungle service in the [[w:Vietnam War|Vietnam war]].<!--404 forced my hand on this, this is incomplete, as I want to work more on the images.--> | * The [[:File:Mercenary Park H-34 01.png|park's helicopter]] has several unique characteristics of the [[w:Sikorsky H-34|Sikorsky H-34]] (albeit of much shortened length), which saw extensive naval and jungle service in the [[w:Vietnam War|Vietnam war]].<!--404 forced my hand on this, this is incomplete, as I want to work more on the images.--> | ||
| + | |||
== Gallery == | == Gallery == | ||
<gallery> | <gallery> | ||
File:Mercenary Park H-34 03.png|Scenery of Mercenary Park. | File:Mercenary Park H-34 03.png|Scenery of Mercenary Park. | ||
| + | File:Mercenary Park (map) overview.png|Exterior overview of mercenary park | ||
</gallery> | </gallery> | ||
| + | |||
; Locations | ; Locations | ||
<gallery> | <gallery> | ||
| Line 174: | Line 169: | ||
File:Mercenary Park Shack.png|Gift Shop. | File:Mercenary Park Shack.png|Gift Shop. | ||
File:Mercenary Park First Control Point.png| Overview of Control Point A. | File:Mercenary Park First Control Point.png| Overview of Control Point A. | ||
| − | File: | + | File:Mercenary_Park Second Control Point.png| Overview of Control Point B. |
File:Mercenary Park Control Point C.png|Overview of Control Point C. | File:Mercenary Park Control Point C.png|Overview of Control Point C. | ||
File:Mercenary Park BLU Spawn 1.jpg|BLU Team Starting Spawn located before Control Point A. | File:Mercenary Park BLU Spawn 1.jpg|BLU Team Starting Spawn located before Control Point A. | ||
| Line 186: | Line 181: | ||
; Features and Signs | ; Features and Signs | ||
<gallery> | <gallery> | ||
| − | + | File:Mercenary Park H-34 01.png|Park helicopter, H-34. | |
File:Yeti park fees.jpg|Park Pass fees sign in the first BLU Spawn. | File:Yeti park fees.jpg|Park Pass fees sign in the first BLU Spawn. | ||
File:Yeti park health warning.jpg|Health warning sign in the first BLU Spawn. | File:Yeti park health warning.jpg|Health warning sign in the first BLU Spawn. | ||
| Line 196: | Line 191: | ||
File:Mercenary Park Unused Room 2.png|The unused room inside the building. | File:Mercenary Park Unused Room 2.png|The unused room inside the building. | ||
File:Mercenary Park Unused Room 3.png|The unused room underneath Control Point B. | File:Mercenary Park Unused Room 3.png|The unused room underneath Control Point B. | ||
| + | File:Mercenary Park Unused Room 4.png|The wall containing the unused room before Control Point A. | ||
| + | File:Mercenary Park Unused Room 5.png|The unused room inside the wall. | ||
</gallery> | </gallery> | ||
== References == | == References == | ||
| − | <references /> | + | <references/> |
{{Jungle Inferno Update Nav}} | {{Jungle Inferno Update Nav}} | ||
{{Maps Nav}} | {{Maps Nav}} | ||
| + | |||
[[Category:Yeti]] | [[Category:Yeti]] | ||
Latest revision as of 01:04, 1 November 2024
| Mercenary Park | |
|---|---|

| |
| Basic Information | |
| Map type: | Attack/Defend |
| File name: | cp_mercenarypark
|
| Released: | October 20, 2017 Patch (Jungle Inferno Update) |
| Developer(s): | Valve |
| Map Info | |
| Environment: | Jungle |
| Setting: | Daylight, overcast |
| Hazards: | Crocodiles, Pitfalls |
| Deep Water: | Yes |
| Bot support: | Yes |
| Map Items | |
| Map Photos | |
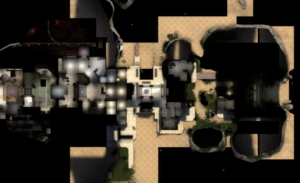
| Map Overview | |
| “ | Welcome... to Mercenary Park!
— Saxton Hale
|
” |
Mercenary Park is an Attack/Defend Control Point map released during the Jungle Inferno Update and featured in the Jungle Inferno video. It is a biological research facility and weapons factory that was repurposed as "Yeti Park", but was changed hastily to just a fighting park after Saxton Hale killed the last Yeti in existence.
Certain features of the map depict a bloody running battle with a large, escaped beast, the result of experimentation on large (and peaceful)[1] animals by the Yti-Hale corporation, enhancing them for strength, aggression,[2] and escape ("That was the whole bloody point!")[3].
Contents
Locations
Note: If you are having trouble with finding the locations listed here, see the Helpful overview section to see their exact position marked on the map.
Visitor Center
- Monorail station: First BLU spawn.
- Main Ticketing: interactive space, cafe, and a parrot.
- Playground: The play equipment in this open space is kept to a minimum to encourage youthful guests to fight over it.
- Gift Shop: cover near right roll out.
Mann Co. building
- Supply warehouse for the park.
- Helipad: First advanced BLU Spawn, which opens when the Receiving Bay is captured. Located right before control point A.
- Steroid room: Steroid storage is on the other end of the warehouse from the first advanced BLU spawn.
Transfer crane
- Capture point A -- Receiving Bay -- Beneath the Transfer gantry crane.
- Capture of this point closes access to the Playground and opens access to the Test Pit (C).
- Transfer gantry crane. Catwalks between the upper levels of the Mann Co. building and Processing. Operator station can view the point.
- Transport cages: Yti-Hale Shipping. Two-level flanking of the Capture point. The highest can be reached by jumping.
- Dock: crocodile-infested water.
Processing
- BLU Second Forward Spawn: Located right before control point B. Unlocked when control point B is captured.
- Capture point B -- Lab -- (hidden beneath the point are three inaccessible stories of fluid tanks).
- Monorail station: First RED spawn, which closes when the Receiving Bay is captured.
- BLU Third Forward Spawn: Located before the staircases leading to the YTI room. Unlocked when control point B is captured.
- Loading bay: There is a small elevated loading bay positioned right next to the point B
- Staircase: Leading from the Lab's second floor is a set of stairs that go directly to the Red's first spawn.
- Server Room: A compact room filled with servers located directly above the Loading Bay on the Lab's second floor. Leading out of the Server Room is a gate that leads out to a section of platforms positioned above the first point and attached to the wall next to it.
Research and Captivity
- YTI: Institute for Research and Development: Rally room for BLU pushes on final.
- Elevator shaft: (final choke) This elevator was used to transfer specimens between the ten cages, the Lab, and the Test Pit.
- The elevator cage is at the upper level (with the broken window); the grated floor is the lower level.
- Access to Research and Captivity is through the lower and upper-level elevator doors.
- These doors are blocked to both sides until the Receiving Bay (A) is captured.
- Platform: An elevated position just behind the C point, the usual location of the Red's defenses.
- Cave: A flank through ventilation and a cave to the rear corner of both levels of the Test Pit.
- Rear Vents: A subtle sneak path back to the corner under RED's Spawn gates.
- Side Stairs: A relatively hidden flank between the two levels.
- Capture point C -- Test Pit -- Capture wins the round for BLU.
- Monorail station: Final RED spawn, which opens when the Receiving Bay is captured.
Helpful overview
Yellow circle: Control point A and the Mann Co. building (Note that the Mann Co. building is split into two parts which are connected by a pair of catwalks)
Blue circle: General location of the control point B (Not visible)
Orange circle: Control point C and the pit
 Blue diagonal lines: Blu's spawn locations
 Red diagonal lines: Red's spawn room
 Black lines: Used for more clearer separation
1.Visitors center (First Blu spawn)
2.Gift shop
3.Playground
4.Helipad (Second Blu spawn)
5.Transport cages
6.Catwalks
7.Docks
8.General location of the first Red spawn room
9.Cave
10.Institute for Research and Development (YTI Room)
11.Elevator cage
12.Side stairs
13.Final Red spawnroom
Strategy
 | “Sun Tzu's got nothing on us!” This map's Community strategy page is a stub. As such, it is not complete. You can help the Team Fortress Wiki Community Strategy Project by expanding it. Notes: None added |
Control Point timing
| Control Point | Multiplier | Seconds | ||
|---|---|---|---|---|
| Control Point A | ×1 |
| ||
| ×2 |
| |||
| ×3 |
| |||
| ×4 |
| |||
| Control Point B | ×1 |
| ||
| ×2 |
| |||
| ×3 |
| |||
| ×4 |
| |||
| Control Point C | ×1 |
| ||
| ×2 |
| |||
| ×3 |
| |||
| ×4 |
|
Update history
- Added Mercenary Park to the game.
- Fixed enemy players being able to enter opposing spawn rooms.
- Fixed an area near cap B where Engineers could build in an inaccessible area.
- Fixed spawn room doors sometimes becoming blocked.
December 21, 2017 Patch #1 (Smissmas 2017)
- Added a forward spawn for BLU when attacking the final control point.
- Added a connecting stairwell to the mid-structure of the final control point.
- Fixed area portal rendering issues between the first and second control points.
- Fixed RED being able to shoot through the roof of BLU's starting spawn.
- Changes to control point C.
- BLU's spawn time has been slightly lowered.
- The upper-mid route window now has a small opening for attackers to use.
- Players can no longer build on the very top of the crate stack overlooking the control point.
- Increased cover next to the control point.
- Increased the size of the metal supply next to the cover stack.
- Added a vent route that exits behind the new cover.
- Bullets no longer go through the chain fence wall at the ramp connecting lower and upper.
Unused content
- There are three unused rooms in Mercenary Park:
- To the left of the first Control Point and behind the fence, there is a mostly empty, dimly lit room with two floors and a dropdown between the two.
- Directly underneath the second Control Point is a partially lit area that has walls lined with cages and cylindrical containers.
- On the lower right-most path leading to the first Control Point, there is a small empty room behind a wall with a single light illuminating it.
- Additionally, there are several unused models and textures in the game files:
- This includes a speedboat, older variants of the atrium and alligator models, blue and yellow corroded metal, a low-quality white yeti cell, a poster which reads "pick your fight!", different sign letters that together read "Yeti Island", and other miscellaneous content.
- One such unused model is a guard tower with a turret gun model mounted to it with improper texturing. The turret model is the model that the "turretguns" texture is for. This was meant to be TF2's spawnroom turret before the idea was cut.
- This includes a speedboat, older variants of the atrium and alligator models, blue and yellow corroded metal, a low-quality white yeti cell, a poster which reads "pick your fight!", different sign letters that together read "Yeti Island", and other miscellaneous content.
Bugs
- Just above the first point is a clip brush that does not extend to the ceiling, allowing for players who can reach the invisible perch to output damage while being almost entirely hidden from view.
- It is not possible to build on this perch.
- On the third point, it is possible for certain classes to jump on a certain part of the metal bars above.[4]
- When in Pyroland, certain doorways turn visually solid. The player is still able to walk and shoot through these doorways as normal.
- Engineers can build Sentry Guns and Dispensers in the first RED spawn.
Notes
- After BLU has captured point A, all the health and ammo pickups leading up to that point will be disabled. Meanwhile, a small ammo pack and a medium health kit will become available near the original RED spawn.
- After BLU has captured point B, the health and ammo pickups near their final spawn will be disabled, and a no-build zone for RED will be enabled on the stairs near the BLU spawn.
Trivia
- The name Mercenary Park references the 1993 film Jurassic Park.
- Similarly, both plots revolve around the parks containing dangerous experimental animals for the public, which eventually escape.
- The park's helicopter has several unique characteristics of the Sikorsky H-34 (albeit of much shortened length), which saw extensive naval and jungle service in the Vietnam war.
Gallery
- Locations
- Features and Signs
- Unused content
References
- ↑ A Fate Worse Than Chess, cover page.
- ↑ Barrels of anabolic steroids in the Mann Co. warehouse building and elsewhere around the map.
- ↑ Jungle Inferno (Video), 2:16.
- ↑ Video showing off metal bars spot.
| ||||||||||||||||||||||||||||||||||||||||||||||||||||

