Dustbowl
| Esta página está no processo de tradução (em inglês) para português do Brasil. Fluente em inglês e português? Ajude-nos a terminar a tradução deixando uma mensagem na página de discussão ou entrando em contato com quem já contribuiu para a tradução (disponível no histórico da página). |
| Dustbowl | |
|---|---|

| |
| Informações básicas | |
| Variantes: | Modo de Treinamento |
| Desenvolvedor(es): | Desconhecido |
| Informações do mapa | |
| Ambiente: | Deserto |
| Cenário: | Luz do dia, ensolarado |
| Imagens do mapa | |
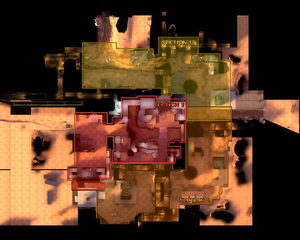
| Vista aérea | |
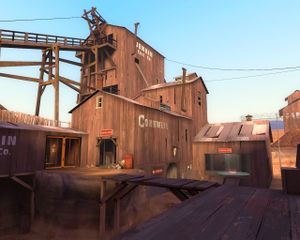
Dustbowl é um mapa de Ponto de Controle de Ataque/Defesa, e um remake subsequente do mapa homônimo de Team Fortress Classic. Ela e a Gravel Pit foram os primeiros mapas de Ponto de Controle com Ataque/Defesa para Team Fortress 2, além de também ter sido um dos seus mapas iniciais incluídos com o lançamento do jogo. Dustbowl é o único mapa no qual um modo de treinamento foi criado.
Em Dustbowl, a meta dos atacantes (BLU) é sair ganhando por uma série de estágios para poder vencer o mapa. Dentro de cada estágio, os atacantes devem capturar dois pontos de controle, A e B, que estão tomados pelos (RED). O Ponto A deve ser capturado antes de os atacantes poderem assaltar o ponto B. A contagem do tempo é aumentada para cada captura de ponto, e, uma vez que o ponto é capturado, ele é fechado e não pode ser retomado pelos defensores.
Como todos os mapas de Ataque/Defesa, os BLU são os atacantes enquanto os RED são os defensores. Egypt e Gorge compartilham de um design similar a Dustbowl.
Índice
Vídeo de Introdução
Objetivo
O BLU ataca e deve capturer ambos os pontos (A e B) em todos os três estágios para vencer a partida. O RED deve impedir o BLU de alcançar essa meta.
Localizações
Observe que todas são vistas da perspective do time BLU após sair do spawn
Estágio 1, Ponto A
Ponto de Controle A dentro de uma construção pequena à esquerda.
- spawn dos Atacantes: Três saídas – Esquerda, Meio e Direita. Defensores podem atirar para dentro do spawn.
- Desfiladeiro: A passagem longa e reta da porta do meio do spawn leva direto à porta de trás do Ponto de Controle A.
- Celeiro Principal: Ao lado da porta da esquerda, contém um Health um pacote de munição grandes. A passagem leva direto para a entrada frontal do edifício do Ponto de Controle. Tem uma entrada.
- Celeiro Lateral: Perto da porta da direita do spawn, contém munição e health médios. Tem duas entradas.
- Edifício do Ponto de Controle “A”: Contém uma Health e Munição grandes. Escadas levam a um túnel de mineração que tem um Health grande e levam ao Ponto de Controle B. Tem duas entradas, além de janelas altas e sacada.
- Saídas Túnel à esquerda, túnel à direita e túnel da mina (em cima).
Estágio 1, Ponto B
O Ponto de Controle B é novamente dentro de uma construção à esquerda.
- Caminho da caverna: 3 passagens por túneis levam à segunda área.
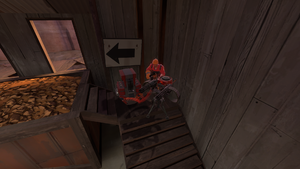
- O Segundo piso do Túnel de Mineração de cima leva a uma porta de um caminho só (ela abre para quem está dentro do túnel, mas não para quem está fora) e saída de pneus acima e à esquerda do Ponto de Controle B. Contém um kit de Health médio e um Pacote de Munição.
- Nível do Chão no túnel da esquerda, atrás do Ponto de Controle A.
- Túnel da direita levando a caverna grande (caverna da direita) com saídas superiors e inferiors. Contém um kit de Health médio e um pacote de Munição grande.
A ponte vai da saída superior da caverna do lado direito até o portão.
- Edifício do ponto B: Contém um pacote de Health e Munição pequenos.
- Teto do Sniper: Localizado sobre o spawn dos defensores. É dividido em duas partes conectadas pela ponte do Sniper, e tem um Health e munição pequenos de um lado.
- Spawn dos Defensores: O ponto de spawn dos (time RED). Localiza-se abaixo do teto do Sniper.
Estágio 2, Ponto A
O primeiro ponto está no topo de uma construção à esquerda (da perspectiva do BLU).
- Spawn do BLU: Esta é uma construção pequena que se debruça sobre a Cova.
- Cova: Duas entradas emergem do spawn, uma levando à esquerda e outra, à direita. Defensores estão livres para entrar depois que as portas do setup abrem.
- Celeiro Grande: Do lado direito estão dois pacotes de Health e Munição. A escadaria atrás leva ao teto da construção.
- Edifício do Ponto de Controle: O Ponto de controle fica no topo do Segundo nível do edifício. Esse segundo nível tem uma barraquinha que contém um Health e Munição grandes. O primeiro piso tem uma sala pequena e aberta que dá de cara para o spawn do BLU, com um pacote médio de Health e Munição. Tem duas entradas, e pode também ser acessada por uma janela e através de caixotes localizados na frente e à esquerda ou através de pneus, atrás e à esquerda.
- O Escritório: Fica atrás dessa área. Há duas salas: a da direita tem um pacote de Munição grande e outro de Health médio. A segunda sala tem uma janela que dá de cara para a cova.
- Poste de Sinalização: Um Health grande e uma Munição média se localizam à esquerda do Escritório.
- Saídas: Uma à esquerda e outra à direita, ambas levando ao ponto B.
Estágio 2, Ponto B
O segundo ponto de controle fica em uma plataforma próxima ao spawn do RED.
- O Túnel de Mineração: Um túnel longo e estreito que começa na parte traseira à direita do edifício do escritório.
- As saídas duplas: Estes dois túneis estão localizados paralelamente um ao outro; O túnel da esquerda leva a portas duplas, e o da direita leva às duas portas ou ao portão.
- O Portão: Bem à direita das saídas duplas está um portão de um caminho só, acessado por outro túnel. Há um pacote de Health grande no final, perto da grade.
- O Pátio: A area aberta logo na parte de fora das saídas duplas e da saída do túnel de mineração comprido. Situa-se próxima à construção do meio.
- A Construção do Meio: Uma construção grande no meio da área do pátio. No Segundo piso tem dois pacotes médios de Health e Munição. Um corredor no térreo atravessa a construção e sai do outro lado, diretamente à frente do ponto de controle final. Há também uma passagem por fora com algunas rochas grandes
- Ponto de Controle B: O ponto de controle está assentado sobre uma plataforma que fica próxima ao spawn dos defensores e é acessível por escadas de cada lado.
- Edifício do Spawn do RED: É o ponto de spawn pro time defensor, RED, e fica atrás do ponto de controle.
Estágio 3, Ponto A
O primeiro ponto de controle fica numa plataforma diretamente do outro lado da saída do BLU.
O RED tem um atalho de uma de suas salas de spawn para esse ponto. Esse atalho é fechado assim que o BLU capturar esse ponto.
- Três Saídas: Esquerda, Meio e Direita, todos os portões traseiros que abrem no início da rodada podem ser acessados pelos defensores e faze-los ir até o spawn do BLU.
- spawn do BLU: Ao sair, os jogadores podem virar imediatamente à direita e subir um longo corridor até o portão fechado da direita, ou usar as escadas da direita ou da esquerda. Ambas levam às saídas do portão duplo.
- A Doca de Carga: Uma pequena construção contendo um pacote de Munição grande e um de Health pequeno. A construção fica entre os portões e o ponto de controle e tem uma ampla janela da qual se vê os portões duplos.
- Ponto de controle A: Localizado na parte de trás da área em uma plataforma um pouco elevada.
- O Elevado: Um elevado no fim do atalho dos defensores pro ponto A. Quando o primeiro ponto de controle é tomado, a entrada do spawn do RED é trancada.
Estágio 3, Ponto B
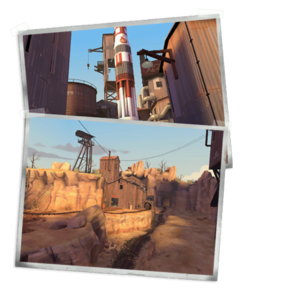
O ponto de controle final fica na base de uma plataforma de lançamento, sob um foguete, no centro da base do RED.
- Os Becos: São as passagens estreitas que vão do ponto de controle A ao ponto de controle B. Consistem em dois níveis, com a rota principal não tendo health ou munição, e as salas laterais no andar de cima tendo alguns pacotes de health e munição.
- Térreo: Entrada lateral que leva pra parte de baixo da base até o vale embaixo da área do ponto de controle B.
- A Casa da Sacada: Tem uma ponte por sobre o beco e pacotes pequenos de health e munição. Dá de cara para o ponto de controle B.
- A Casa do Sniper: Do lado oposto da Casa da Sacada. Tem um pacote de Health médio e um de Munição grande no segundo piso. No primeiro piso, há uma trincheira com janelas olhando a parte baixa do longo beco. Há duas portas, uma no beco, outra nos fundos. Elas podem ser acessadas pelo lado de fora por defensores por um pequeno aclive.
- Ponto de Controle B: Esse é o ponto de controle final para o mapa e está situado entre as duas saídas de spawn do RED, embaixo de um foguete grande.
- Spawn do RED: Tem saídas levando a cada um dos lados do ponto de controle B.
- Sala de Equipamentos: Em frente ao ponto de controle, uma sala comprida com um pacote de Munição na frente e um pacote de Health médio nos fundos. Acessível por escadas.
- O Vale: Localizado sob a ponte final, o Vale tem uma entrada, e um lance de escadas levando à ponte.
Estratégia
Equilíbrio do Time
Como em qualquer mapa, ÜberCharge e trabalho em equipe são cruciais para avançar até a vitória ou prevenir-se da derrota.
Vá para as páginas individuais de estratégia para maiores informações sobre como jogar com as classes.
Geral
- Atacantes
- Teleporters are very helpful for capturing the second point.
- Engineers are the most useful on attack for the second point of each stage.
- Spies may sneak through enemy lines while cloaked, and then capture the point before they are noticed.
- Defenders
- Defenders have much longer respawn times than compared to attackers.
- Guard the second point, and watch out for Spy capping.
- Teleporters are beneficial for defending the first point effectively.
Stage 1, Point A
- Attackers
- ÜberCharges from the left side can make it onto the Control point before they expire. Players may wish to travel immediately up the stairs to avoid Sentry Gun fire that may hinder them at the door. Because of the close quarters, a Pyro assault is very effective here, particularly if the airblast is used to clear the route.
- Sentry Guns in the capture building can be cleared using Soldiers and Demomen to fire into the windows from the outside. These classes can also jump up to those windows and enter them from behind.
- Players looking for unguarded exits can communicate with the team to enable an effective attack from both areas.
- The third exit, being the farthest from the control point, is often ignored. Classes with long distance weapons may fire into the control point with relative ease.
- Defenders
- The offense only has three exits available to them: controlling and watching all of these choke points is vital. The high vantage points on the sheds, ledges and spires give high ground advantage. Any breakthroughs make by the offense at the exits should be reported to other players.
- Sentry Guns are best positioned inside the control point room on the first set of steps and on the bridge just in the doorway, about half a unit (inch) down the stairs. \ This covers the point in the same way as the corner Sentry Gun, but without being so susceptible to Pyros.
Stage 1, Point B
- Attackers
- Point B should be rushed immediately upon capturing the first point. Defenders are often scattered or dead and Sentry Guns at Level 1. Scouts are ideal using their speed on this map.
- A forward base in the mining tunnel provides easy passage into the enemy base through the one way gate. A sentry is recommended to prevent Demomen and Soldiers from ambushing this point. Soldiers and other ranged classes can eliminate Sentry Guns behind the water tower from this angle behind the one way gate.
- Defenders
- A base set up in the mining tunnel after Point A is capture can often delay the attacking team for a few precious minutes.
- As with any Control Point map have someone guarding the point to prevent Spy caps and Scout rushes, Any defensive class will do.
- Control the entrances to prevent pushes being coordinated across all three fronts.
- Well place Sentry Guns are key to defending this point, and can be placed on the ramp in front of the point, next to the silo, or inside the building that houses the point. Do not however, depend on many Sentry Guns alone to defend the point, as a well coordinated ÜberCharge can quickly rush the point.
Stage 2, Point A
- Attackers
The dugout attracts a barrage of explosives and Sentry Gun fire. Defences will be most vulnerable at the start; faster respawn time allows for the pressure to be continually applied.
- Try to limit the time defenders have setup or settle.
- If defenders gain control of the dugout don’t forget the entryway on the left.
- Anti spam measures such as Bonk, ÜberCharges and airblasts can help clear a pathway.
- The building on the right is a great staging area due to its health, ammo and protection Use the passageway around the back to assault the defenders on the roof.
- Defenders
- Knock them back: explosive fire can constantly fill the dugout area, making it very difficult to move through.
- Engineer emplacements are effective in the control point building and on top of the hut above the dugout.
- The dugout is an ideal spot to break up incoming attacks using Spies and other close quarter specialists such as Pyros and Heavies.
Stage 2, Point B
- Notes
- This is classified as one of the hardest control points to take mainly due to its distance from the spawn, leading to uncoordinated solo rushes on the point coupled with the ease with which two or three Sentry Guns can lock down the area by the final Control point.
- Attackers
- Search everywhere for Engineer’s buildings, including underneath the control point and behind the office block at point A.
- Defend the area next to the office block. to prevent flanking or being pushed back to far.
- Teleporters should be placed near the office building. It's a long walk from the respawn to this point which can remove attackers respawn advantage.
- The rock spire and one way gate are the usual staging areas for coordinated assaults. It is always best to combine this push with attacks through middle and from the opposite side.
- Overcoming the defenses around the control point is key. The usual techniques of ÜberCharges, sapping and ranged assault apply. Attackers need to be aware of knockback, airblasts and explosive separation. Don’t forget to cap the point while the defenses are taken down.
- Defenders
- You must hold the rock spire and the area down to the first tunnel exit. If attackers establish themselves behind the rock spire, they can attack the control point and any equipment there with relative impunity.
- Sentry Guns can be used to control the area around the control point and explosives used to hold or control the ledge above.
- Spies and ÜberCharges are a major threat; therefore, airblasting and Spy checking Pyros, while infuriating for the attackers, are an ideal accompaniment to the inevitable Dispensers in this area.
- Try not to push the attacking team back to their spawn. Not only is this frowned upon, but it frequently results in an embarrassing Spy cap.
Stage 3, Point A
- Attackers
- Clear the left side. Defenders on the left can cover the entire capture zone from behind the pavilion. If a break is made on the left side, a capture is usually imminent. Defenders cannot cover the whole capture area from the right side making Spy caps possible once the left side is cleared.
- Launching explosive through the windows can help to eliminate the defenders, Sentry Guns can also be built through that window to surprise the defenders.
- Dispensers and Teleporters near the front lines will help the attacking team keep the pressure on
- Defenders
- Use the shortcut: One spawn point has a door that opens to a shortcut to the first point. Note that players going through this door as the attackers capture the point will result in death from the closing door.
- Build Teleporter exits in the shortcut area: If the attackers capture the point, the shortcut door will become locked. Should Engineers have set up Teleporters beforehand, however, players can still teleport into the area. The exit doorway is an excellent spot for a Sentry Gun.
Stage 3, Point B
- Attackers
- Clear RED's closed spawn door: RED Teleporter exits can remain in this area even after the first point is captured. It is best to clear this out to be safe from surprise attacks from behind. Always confirm this with the team in case manpower is needed elsewhere.
- It is a long walk from the respawn so Teleporters are necessary. A forward base can help hold the line after the passageways are cleared.
- Breaking through the final line here is very hard and games often stall at the final hurdle due to uncoordinated pushes by insufficient numbers of players. Use team talk or speak to co ordinate pushes.
- ÜberCharges are most essential for this point to break through torrents of spam.
- Defenders
- Defend the last point; do not push too far forward.
- Use the tunnel to ambush an attacking team setting up in the halfway area in the alley approaching. The team will (hopefully) be facing the opposite direction.
- The last cap is where Wrangler shines. A Sentry Gun with high health and unlimited range is an almost guaranteed win against uncoordinated teams.
- Placing a Sentry and a Teleporter on the steps of the Equipment Room can prove to be amazingly powerful. Just be aware of ÜberCharged Pyros.
- Use The Valley to sneak around the main battle and pick off enemies. Setting up a blockade here can be useful, as the area is most likely to have no defense in the heat of the battle.
- Demomen and Kritzkrieg work well for the narrow corridor between Point A and Point B.
Sentry Gun placements
- Dustbowl Sentry Gun spots:
- 2iu6-1c.png
Dustbowl first stage, first cap
- 2iu6-1d.png
Dustbowl first stage, second cap
- 2iu6-1e.png
Dustbowl second stage, first cap
- 2iu6-1f.png
Dustbowl second stage, second cap
- 2iu6-1g.png
Dustbowl, third stage
Related Achievements
 General
|
|
Update history
- Fixed players being able to use spectator points in Dustbowl that were not in play.
- Fixed issues on Dustbowl that could occur when a server emptied in the middle of a round.
- Now waits until either team wins fully before changing to another map on server timelimit expiring.
- Teams now score a point per captured control point, rather than per sub round.
- Prevented Demomen being able to launch grenades into the stage three alleys while standing at the final cap point.
- Fixed gaps in stage gates that allowed Snipers to kill defenders during setup.
- Fixed several model and brush perch exploits in stage three.
- Added stair access to the upper area in stage three after the first cap.
- Limited line-of-sight at the first control point in stage 3 to remove a griefable Sniper spot.
- Fixed model exploit in stage one allowing Sentry Gun/Teleporter to be placed behind chain link fence.
- Fixed the problem with mp_maxrounds not correctly counting the number of rounds for Dustbowl after the scoring change.
- Added a new access point to the stage 2 attacker gates (drop-down left from spawn), allowing attackers a way to reach the left route without being subjected to the spam and Sentry Gun fire.
- Fixed a gap in stage 3, cap 1 that allowed a player with to wiggle above the "ceiling" clip.
- Fixed a gap behind stage 1, cap 1 house.
- Fixed a high perch on stage 1, cap 1 house roof.
- Fixed a perch offering view of nodraw textures and the skybox (stage1 cap2 rock barrier).
- Fixed a few places where rockets/Demoman pipes could pass through non-solid models.
- Sealed up a gap over stage 1 lower startgate.
- Clipped off tall windows in stage 3 to prevent Sentry Guns from behind built behind them.
- Updated Dustbowl with several exploit fixes.
Bugs
- On the console versions, Snipers and other classes are able to shoot through the grating and pick off enemies (see Differences between platforms).
- Inside the double gates of BLU spawn at Stage 3 between the two gates, stickies exploded alongside the wall on the outside will kill those standing inside.
Trivia
- Dustbowl is one of the maps designed after existing Team Fortress Classic maps, the others being 2Fort, Well, and Badlands. The gameplay of the original version was similar to one-sided Capture the Flag, in which one player on the BLU team must take a flag to the RED team's control points, with only one control point per stage.
- Dustbowl was the map featured in the closing scene of Meet the Heavy, with the same scene featured in Meet the Sandvich. The area featured was the area just outside BLU's spawn on first stage.
- The Cornwell company logos scattered around the map are a likely reference to Dean Cornwell, an artist who greatly inspired the visual design of Team Fortress 2.[1]
- The last cap of Dustbowl is featured as a background map in the Xbox 360 version of TF2.
Control Point Timing
All control points have the same capture times.
| Pontos de Controle | Multiplicador | Segundos | ||
|---|---|---|---|---|
| Todos os pontos de controle | ×1 |
| ||
| ×2 |
| |||
| ×3 |
| |||
| ×4 |
|
See also
Notes and References
- ↑ Jason Mitchell, Moby Francke, Dhabih Eng, Illustrative Rendering in Team Fortress 2 (2007), retrieved 2010-10-23.


