| Gorge Event
|

|
| Información básica
|
| Variantes: |
5Gorge, Ataque/Defensa y Mannpower
|
| Desarrollado por: |
Desconocido
|
| Información del mapa
|
| Entorno: |
Halloween
|
| Escenario: |
Noche, nublado
|
| Vista general
|
|
|
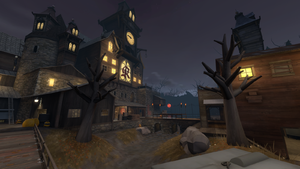
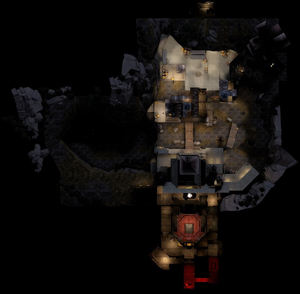
Gorge Event es un mapa de Ataque/Defensa de una sola etapa. El primer punto se encuentra en el puente sobre el barranco y el segundo, en el gran sala dentro de la mansión de Redmond Mann. Este mapa es una versión de Halloween de Gorge. Redmond ha escapado del Infierno y se ha reconectado a su Extensor de Vida — BLU debe capturar la mansión para enviarlo de vuelta.
Aunque similar al estilo de mapas de Ataque/Defensa como Dustbowl y Egypt, Gorge Event presenta una sola etapa larga, opuesto a tres etapas más pequeñas. El diseño del mapa permite más oportunidades para atacar para BLU y menos puntos de choque.
Como todos los mapas de Ataque/Defensa, BLU juega a los atacantes mientras que RED, a los defensores. El objetivo de los atacantes (BLU) es capturar los dos puntos de control en secuencia. El objetivo de los defensores (RED) es defender esos puntos de control hasta que se acabe el tiempo. El temporizador aumenta cuando BLU captura el primer punto; una vez que este punto es capturado, será bloqueado y no podrá ser retomado por los defensores.
Gorge Event fue contribuido a la Steam Workshop.
This Event map has some changes from the original, while most are minor or subtle, a few have significant effect on game play and are described in the Locations.
- Some rooms have modestly changed shapes.
- All chemical drums are removed and most are replaced with pumpkin props, somewhat increasing fire angles and decreasing cover.
- Traffic cones and other cosmetic industrial props are removed.
- Evergreen trees are replaced with dead hardwoods, reducing visual cover in the gorge.
- Water in the gorge, a new flank and battlement over the front of the RED Base, a Hell Pit, and a Witching Hour of Skeleton spawns are all added to the Event Map.
Witching Hour
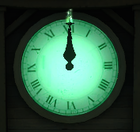
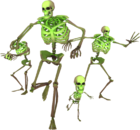
Capturing the first point triggers a Witching Hour. The Game Clock stops and the earth shakes. The clocks on the Tower and over the Great Hall turn green, the clockworks rumble and quickly step the hand from IX to XII and then chime 5 times. A total of 15 Normal Skeletons and the Skeleton King begin to spawn with the shaking. Around the first point, 9 Skeletons spawn in 3 waves of three Normal Skeletons. Around the second point, the Skeleton King spawns and 6 Normal Skeletons spawn in 2 waves of three. As about 50 seconds of time runs out, the Witching Hour ends: the clocks chime once and return to white faces and the Game Clock resumes. The Skeletons remain in-play until destroyed.
Locations
Directions are described from BLU's (attacking) perspective.
BLU Spawn
- Entrance Yard: The entrance yard is located outside of BLU's initial spawn area. It is entered by BLU from three different exits that are all respectively located at the far left, right, and center of the BLU spawn mountain wall. The entrance yard is mostly open without any cover except for the toll booth and a small wall on one side.
- Toll Booth: The toll booth is the small building to one side of the entrance yard. Inside is a large ammo pack, and the roof can be accessed by a ladder leaning on it. Engineers often like to camp here and place Sentry Guns, especially on the roof of the booth.
- Checkpoint Building: The checkpoint building is the large building separating the gorge area and the entrance yard. From the front, it has one main entrance walled off leaving entrance from two sides. The building interior is mostly empty except for a few barrels and water tanks lined up on the walls. There are two exits on the far walls each of which exit out to far sides of the gorge. The main exit is atop a twin staircase that exits out in front of Control Point A. The main room is a common location for Engineer nests, usually under or near the twin staircase. A secondary nest location is the nook behind the single large tank on the BLU side of the room and even on top of the tank itself.
- Upper Deck: A second floor route with two rooms and staircases at each end give defensive battlements to RED and a flank to the gorge to BLU.
Control Point A
- Bridge: Control Point A is located on a level bridge over the map's titular gorge. The gorge landmark itself is accessible from various entrances from all directions.
- Gorge: With water just deep enough to extinguish burning players, the gorge runs through the entire capture point area, from wall to wall and under the bridge. There is a large health kit underneath the bridge in the gorge. BLU's side of the gorge generally slopes to the water while the RED side has some defensive walls that block classes that cannot jump. The far right wall has more defensive cover.
- BLU Forward Spawn: Once BLU captures Control Point A, their spawn room moves to the top of the building overlooking the Gorge and the main building. Also when Control Point A is captured, Control Point B remains locked (so both points are locked) for a short time while the Skeleton King and his minions spawn in the Witching Hour.
RED Base
- Porch Roof: The porch roof at the front of the mansion and the roof next to it are playable surfaces, giving RED a wide, but exposed, elevated battlement. It gives BLU jumpers a shortcut to the second floor and BLU non-jumpers a long flank to that opening.
- Main Hallway: The main hallway is the long hallway connected to the main entrance nearest the bridge. It runs through the building from the entrance to the choke room. It is connected to the flank hallway and has a set of stairs at the end that leads up to platforms above the hallway and choke room.
- Flank Hallway: The flank hallway runs through the building nearer the entrance perpendicular to the main hallway. It connects near the entrance of the main hallway, and to the side entrance to the building. There is a staircase at its far end that leads to the second floor.
- Second Floor: The second floor runs all through the hallways and choke room. It is accessible from a set of stairs at the end of the main hallway and a set at the end of the flank hallway. It runs above the flank and main hallway. From the flank it leads to a drop down to the choke.
- Choke: The choke is the room before the final point, which is often heavily contested. The sheltered areas under the second-floor balconies in the four corners of the room are common locations for RED Engineer nests, particularly the two corners that were occupied by tanks on Gorge (the arrow and the piano). The small far corner room on the balcony is a common forward BLU Engineer nest location. Most of the fighting just before capture the final point will go on in this room; this room must be controlled before the final defense of the second point can be attacked. There are six entrances/exits: one from the main hallway, one above that from the second floor (closed until the first point is captured), two from the second floor flank, and two exits to the final point room. In the middle of the room is a pit to Hell, presumably how Redmond escaped Hell.
- Flank Room: This far flank between the choke and the final room is closed off until the first point is captured.
Control Point B
- Final Room: The final room is marked by a grand hall in the center where the point is located. Surrounding the grand hall are walkways on the walls that curve around the area.
- RED Spawn: RED spawn is located to the right of the final room.
- Spawn Flank: From RED Spawn, a flanking hallway runs all of the way around the control point, left and right, and has a number of locations from which to fire into on the control point and into the choke. The stone chimney provides additional cover for RED firing onto the point or into the choke. Redmond and his coffin can be seen in separate rooms off of this hallway.
- Control Point: The final capture point of the map is situated in the heart of the mansion. The point itself is set in a deep grand hall, putting BLU at a height disadvantage when attempting to capture. In one corner of the room is the RED spawn room, and in the other is a similar overlook to the point. Beneath the overhanging ledge within the hall is a popular place for RED Sentry Guns, as it can only be attacked from within the hall itself or from the far walkways.
Hallway that leads to point B
Strategy
Control Point timing
| Punto de Control 1
|
×1
|
|
| ×2
|
|
| ×3
|
|
| ×4
|
|
| ×5
|
|
| Punto de Control 2
|
×1
|
|
| ×2
|
|
| ×3
|
|
| ×4
|
|
| ×5
|
|
Update history
Parche del 28 de octubre de 2015 (Scream Fortress 2015)
- Added Gorge Event to the game.
Parche del 6 de noviembre de 2015
- Fixed two of the Gorge Event Merasmission's objectives not working properly.
Notes
- The bottomless pit in the room before point B reuses the long fall screams from Ghost Fort, which may result in the Soldier yelling at Meramus despite Meramus not being present in this map.
Trivia
- Outside the BLU Team's base there is a door that reads "RESTRICTED AREA authorized personnel only". Inside there is a hidden room containing a Jimi Jam poster, a table with a TV, a bookshelf, and Zepheniah Mann's ghost "sitting" on a couch.
- You can hear the Team Fortress 2 version of Michael Jackson's Thriller (used on one of Merasmus's spells on Ghost Fort) played very quietly by the TV.
See also
