Difference between revisions of "Jungle Inferno Update/fr"
BrazilianNut (talk | contribs) m (→Cosmétiques) |
BrazilianNut (talk | contribs) m |
||
| Line 1: | Line 1: | ||
| − | {{DISPLAYTITLE:Jungle Inferno Update}} | + | {{DISPLAYTITLE:{{update name|Jungle Inferno Update}}}} |
{{patch info|10|20|2017}} | {{patch info|10|20|2017}} | ||
[[File:Jungle Inferno Update.jpg|frameless|right|290px|link=http://www.teamfortress.com/jungleinferno/]] | [[File:Jungle Inferno Update.jpg|frameless|right|290px|link=http://www.teamfortress.com/jungleinferno/]] | ||
| Line 8: | Line 8: | ||
| − | La '''Jungle Inferno Update''' était une [[Patches/fr#Mises à jour majeures|mise à jour majeure]] pour ''[[Team Fortress 2/fr|Team Fortress 2]]'' qui a été dévoilée sur quatre jours, commençant le 17 octobre 2017, pour finalement sortir le 21 octobre 2017 après une journée de retard. Elle ajoute cinq nouvelles armes, cinq nouvelles cartes communautaires, une nouvelle carte de Valve, sept railleries, une nouvelle raillerie d'attaque, plus de quarante objets cosmétiques, un nouvel équilibre des armes et un équilibre pour la classe du Pyro. Elle a aussi introduit une refonte du système de contrat avec le [[ConTracker/fr|Contr'Assistant]] ainsi que des [[War Paint/fr|Peinture de guerre]]. | + | La '''{{update name|Jungle Inferno Update}}''' était une [[Patches/fr#Mises à jour majeures|mise à jour majeure]] pour ''[[Team Fortress 2/fr|Team Fortress 2]]'' qui a été dévoilée sur quatre jours, commençant le 17 octobre 2017, pour finalement sortir le 21 octobre 2017 après une journée de retard. Elle ajoute cinq nouvelles armes, cinq nouvelles cartes communautaires, une nouvelle carte de Valve, sept railleries, une nouvelle raillerie d'attaque, plus de quarante objets cosmétiques, un nouvel équilibre des armes et un équilibre pour la classe du Pyro. Elle a aussi introduit une refonte du système de contrat avec le [[ConTracker/fr|Contr'Assistant]] ainsi que des [[War Paint/fr|Peinture de guerre]]. |
== Vidéo == | == Vidéo == | ||
| Line 28: | Line 28: | ||
==== Cartes ==== | ==== Cartes ==== | ||
| + | {{main|List of maps/fr|l1={{common string|List of maps}}}} | ||
{{hatnote|Les cartes communautaires sont indiquées en italique.}} | {{hatnote|Les cartes communautaires sont indiquées en italique.}} | ||
{| class="wikitable" cellpadding=2 style="text-align:center;" | {| class="wikitable" cellpadding=2 style="text-align:center;" | ||
|- style="height: 20px;" | |- style="height: 20px;" | ||
| − | ! class="header" style="background-color:# | + | ! class="header" style="background-color:#748c41;color:white;" |{{common string|Name}} |
| − | ! class="header" style="background-color:# | + | ! class="header" style="background-color:#748c41;color:white;" |{{common string|Picture}} |
| − | ! class="header" style="background-color:# | + | ! class="header" style="background-color:#748c41;color:white;" |{{common string|Game mode}} |
| − | ! class="header" style="background-color:# | + | ! class="header" style="background-color:#748c41;color:white;" |{{common string|File name}} |
|- | |- | ||
| − | | style="background-color:#b5b85c;" |'''[[Banana Bay | + | | style="background-color:#b5b85c;" | '''''[[Banana Bay{{if lang}}|<span style="color:#000;">Banana Bay</span>]]''''' |
| − | | style="background-color:#f8d28c;" | + | | style="background-color:#f8d28c;" | [[File:Bananabay_main.jpg|160px|link=Banana Bay{{if lang}}]] |
| − | | style="background-color:#f8d28c; | + | | style="background-color:#f8d28c;" | '''[[Payload{{if lang}}|{{common string|Payload Race}}]]'''<br>[[File:RED Bombcart.png|30px|link=Payload Race{{if lang}}]][[File:BLU Bombcart.png|30px|link=Payload Race]] |
| − | | style="background-color:#f8e2a1;" | + | | style="background-color:#f8e2a1;" | {{code|plr_bananabay}} |
|- | |- | ||
| − | | style="background-color:#b5b85c;" |'''[[Brazil | + | | style="background-color:#b5b85c;" | '''''[[Brazil{{if lang}}|<span style="color:#000;">Brazil</span>]]''''' |
| − | | style="background-color:#f8d28c;" | + | | style="background-color:#f8d28c;" | [[File:Brazil_main.jpg|160px|link=Brazil{{if lang}}]] |
| − | | style="background-color:#f8d28c; | + | | style="background-color:#f8d28c;" | '''[[King of the Hill{{if lang}}|{{common string|King of the Hill}}]]'''<br>[[File:Controlpoint.png|50px|link=King of the Hill{{if lang}}]] |
| − | | style="background-color:#f8e2a1;" | + | | style="background-color:#f8e2a1;" | {{code|koth_brazil}} |
|- | |- | ||
| − | | style="background-color:#b5b85c;" |'''[[Enclosure | + | | style="background-color:#b5b85c;" | '''''[[Enclosure{{if lang}}|<span style="color:#000;">Enclosure</span>]]''''' |
| − | | style="background-color:#f8d28c;" | + | | style="background-color:#f8d28c;" | [[File:Enclosure_main.jpg|160px|link=Enclosure{{if lang}}]] |
| − | | style="background-color:#f8d28c; | + | | style="background-color:#f8d28c;" | '''[[Payload{{if lang}}|{{common string|Payload}}]]'''<br>[[File:BLU_Bombcart.png|50px|link=Payload{{if lang}}]] |
| − | | style="background-color:#f8e2a1;" | + | | style="background-color:#f8e2a1;" | {{code|pl_enclosure_final}} |
|- | |- | ||
| − | | style="background-color:#b5b85c;" |'''[[Lazarus | + | | style="background-color:#b5b85c;" | '''''[[Lazarus{{if lang}}|<span style="color:#000;">Lazarus</span>]]''''' |
| − | | style="background-color:#f8d28c;" | + | | style="background-color:#f8d28c;" | [[File:Lazarus_main.jpg|160px|link=Lazarus{{if lang}}]] |
| − | | style="background-color:#f8d28c; | + | | style="background-color:#f8d28c;" | '''[[King of the Hill{{if lang}}|{{common string|King of the Hill}}]]'''<br>[[File:Controlpoint.png|50px|link=King of the Hill{{if lang}}]] |
| − | | style="background-color:#f8e2a1;" | + | | style="background-color:#f8e2a1;" | {{code|koth_lazarus}} |
|- | |- | ||
| − | | style="background-color:#b5b85c;" |'''[[Mercenary Park | + | | style="background-color:#b5b85c;" | '''[[Mercenary Park{{if lang}}|<span style="color:#000;">Mercenary Park</span>]]''' |
| − | | style="background-color:#f8d28c;" | + | | style="background-color:#f8d28c;" | [[File:Yetipark 5.png|160px|link=Mercenary Park (map){{if lang}}]] |
| − | | style="background-color:#f8d28c; | + | | style="background-color:#f8d28c;" | '''[[Control Point (game mode){{if lang}}|{{common string|Attack/Defend}}]]'''<br>[[File:Controlpoint.png|50px|link=Control Point (game mode){{if lang}}]] |
| − | | style="background-color:#f8e2a1;" | + | | style="background-color:#f8e2a1;" | {{code|cp_mercenarypark}} |
|- | |- | ||
| − | | style="background-color:#b5b85c;" |'''[[Mossrock | + | | style="background-color:#b5b85c;" | '''''[[Mossrock{{if lang}}|<span style="color:#000;">Mossrock</span>]]''''' |
| − | | style="background-color:#f8d28c;" | + | | style="background-color:#f8d28c;" | [[File:Mossrock_main.jpg|160px|link=Mossrock{{if lang}}]] |
| − | | style="background-color:#f8d28c; | + | | style="background-color:#f8d28c;" | '''[[Control Point (game mode){{if lang}}|{{common string|Attack/Defend}}]]'''<br>[[File:Controlpoint.png|50px|link=Control Point (game mode){{if lang}}]] |
| − | | style="background-color:#f8e2a1;" | + | | style="background-color:#f8e2a1;" | {{code|cp_mossrock}} |
|} | |} | ||
==== Railleries ==== | ==== Railleries ==== | ||
| + | {{main|Taunts/fr|l1=Railleries }} | ||
{| class="wikitable collapsible" cellpadding=2 style="text-align:center;" | {| class="wikitable collapsible" cellpadding=2 style="text-align:center;" | ||
|- | |- | ||
| − | | style="background: #b5b85c | + | | width="90px" style="background:#b5b85c;" rowspan="1" | '''{{class link|Pyro|br=yes|color=black}}''' |
| − | | | + | | style="background:#f8d28c;" | {{Icon item|Headcase|75px}} |
| − | | style="background: #f8e2a1 "| '''{{item link|Headcase}}''' | + | | style="background:#f8e2a1;" | '''{{item link|Headcase}}''' |
|- | |- | ||
| − | | style="background: #b5b85c | + | | style="background:#b5b85c;" rowspan="2" | '''{{class link|Heavy|br=yes|color=black}}''' |
| − | | | + | | style="background:#f8d28c;" | {{Icon item|Russian Arms Race|75px}} |
| − | | style="background: #f8e2a1 "| '''{{item link|Russian Arms Race}}''' | + | | style="background:#f8e2a1;" | '''{{item link|Russian Arms Race}}''' |
|- | |- | ||
| − | | | + | | style="background:#f8d28c;" | {{Icon item|Soviet Strongarm|75px}} |
| − | | style="background: #f8e2a1 "| '''{{item link|Soviet Strongarm}}''' | + | | style="background:#f8e2a1;" | '''{{item link|Soviet Strongarm}}''' |
|- | |- | ||
| − | | style="background: #b5b85c | + | | style="background:#b5b85c;" rowspan="2" | '''{{class link|Engineer|br=yes|color=black}}''' |
| − | | | + | | style="background:#f8d28c;" | {{Icon item|Dueling Banjo|75px}} |
| − | | style="background: #f8e2a1 "| '''{{item link|Dueling Banjo}}''' | + | | style="background:#f8e2a1;" | '''{{item link|Dueling Banjo}}''' |
|- | |- | ||
| − | | | + | | style="background:#f8d28c;" | {{Icon item|Jumping Jack|75px}} |
| − | | style="background: #f8e2a1 "| '''{{item link|Jumping Jack}}''' | + | | style="background:#f8e2a1;" | '''{{item link|Jumping Jack}}''' |
|- | |- | ||
| − | | style="background: #b5b85c | + | | style="background:#b5b85c;" rowspan="2" | '''{{class link|All Classes|br=yes|color=black}}''' |
| − | | | + | | style="background:#f8d28c;" | {{Icon item|Yeti Punch|75px}} |
| − | | style="background: #f8e2a1 "| '''{{item link|Yeti Punch}}''' | + | | style="background:#f8e2a1;" | '''{{item link|Yeti Punch}}''' |
|- | |- | ||
| − | | | + | | style="background:#f8d28c;" | {{Icon item|Yeti Smash|75px}} |
| − | | style="background: #f8e2a1 "| '''{{item link|Yeti Smash}}''' | + | | style="background:#f8e2a1;" | '''{{item link|Yeti Smash}}''' |
|} | |} | ||
| Line 105: | Line 107: | ||
{{main|Cosmetic items{{if lang}}|l1={{common string|Cosmetic items}}}} | {{main|Cosmetic items{{if lang}}|l1={{common string|Cosmetic items}}}} | ||
{| class="wikitable collapsible" cellpadding=2 style="text-align:center;" | {| class="wikitable collapsible" cellpadding=2 style="text-align:center;" | ||
| + | | width="90px" style="background:#b5b85c;" rowspan="3" | '''{{class link|Scout|br=yes|color=black}}''' | ||
| + | | style="background:#4B69FF;" | {{Icon item|Forest Footwear|75px}} | ||
| + | | style="background:#f8e2a1;" | '''{{item link|Forest Footwear}}''' | ||
|- | |- | ||
| − | | style="background: # | + | | style="background:#D32CE6;" | {{Icon item|Jungle Jersey|75px}} |
| − | + | | style="background:#f8e2a1;" | '''{{item link|Jungle Jersey}}''' | |
| − | | style="background: #f8e2a1 "| '''{{item link| | ||
|- | |- | ||
| − | | | + | | style="background:#8847FF;" | {{Icon item|Transparent Trousers|75px}} |
| − | | style="background: #f8e2a1 "| '''{{item link| | + | | style="background:#f8e2a1;" | '''{{item link|Transparent Trousers}}''' |
|- | |- | ||
| − | | | + | | style="background:#b5b85c;" rowspan="4" | '''{{class link|Soldier|br=yes|color=black}}''' |
| − | | style="background: #f8e2a1 "| '''{{item link| | + | | style="background:#4B69FF;" | {{Icon item|Attack Packs|75px}} |
| + | | style="background:#f8e2a1;" | '''{{item link|Attack Packs}}''' | ||
|- | |- | ||
| − | | style="background: # | + | | style="background:#8847FF;" | {{Icon item|Crit Cloak|75px}} |
| − | + | | style="background:#f8e2a1;" | '''{{item link|Crit Cloak}}''' | |
| − | | style="background: #f8e2a1 "| '''{{item link| | ||
|- | |- | ||
| − | | | + | | style="background:#4B69FF;" | {{Icon item|Sharp Chest Pain|75px}} |
| − | | style="background: #f8e2a1 "| '''{{item link| | + | | style="background:#f8e2a1;" | '''{{item link|Sharp Chest Pain}}''' |
|- | |- | ||
| − | | | + | | style="background:#4B69FF;" | {{Icon item|Shellmet|75px}} |
| − | | style="background: #f8e2a1 "| '''{{item link| | + | | style="background:#f8e2a1;" | '''{{item link|Shellmet}}''' |
|- | |- | ||
| − | | | + | | style="background:#b5b85c;" rowspan="6" | '''{{class link|Pyro|br=yes|color=black}}''' |
| − | | style="background: #f8e2a1 "| '''{{item link| | + | | style="background:#4B69FF;" | {{Icon item|Deity's Dress|75px}} |
| + | | style="background:#f8e2a1;" | '''{{item link|Deity's Dress}}''' | ||
|- | |- | ||
| − | | style="background: # | + | | style="background:#8847FF;" | {{Icon item|D-eye-monds|75px}} |
| − | + | | style="background:#f8e2a1;" | '''{{item link|D-eye-monds}}''' | |
| − | | style="background: #f8e2a1 "| '''{{item link| | ||
|- | |- | ||
| − | | | + | | style="background:#8847FF;" | {{Icon item|Feathered Fiend|75px}} |
| − | | style="background: #f8e2a1 "| '''{{item link| | + | | style="background:#f8e2a1;" | '''{{item link|Feathered Fiend}}''' |
|- | |- | ||
| − | | | + | | style="background:#4B69FF;" | {{Icon item|Fireman's Essentials|75px}} |
| − | | style="background: #f8e2a1 "| '''{{item link| | + | | style="background:#f8e2a1;" | '''{{item link|Fireman's Essentials}}''' |
|- | |- | ||
| − | | | + | | style="background:#8847FF;" | {{Icon item|Hot Huaraches|75px}} |
| − | | style="background: #f8e2a1 "| '''{{item link| | + | | style="background:#f8e2a1;" | '''{{item link|Hot Huaraches}}''' |
|- | |- | ||
| − | | | + | | style="background:#D32CE6;" | {{Icon item|Sacrificial Stone|75px}} |
| − | | style="background: #f8e2a1 "| '''{{item link| | + | | style="background:#f8e2a1;" | '''{{item link|Sacrificial Stone}}''' |
|- | |- | ||
| − | | | + | | style="background:#b5b85c;" rowspan="8" | '''{{class link|Heavy|br=yes|color=black}} |
| − | | style="background: #f8e2a1 "| '''{{item link| | + | | style="background:#FFD700;" | {{Icon item|Abominable Snow Pants|75px}} |
| + | | style="background:#f8e2a1;" | '''{{item link|Abominable Snow Pants}}''' | ||
|- | |- | ||
| − | | style="background: # | + | | style="background:#D32CE6;" | {{Icon item|Aztec Aggressor|75px}} |
| − | + | | style="background:#f8e2a1;" | '''{{item link|Aztec Aggressor}}''' | |
| − | | style="background: #f8e2a1 "| '''{{item link| | ||
|- | |- | ||
| − | | | + | | style="background:#4B69FF;" | {{Icon item|Commando Elite|75px}} |
| − | | style="background: #f8e2a1 "| '''{{item link| | + | | style="background:#f8e2a1;" | '''{{item link|Commando Elite}}''' |
|- | |- | ||
| − | | | + | | style="background:#4B69FF;" | {{Icon item|Fat Man's Field Cap|75px}} |
| − | | style="background: #f8e2a1 "| '''{{item link| | + | | style="background:#f8e2a1;" | '''{{item link|Fat Man's Field Cap}}''' |
|- | |- | ||
| − | | | + | | style="background:#4B69FF;" | {{Icon item|Heavy Harness|75px}} |
| − | | style="background: #f8e2a1 "| '''{{item link| | + | | style="background:#f8e2a1;" | '''{{item link|Heavy Harness}}''' |
|- | |- | ||
| − | | | + | | style="background:#FFD700;" | {{Icon item|Himalayan Hair Shirt|75px}} |
| − | | style="background: #f8e2a1 "| '''{{item link| | + | | style="background:#f8e2a1;" | '''{{item link|Himalayan Hair Shirt}}''' |
|- | |- | ||
| − | | | + | | style="background:#FFD700;" | {{Icon item|Kathman-Hairdo|75px}} |
| − | | style="background: #f8e2a1 "| '''{{item link| | + | | style="background:#f8e2a1;" | '''{{item link|Kathman-Hairdo}}''' |
|- | |- | ||
| − | | | + | | style="background:#4B69FF;" | {{Icon item|Siberian Tigerstripe|75px}} |
| − | | style="background: #f8e2a1 "| '''{{item link| | + | | style="background:#f8e2a1;" | '''{{item link|Siberian Tigerstripe}}''' |
|- | |- | ||
| − | | | + | | style="background:#b5b85c;" rowspan="2" | '''{{class link|Engineer|br=yes|color=black}}''' |
| − | | style="background: #f8e2a1 "| '''{{item link| | + | | style="background:#4B69FF;" | {{Icon item|Conaghers' Utility Idol|75px}} |
| + | | style="background:#f8e2a1;" | '''{{item link|Conaghers' Utility Idol}}''' | ||
|- | |- | ||
| − | | style="background: # | + | | style="background:#D32CE6;" | {{Icon item|Tropical Toad|75px}} |
| − | + | | style="background:#f8e2a1;" | '''{{item link|Tropical Toad}}''' | |
| − | | style="background: #f8e2a1 "| '''{{item link| | ||
|- | |- | ||
| − | | | + | | style="background:#b5b85c;" rowspan="2" | '''{{class link|Medic|br=yes|color=black}}''' |
| − | | style="background: #f8e2a1 "| '''{{item link| | + | | style="background:#4B69FF;" | {{Icon item|Battle Boonie|75px}} |
| + | | style="background:#f8e2a1;" | '''{{item link|Battle Boonie}}''' | ||
|- | |- | ||
| − | | style="background: # | + | | style="background:#4B69FF;" | {{Icon item|Vitals Vest|75px}} |
| − | + | | style="background:#f8e2a1;" | '''{{item link|Vitals Vest}}''' | |
| − | | style="background: #f8e2a1 "| '''{{item link| | ||
|- | |- | ||
| − | | | + | | style="background:#b5b85c;" rowspan="6" | '''{{class link|Sniper|br=yes|color=black}}''' |
| − | | style="background: #f8e2a1 "| '''{{item link| | + | | style="background:#4B69FF;" | {{Icon item|Bait and Bite|75px}} |
| + | | style="background:#f8e2a1;" | '''{{item link|Bait and Bite}}''' | ||
|- | |- | ||
| − | | style="background: # | + | | style="background:#4B69FF;" | {{Icon item|Cammy Jammies|75px}} |
| − | + | | style="background:#f8e2a1;" | '''{{item link|Cammy Jammies}}''' | |
| − | | style="background: #f8e2a1 "| '''{{item link| | ||
|- | |- | ||
| − | | | + | | style="background:#4B69FF;" | {{Icon item|Classy Capper|75px}} |
| − | | style="background: #f8e2a1 "| '''{{item link| | + | | style="background:#f8e2a1;" | '''{{item link|Classy Capper}}''' |
|- | |- | ||
| − | | | + | | style="background:#8847FF;" | {{Icon item|Conspicuous Camouflage|75px}} |
| − | | style="background: #f8e2a1 "| '''{{item link| | + | | style="background:#f8e2a1;" | '''{{item link|Conspicuous Camouflage}}''' |
|- | |- | ||
| − | | | + | | style="background:#4B69FF;" | {{Icon item|Most Dangerous Mane|75px}} |
| − | | style="background: #f8e2a1 "| '''{{item link| | + | | style="background:#f8e2a1;" | '''{{item link|Most Dangerous Mane}}''' |
|- | |- | ||
| − | | | + | | style="background:#8847FF;" | {{Icon item|Rifleman's Regalia|75px}} |
| − | | style="background: #f8e2a1 "| '''{{item link| | + | | style="background:#f8e2a1;" | '''{{item link|Rifleman's Regalia}}''' |
|- | |- | ||
| − | | align=" | + | | align="left" style="background:#b5b85c;" | '''{{Class link|Scout|color=black}}'''<br/>'''{{Class link|Engineer|color=black}}'''<br/>'''{{Class link|Spy|color=black}}''' |
| − | | style="background: #f8e2a1 "| '''{{item link| | + | | style="background:#4B69FF;" | {{Icon item|Aloha Apparel|75px}} |
| + | | style="background:#f8e2a1;" | '''{{item link|Aloha Apparel}}''' | ||
|- | |- | ||
| − | | style="background: #b5b85c | + | | align="left" style="background:#b5b85c;"| '''{{Class link|Soldier|color=black}}'''<br/>'''{{Class link|Pyro|color=black}}'''<br/>'''{{Class link|Demoman|color=black}}''' |
| − | | | + | | style="background:#D32CE6;" | {{Icon item|Bananades|75px}} |
| − | | style="background: #f8e2a1; " | '''{{item link| | + | | style="background:#f8e2a1;" | '''{{item link|Bananades}}''' |
|- | |- | ||
| − | | style="background: #b5b85c | + | | align="left" style="background:#b5b85c;" | '''{{Class link|Soldier|color=black}}'''<br/>'''{{Class link|Demoman|color=black}}'''<br/>'''{{Class link|Heavy|color=black}}''' |
| − | | | + | | style="background:#EB4B4B;" | {{Icon item|War Eagle|75px}} |
| − | | style="background: #f8e2a1; " | '''{{item link| | + | | style="background:#f8e2a1;" | '''{{item link|War Eagle}}''' |
|- | |- | ||
| − | | style="background: #b5b85c | + | | align="left" style="background:#b5b85c;" | '''{{Class link|Soldier|color=black}}'''<br/>'''{{Class link|Heavy|color=black}}''' |
| − | | | + | | style="background:#4B69FF;" | {{Icon item|Nuke|75px}} |
| − | | style="background: #f8e2a1; " | '''{{item link| | + | | style="background:#f8e2a1;" | '''{{item link|Nuke}}''' |
|- | |- | ||
| − | | style="background: #b5b85c; | + | | style="background:#b5b85c;" rowspan="14" | '''{{class link|All Classes|br=yes|color=black}}''' |
| − | | | + | | style="background:#EB4B4B;" | {{Icon item|Aztec Warrior|75px}} |
| − | | style="background: #f8e2a1; " | '''{{item link| | + | | style="background:#f8e2a1;" | '''{{item link|Aztec Warrior}}''' |
|- | |- | ||
| − | | style="background: # | + | | style="background:#8847FF;" | {{Icon item|Croaking Hazard|75px}} |
| − | + | | style="background:#f8e2a1;" | '''{{item link|Croaking Hazard}}''' | |
| − | | style="background: #f8e2a1 "| '''{{item link| | ||
|- | |- | ||
| − | | | + | | style="background:#8847FF;" | {{Icon item|Hunter in Darkness|75px}} |
| − | | style="background: #f8e2a1 "| '''{{item link| | + | | style="background:#f8e2a1;" | '''{{item link|Hunter in Darkness}}''' |
|- | |- | ||
| − | | | + | | style="background:#D32CE6;" | {{Icon item|Jungle Wreath|75px}} |
| − | | style="background: #f8e2a1 "| '''{{item link| | + | | style="background:#f8e2a1;" | '''{{item link|Jungle Wreath}}''' |
|- | |- | ||
| − | | | + | | style="background:#FFD700;" | {{Icon item|Mannanas Hat|75px}} |
| − | | style="background: #f8e2a1 "| '''{{item link| | + | | style="background:#f8e2a1;" | '''{{item link|Mannanas Hat}}''' |
|- | |- | ||
| − | | | + | | style="background:#FFD700;" | {{Icon item|Mercenary Park|75px}} |
| − | | style="background: #f8e2a1 "| '''{{item link| | + | | style="background:#f8e2a1;" | '''{{item link|Mercenary Park (hat)}}''' |
|- | |- | ||
| − | | | + | | style="background:#FFD700;" | {{Icon item|Monstrous Memento|75px}} |
| − | | style="background: #f8e2a1 "| '''{{item link| | + | | style="background:#f8e2a1;" | '''{{item link|Monstrous Memento}}''' |
|- | |- | ||
| − | | | + | | style="background:#FFD700;" | {{Icon item|Never Forget Hat|75px}} |
| − | | style="background: #f8e2a1 "| '''{{item link| | + | | style="background:#f8e2a1;" | '''{{item link|Never Forget Hat}}''' |
|- | |- | ||
| − | | | + | | style="background:#4B69FF;" | {{Icon item|Pithy Professional|75px}} |
| − | | style="background: #f8e2a1 "| '''{{item link| | + | | style="background:#f8e2a1;" | '''{{item link|Pithy Professional}}''' |
|- | |- | ||
| − | | | + | | style="background:#8847FF;" | {{Icon item|Pocket Saxton|75px}} |
| − | | style="background: #f8e2a1 "| '''{{item link| | + | | style="background:#f8e2a1;" | '''{{item link|Pocket Saxton}}''' |
|- | |- | ||
| − | | | + | | style="background:#EB4B4B;" | {{Icon item|Quizzical Quetzal|75px}} |
| − | | style="background: #f8e2a1 "| '''{{item link| | + | | style="background:#f8e2a1;" | '''{{item link|Quizzical Quetzal}}''' |
|- | |- | ||
| − | | | + | | style="background:#FFD700;" | {{Icon item|Saxton|75px}} |
| − | | style="background: #f8e2a1 "| '''{{item link| | + | | style="background:#f8e2a1;" | '''{{item link|Saxton}}''' |
|- | |- | ||
| − | | | + | | style="background:#EB4B4B;" | {{Icon item|Slithering Scarf|75px}} |
| − | | style="background: #f8e2a1 "| '''{{item link| | + | | style="background:#f8e2a1;" | '''{{item link|Slithering Scarf}}''' |
|- | |- | ||
| − | | | + | | style="background:#FFD700;" | {{Icon item|Yeti Park Hardhat|75px}} |
| − | + | | style="background:#f8e2a1;" | '''{{item link|Yeti Park Hardhat}}''' | |
| − | |||
| − | |||
| − | | style="background: #f8e2a1 "| '''{{item link|Yeti Park Hardhat}}''' | ||
|} | |} | ||
==== Ensemble d'objets ==== | ==== Ensemble d'objets ==== | ||
| + | {{main|Item sets/fr|l1=Ensembles d'objets}} | ||
{| class="wikitable collapsible" cellpadding="2" style="text-align:center;" | {| class="wikitable collapsible" cellpadding="2" style="text-align:center;" | ||
| − | | style="background: #b5b85c | + | | width="90px" style="background:#b5b85c;" rowspan="3" | '''{{class link|Heavy|br=yes|color=black}}''' |
| − | | style="background: #f8e2a1;" rowspan="3" | ''' | + | | style="background:#f8e2a1;" rowspan="3" | '''{{item link|Monster Mash-Up Pack}}'''<br/> |
| − | | | + | | style="background:#f8d28c;" | {{icon item|Kathman-Hairdo|80px}} |
| − | | style="background: #f8e2a1;" | '''{{item link|Kathman-Hairdo | + | | style="background:#f8e2a1;" | '''{{item link|Kathman-Hairdo}}''' |
| − | |||
| − | |||
| − | |||
|- | |- | ||
| − | | | + | | style="background:#f8d28c;" | {{item icon|Himalayan Hair Shirt|80px}} |
| − | | style="background: #f8e2a1;" | '''{{item link| | + | | style="background:#f8e2a1;" | '''{{item link|Himalayan Hair Shirt}}''' |
|- | |- | ||
| + | | style="background:#f8d28c;" | {{item icon|Abominable Snow Pants|80px}} | ||
| + | | style="background:#f8e2a1;" | '''{{item link|Abominable Snow Pants}}''' | ||
|} | |} | ||
| Line 284: | Line 285: | ||
{{main|Tools/fr|l1=Outils}} | {{main|Tools/fr|l1=Outils}} | ||
{| class="wikitable collapsible" cellpadding="3" style="text-align:center;" | {| class="wikitable collapsible" cellpadding="3" style="text-align:center;" | ||
| − | | | + | | width="90px" style="background:#f8d28c;" | {{Icon item|Abominable Cosmetic Case|75px}} |
| − | | style="background: #f8e2a1 "| '''{{item link|Abominable Cosmetic Case}}''' | + | | style="background:#f8e2a1;" | '''{{item link|Abominable Cosmetic Case}}''' |
|- | |- | ||
| − | | | + | | style="background:#f8d28c;" | {{Icon item|Abominable Cosmetic Key|75px}} |
| − | | style="background: #f8e2a1 "| '''{{item link|Unleash the Beast Cosmetic Case}}''' | + | | style="background:#f8e2a1;" | '''{{item link|Abominable Cosmetic Key}}''' |
| + | |- | ||
| + | | style="background:#f8d28c;" | {{Icon item|Unleash the Beast Cosmetic Case|75px}} | ||
| + | | style="background:#f8e2a1;" | '''{{item link|Unleash the Beast Cosmetic Case}}''' | ||
| + | |- | ||
| + | | style="background:#f8d28c;" | {{Icon item|Unleash the Beast Cosmetic Key|75px}} | ||
| + | | style="background:#f8e2a1;" | '''{{item link|Unleash the Beast Cosmetic Key}}''' | ||
|- | |- | ||
| − | | | + | | style="background:#f8d28c;" | {{Icon item|Jungle Inferno Campaign Pass|75px}} |
| − | | style="background: #f8e2a1 "| '''{{item link|Jungle Inferno Campaign Pass}}''' | + | | style="background:#f8e2a1;" | '''{{item link|Jungle Inferno Campaign Pass}}''' |
|- | |- | ||
| − | | | + | | style="background:#f8d28c;" | {{Icon item|Infernal Reward War Paint Case|75px}} |
| − | | style="background: #f8e2a1 "| '''{{item link| | + | | style="background:#f8e2a1;" | '''{{item link|Infernal Reward War Paint Case}}''' |
|- | |- | ||
| − | | | + | | style="background:#f8d28c;" | {{Icon item|Infernal Reward War Paint Key|75px}} |
| − | | style="background: #f8e2a1 "| '''{{item link|Infernal Reward War Paint | + | | style="background:#f8e2a1;" | '''{{item link|Infernal Reward War Paint Key}}''' |
|- | |- | ||
| − | | | + | | style="background:#f8d28c;" | {{Icon item|Jungle Jackpot War Paint Case|75px}} |
| − | | style="background: #f8e2a1 "| '''{{item link|Jungle Jackpot War Paint | + | | style="background:#f8e2a1;" | '''{{item link|Jungle Jackpot War Paint Case}}''' |
| + | |- | ||
| + | | style="background:#f8d28c;" | {{Icon item|Jungle Jackpot War Paint Key|75px}} | ||
| + | | style="background:#f8e2a1;" | '''{{item link|Jungle Jackpot War Paint Key}}''' | ||
| + | |} | ||
| + | |||
| + | ==== Objets d'action ==== | ||
| + | {{main|Action items/fr|l1=Objets d'action}} | ||
| + | {| class="wikitable collapsible" cellpadding="3" style="text-align:center;" | ||
| + | | width="90px" style="background:#f8d28c;" | {{Icon item|Jungle Inferno ConTracker|75px}} | ||
| + | | style="background:#f8e2a1;" | '''{{item link|Jungle Inferno ConTracker}}''' | ||
|} | |} | ||
| + | |||
| + | ==== Peintures de guerre ==== | ||
| + | {{main|War Paint/fr|l1=Peinture de guerre}} | ||
| + | ===== {{decorated name|Jungle Jackpot Collection}} ===== | ||
| + | <gallery> | ||
| + | File:Backpack War Paint Park Pigmented.png|<div style="display:inline-block; padding:0px 3px; font-weight:bold; border-radius:4px; color:#EB4B4B;background:#24201B;">{{Decorated name|park pigmented}}</div> | ||
| + | File:Backpack War Paint Sax Waxed.png|<div style="display:inline-block; padding:0px 3px; font-weight:bold; border-radius:4px; color:#D32CE6;background:#24201B;">{{Decorated name|sax waxed}}</div> | ||
| + | File:Backpack War Paint Yeti Coated.png|<div style="display:inline-block; padding:0px 3px; font-weight:bold; border-radius:4px; color:#D32CE6;background:#24201B;">{{Decorated name|yeti coated}}</div> | ||
| + | File:Backpack War Paint Croc Dusted.png|<div style="display:inline-block; padding:0px 3px; font-weight:bold; border-radius:4px; color:#8847FF;background:#24201B;">{{Decorated name|croc dusted}}</div> | ||
| + | File:Backpack War Paint Macaw Masked.png|<div style="display:inline-block; padding:0px 3px; font-weight:bold; border-radius:4px; color:#8847FF;background:#24201B;">{{Decorated name|macaw masked}}</div> | ||
| + | File:Backpack War Paint Piña Polished.png|<div style="display:inline-block; padding:0px 3px; font-weight:bold; border-radius:4px; color:#8847FF;background:#24201B;">{{Decorated name|piña polished}}</div> | ||
| + | File:Backpack War Paint Anodized Aloha.png|<div style="display:inline-block; padding:0px 3px; font-weight:bold; border-radius:4px; color:#4B69FF;background:#24201B;">{{Decorated name|anodized aloha}}</div> | ||
| + | File:Backpack War Paint Bamboo Brushed.png|<div style="display:inline-block; padding:0px 3px; font-weight:bold; border-radius:4px; color:#4B69FF;background:#24201B;">{{Decorated name|bamboo brushed}}</div> | ||
| + | File:Backpack War Paint Leopard Printed.png|<div style="display:inline-block; padding:0px 3px; font-weight:bold; border-radius:4px; color:#4B69FF;background:#24201B;">{{Decorated name|leopard printed}}</div> | ||
| + | File:Backpack War Paint Mannana Peeled.png|<div style="display:inline-block; padding:0px 3px; font-weight:bold; border-radius:4px; color:#4B69FF;background:#24201B;">{{Decorated name|mannana peeled}}</div> | ||
| + | File:Backpack War Paint Tiger Buffed.png|<div style="display:inline-block; padding:0px 3px; font-weight:bold; border-radius:4px; color:#4B69FF;background:#24201B;">{{Decorated name|tiger buffed}}</div> | ||
| + | </gallery> | ||
| + | |||
| + | ===== {{decorated name|Infernal Reward Collection}} ===== | ||
| + | <gallery> | ||
| + | File:Backpack War Paint Fire Glazed.png|<div style="display:inline-block; padding:0px 3px; font-weight:bold; border-radius:4px; color:#EB4B4B;background:#24201B;">{{Decorated name|fire glazed}}</div> | ||
| + | File:Backpack War Paint Bonk Varnished.png|<div style="display:inline-block; padding:0px 3px; font-weight:bold; border-radius:4px; color:#D32CE6;background:#24201B;">{{Decorated name|bonk varnished}}</div> | ||
| + | File:Backpack War Paint Dream Piped.png|<div style="display:inline-block; padding:0px 3px; font-weight:bold; border-radius:4px; color:#D32CE6;background:#24201B;">{{Decorated name|dream piped}}</div> | ||
| + | File:Backpack War Paint Freedom Wrapped.png|<div style="display:inline-block; padding:0px 3px; font-weight:bold; border-radius:4px; color:#D32CE6;background:#24201B;">{{Decorated name|freedom wrapped}}</div> | ||
| + | File:Backpack War Paint Bank Rolled.png|<div style="display:inline-block; padding:0px 3px; font-weight:bold; border-radius:4px; color:#8847FF;background:#24201B;">{{Decorated name|bank rolled}}</div> | ||
| + | File:Backpack War Paint Clover Camo'd.png|<div style="display:inline-block; padding:0px 3px; font-weight:bold; border-radius:4px; color:#8847FF;background:#24201B;">{{Decorated name|clover camo'd}}</div> | ||
| + | File:Backpack War Paint Kill Covered.png|<div style="display:inline-block; padding:0px 3px; font-weight:bold; border-radius:4px; color:#8847FF;background:#24201B;">{{Decorated name|kill covered}}</div> | ||
| + | File:Backpack War Paint Pizza Polished.png|<div style="display:inline-block; padding:0px 3px; font-weight:bold; border-radius:4px; color:#8847FF;background:#24201B;">{{Decorated name|pizza polished}}</div> | ||
| + | File:Backpack War Paint Bloom Buffed.png|<div style="display:inline-block; padding:0px 3px; font-weight:bold; border-radius:4px; color:#4B69FF;background:#24201B;">{{Decorated name|bloom buffed}}</div> | ||
| + | File:Backpack War Paint Cardboard Boxed.png|<div style="display:inline-block; padding:0px 3px; font-weight:bold; border-radius:4px; color:#4B69FF;background:#24201B;">{{Decorated name|cardboard boxed}}</div> | ||
| + | File:Backpack War Paint Merc Stained.png|<div style="display:inline-block; padding:0px 3px; font-weight:bold; border-radius:4px; color:#4B69FF;background:#24201B;">{{Decorated name|merc stained}}</div> | ||
| + | File:Backpack War Paint Quack Canvassed.png|<div style="display:inline-block; padding:0px 3px; font-weight:bold; border-radius:4px; color:#4B69FF;background:#24201B;">{{Decorated name|quack canvassed}}</div> | ||
| + | File:Backpack War Paint Star Crossed.png|<div style="display:inline-block; padding:0px 3px; font-weight:bold; border-radius:4px; color:#4B69FF;background:#24201B;">{{Decorated name|star crossed}}</div> | ||
| + | </gallery> | ||
| + | |||
| + | ===== {{decorated name|Decorated War Hero Collection}} ===== | ||
| + | <gallery> | ||
| + | File:Backpack War Paint Carpet Bomber Mk.II.png|<div style="display:inline-block; padding:0px 3px; font-weight:bold; border-radius:4px; color:#8847FF;background:#24201B;">{{Decorated name|carpet bomber mk.ii}}</div> | ||
| + | File:Backpack War Paint Woodland Warrior Mk.II.png|<div style="display:inline-block; padding:0px 3px; font-weight:bold; border-radius:4px; color:#8847FF;background:#24201B;">{{Decorated name|woodland warrior mk.ii}}</div> | ||
| + | File:Backpack War Paint Wrapped Reviver Mk.II.png|<div style="display:inline-block; padding:0px 3px; font-weight:bold; border-radius:4px; color:#8847FF;background:#24201B;">{{Decorated name|wrapped reviver mk.ii}}</div> | ||
| + | File:Backpack War Paint Forest Fire Mk.II.png|<div style="display:inline-block; padding:0px 3px; font-weight:bold; border-radius:4px; color:#4B69FF;background:#24201B;">{{Decorated name|forest fire mk.ii}}</div> | ||
| + | File:Backpack War Paint Night Owl Mk.II.png|<div style="display:inline-block; padding:0px 3px; font-weight:bold; border-radius:4px; color:#4B69FF;background:#24201B;">{{Decorated name|night owl mk.ii}}</div> | ||
| + | File:Backpack War Paint Woodsy Widowmaker Mk.II.png|<div style="display:inline-block; padding:0px 3px; font-weight:bold; border-radius:4px; color:#4B69FF;background:#24201B;">{{Decorated name|woodsy widowmaker mk.ii}}</div> | ||
| + | File:Backpack War Paint Autumn Mk.II.png|<div style="display:inline-block; padding:0px 3px; font-weight:bold; border-radius:4px; color:#5E98D9;background:#24201B;">{{Decorated name|autumn mk.ii}}</div> | ||
| + | File:Backpack War Paint Plaid Potshotter Mk.II.png|<div style="display:inline-block; padding:0px 3px; font-weight:bold; border-radius:4px; color:#5E98D9;background:#24201B;">{{Decorated name|plaid potshotter mk.ii}}</div> | ||
| + | File:Backpack War Paint Civil Servant Mk.II.png|<div style="display:inline-block; padding:0px 3px; font-weight:bold; border-radius:4px; color:#B0C3D9;background:#24201B;">{{Decorated name|civil servant mk.ii}}</div> | ||
| + | File:Backpack War Paint Civic Duty Mk.II.png|<div style="display:inline-block; padding:0px 3px; font-weight:bold; border-radius:4px; color:#B0C3D9;background:#24201B;">{{Decorated name|civic duty mk.ii}}</div> | ||
| + | </gallery> | ||
| + | |||
| + | ===== {{decorated name|Contract Campaigner Collection}} ===== | ||
| + | <gallery> | ||
| + | File:Backpack War Paint Bovine Blazemaker Mk.II.png|<div style="display:inline-block; padding:0px 3px; font-weight:bold; border-radius:4px; color:#8847FF;background:#24201B;">{{Decorated name|bovine blazemaker mk.ii}}</div> | ||
| + | File:Backpack War Paint Dead Reckoner Mk.II.png|<div style="display:inline-block; padding:0px 3px; font-weight:bold; border-radius:4px; color:#8847FF;background:#24201B;">{{Decorated name|dead reckoner mk.ii}}</div> | ||
| + | File:Backpack War Paint Backwoods Boomstick Mk.II.png|<div style="display:inline-block; padding:0px 3px; font-weight:bold; border-radius:4px; color:#4B69FF;background:#24201B;">{{Decorated name|backwoods boomstick mk.ii}}</div> | ||
| + | File:Backpack War Paint Masked Mender Mk.II.png|<div style="display:inline-block; padding:0px 3px; font-weight:bold; border-radius:4px; color:#4B69FF;background:#24201B;">{{Decorated name|masked mender mk.ii}}</div> | ||
| + | File:Backpack War Paint Iron Wood Mk.II.png|<div style="display:inline-block; padding:0px 3px; font-weight:bold; border-radius:4px; color:#5E98D9;background:#24201B;">{{Decorated name|iron wood mk.ii}}</div> | ||
| + | File:Backpack War Paint Macabre Web Mk.II.png|<div style="display:inline-block; padding:0px 3px; font-weight:bold; border-radius:4px; color:#5E98D9;background:#24201B;">{{Decorated name|macabre web mk.ii}}</div> | ||
| + | File:Backpack War Paint Nutcracker Mk.II.png|<div style="display:inline-block; padding:0px 3px; font-weight:bold; border-radius:4px; color:#B0C3D9;background:#24201B;">{{Decorated name|nutcracker mk.ii}}</div> | ||
| + | File:Backpack War Paint Smalltown Bringdown Mk.II.png|<div style="display:inline-block; padding:0px 3px; font-weight:bold; border-radius:4px; color:#B0C3D9;background:#24201B;">{{Decorated name|smalltown bringdown mk.ii}}</div> | ||
| + | </gallery> | ||
| + | |||
| + | ===== {{decorated name|Saxton Select Collection}} ===== | ||
| + | <gallery> | ||
| + | File:Backpack War Paint Dragon Slayer.png|<div style="display:inline-block; padding:0px 3px; font-weight:bold; border-radius:4px; color:#EB4B4B;background:#24201B;">{{Decorated name|dragon slayer}}</div> | ||
| + | </gallery> | ||
=== Jour 3 === | === Jour 3 === | ||
| Line 307: | Line 389: | ||
==== Armes ==== | ==== Armes ==== | ||
| + | {{main|Weapons/fr|l1=Armes}} | ||
{| class="wikitable collapsible" cellpadding=2 style="text-align:center;" | {| class="wikitable collapsible" cellpadding=2 style="text-align:center;" | ||
| + | | width="90px" style="background:#b5b85c;" rowspan="4" | '''{{class link|Pyro|br=yes|color=black}}''' | ||
| + | | style="background:#f8d28c;" | {{Icon item|Dragon's Fury|75px}} | ||
| + | | style="background:#f8e2a1;" | '''{{item link|Dragon's Fury}}''' | ||
|- | |- | ||
| − | | style="background: # | + | | style="background:#f8d28c;" | {{Icon item|Gas Passer|75px}} |
| − | + | | style="background:#f8e2a1;" | '''{{item link|Gas Passer}}''' | |
| − | |||
| − | |||
| − | |||
| − | | style="background: #f8e2a1 "| '''{{item link| | ||
|- | |- | ||
| − | | | + | | style="background:#f8d28c;" | {{Icon item|Hot Hand|75px}} |
| − | | style="background: #f8e2a1 "| '''{{item link| | + | | style="background:#f8e2a1;" | '''{{item link|Hot Hand}}''' |
|- | |- | ||
| − | | | + | | style="background:#f8d28c;" | {{Icon item|Thermal Thruster|75px}} |
| − | | style="background: #f8e2a1 "| '''{{item link| | + | | style="background:#f8e2a1;" | '''{{item link|Thermal Thruster}}''' |
|- | |- | ||
| − | | style="background: #b5b85c | + | | style="background:#b5b85c;" rowspan="1" | '''{{class link|Heavy|br=yes|color=black}}''' |
| − | | | + | | style="background:#f8d28c;" | {{Icon item|Second Banana|75px}} |
| − | | style="background: #f8e2a1 "| '''{{item link|Second Banana}}''' | + | | style="background:#f8e2a1;" | '''{{item link|Second Banana}}''' |
|} | |} | ||
==== Modification des classes ==== | ==== Modification des classes ==== | ||
{| class="wikitable" | {| class="wikitable" | ||
| − | ! style="background: #748c41;" class="header" | <span style="color: black;"> Classe | + | ! style="background:#748c41;" class="header" | <span style="color: black;"> Classe |
| − | ! style="background: #748c41;" class="header" | <span style="color: black;"> Modifications | + | ! style="background:#748c41;" class="header" | <span style="color: black;"> Modifications |
| − | |||
| − | |||
| − | |||
|- | |- | ||
| − | | style="background: #f8d28c " | {{c|+| | + | ! width="90px" style="background:#b5b85c;" rowspan="6" | {{class link|Pyro|br=yes|color=black}} |
| + | | style="background:#f8d28c;" | {{c|+|Modifié :}} La détection du tir d'air comprimé est maintenant sous la forme d'un cône cohérent pour les joueurs et les projectiles | ||
|- | |- | ||
| − | | style="background: #f8d28c " | {{c| | + | | style="background:#f8d28c;" | {{c|+|Modifié :}} Puissance du tir à air comprimé augmentée |
|- | |- | ||
| − | | style="background: #f8d28c " | {{c| | + | | style="background:#f8d28c;" | {{c|-|Modifié :}} Le tir d'air comprimé réduit maintenant le contrôle de la victime pour un petite période (dans les airs et sur terre), au lieu de lui enlever tout contrôle |
|- | |- | ||
| − | | style="background: #f8d28c " | {{c|=| | + | | style="background:#f8d28c;" | {{c|=|Modifié :}} Le tir d'air comprimé prend maintenant en compte les mouvements du Pyro et de sa cible, leurs donnant plus de contrôle lors de l’interaction. |
|- | |- | ||
| − | | style="background: #f8d28c " | {{c|=| | + | | style="background:#f8d28c;" | {{c|=|Modifié :}} Le tir d'air comprimé prend maintenant en compte l'angle d'élévation du tir, au lieu d'exercer une force d'élévation fixe lors du tir |
|- | |- | ||
| + | | style="background:#f8d28c;" | {{c|=|Modifié :}} La durée des brûlures dépend maintenant de la durée d'exposition aux flammes du Lance-flamme | ||
|} | |} | ||
=== Modifications des armes === | === Modifications des armes === | ||
{| class="wikitable" | {| class="wikitable" | ||
| − | ! style="background: #748c41;" class="header" | <span style="color: black;"> Classe | + | ! style="background:#748c41;" class="header" | <span style="color: black;"> Classe |
| − | ! style="background: #748c41;" class="header" | <span style="color: black;"> Armes | + | ! style="background:#748c41;" class="header" | <span style="color: black;"> Armes |
| − | ! style="background: #748c41;" class="header" | <span style="color: black;"> Modifications | + | ! style="background:#748c41;" class="header" | <span style="color: black;"> Modifications |
|- | |- | ||
| − | ! style="background: #b5b85c;" rowspan=7| {{ | + | ! width="90px" style="background:#b5b85c;" rowspan=7 | {{class link|Pyro|br=yes|color=black}} |
| − | ! style="background: #f8d28c;" rowspan=2 | {{Icon item|Flame Thrower|icon-size=75px}} <br /> {{item link|Flame Thrower}} + Variantes | + | ! style="background:#f8d28c;" rowspan=2 | {{Icon item|Flame Thrower|icon-size=75px}} <br /> {{item link|Flame Thrower}} + Variantes |
| − | | style="background: #f8e2a1;" | {{c|=|Modifié :}} Meilleure synchronisation visuelle, plus homogène | + | | style="background:#f8e2a1;" | {{c|=|Modifié :}} Meilleure synchronisation visuelle, plus homogène |
|- | |- | ||
| − | | style="background: #f8e2a1;" | {{c|=|Modifié :}} Nouvel effet de particules | + | | style="background:#f8e2a1;" | {{c|=|Modifié :}} Nouvel effet de particules |
|} | |} | ||
| Line 363: | Line 444: | ||
Au jour 4, les notes du patch pour la mise à jour de la Jungle Inferno ont été annoncées, incluant de différents changements d'armes, des informations sur les nouvelles armes, plusieurs corrections de bug et le changement du système du matchmaking. Les notes de patch ont également annoncés la mécanique d'inspection première personne pour toutes les armes. | Au jour 4, les notes du patch pour la mise à jour de la Jungle Inferno ont été annoncées, incluant de différents changements d'armes, des informations sur les nouvelles armes, plusieurs corrections de bug et le changement du système du matchmaking. Les notes de patch ont également annoncés la mécanique d'inspection première personne pour toutes les armes. | ||
| − | ====Modifications des classes==== | + | ==== Modifications des classes ==== |
{| class="wikitable" | {| class="wikitable" | ||
| − | ! style="background: #748c41;" class="header" | <span style="color: white;"> Classe | + | ! style="background:#748c41;" class="header" | <span style="color: white;"> Classe |
| − | ! style="background: #748c41;" class="header" | <span style="color: white;"> Modifications | + | ! style="background:#748c41;" class="header" | <span style="color: white;"> Modifications |
|- | |- | ||
| − | ! style="background: #b5b85c;" rowspan="2" | {{ | + | ! width="90px" style="background:#b5b85c;" rowspan="2" | {{class link|Heavy|br=yes|color=black}} |
| − | | style="background: #f8e2a1;" | {{c|+|Modification :}} Le damage de 1 seconde et la pénalité de précision est maintenant appliquée sur la première seconde du temps de spin du Minigun, même si le heavy tire ou pas. Préalablement, la seconde de pénalité de dégât était seulement enlevée après une seconde de feu. | + | | style="background:#f8e2a1;" | {{c|+|Modification :}} Le damage de 1 seconde et la pénalité de précision est maintenant appliquée sur la première seconde du temps de spin du Minigun, même si le heavy tire ou pas. Préalablement, la seconde de pénalité de dégât était seulement enlevée après une seconde de feu. |
|- | |- | ||
| − | | style="background: #f8e2a1;" | {{c|+|Modification :}} La précision et les pénalités de dégât sont mises à zéro quand le heavy tourne son Minigun vers le bas, plutôt que quand le heavy arrête de tirer. Cela signifie que si tu spun up au delà de 1 seconde, et faire feu en rafale, le dommage et la précision restent à 100%. | + | | style="background:#f8e2a1;" | {{c|+|Modification :}} La précision et les pénalités de dégât sont mises à zéro quand le heavy tourne son Minigun vers le bas, plutôt que quand le heavy arrête de tirer. Cela signifie que si tu spun up au delà de 1 seconde, et faire feu en rafale, le dommage et la précision restent à 100%. |
|- | |- | ||
| − | ! style="background: #b5b85c;" | {{ | + | ! style="background:#b5b85c;" | {{class link|Engineer|br=yes|color=black}} |
| − | | style="background: #f8e2a1;" | {{c|+|Ajouté :}} La quantité de métal lors l'amélioration des bâtiments a été doublée pendant la période de configuration. | + | | style="background:#f8e2a1;" | {{c|+|Ajouté :}} La quantité de métal lors l'amélioration des bâtiments a été doublée pendant la période de configuration. |
|- | |- | ||
|} | |} | ||
| Line 380: | Line 461: | ||
==== Modifications des armes ==== | ==== Modifications des armes ==== | ||
{| class="wikitable" | {| class="wikitable" | ||
| − | ! style="background: #748c41;" class="header" | <span style="color: white;"> Classe | + | ! style="background:#748c41;" class="header" | <span style="color: white;"> Classe |
| − | ! style="background: #748c41;" class="header" colspan=2 | <span style="color: white;"> Arme | + | ! style="background:#748c41;" class="header" colspan=2 | <span style="color: white;"> Arme |
| − | ! style="background: #748c41;" class="header" | <span style="color: white;"> Modifications | + | ! style="background:#748c41;" class="header" | <span style="color: white;"> Modifications |
|- | |- | ||
| − | ! style="background: #b5b85c;" rowspan=25 | {{ | + | ! width="90px" style="background:#b5b85c;" rowspan=25 | {{class link|Scout|br=yes|color=black}} |
| − | ! style="background: #f8d28c;" colspan=2 rowspan=2 | {{Icon item|Bonk! Atomic Punch|icon-size=75px}} <br /> {{item link|Bonk! Atomic Punch}} | + | ! style="background:#f8d28c;" colspan=2 rowspan=2 | {{Icon item|Bonk! Atomic Punch|icon-size=75px}} <br /> {{item link|Bonk! Atomic Punch}} |
| − | | style="background: #f8e2a1;" | {{c|-|Ajout :}} Application d'un effet de ralentissement chez les joueurs une fois l'effet estompé, en fonction des dégâts absorbés, en partant de -25 % avec peu de dégâts absorbés jusqu'à 50 % avec +200 de dégâts absorbés | + | | style="background:#f8e2a1;" | {{c|-|Ajout :}} Application d'un effet de ralentissement chez les joueurs une fois l'effet estompé, en fonction des dégâts absorbés, en partant de -25 % avec peu de dégâts absorbés jusqu'à 50 % avec +200 de dégâts absorbés |
|- | |- | ||
| − | | style="background: #f8e2a1;" | {{c|=|Note :}} L'effet de ralentissement dure cinq secondes | + | | style="background:#f8e2a1;" | {{c|=|Note :}} L'effet de ralentissement dure cinq secondes |
|- | |- | ||
| − | ! style="background: #f8d28c;" colspan=2 rowspan=4 | {{Icon item|Crit-A-Cola|icon-size=75px}} <br /> {{item link|Crit-A-Cola}} | + | ! style="background:#f8d28c;" colspan=2 rowspan=4 | {{Icon item|Crit-A-Cola|icon-size=75px}} <br /> {{item link|Crit-A-Cola}} |
| − | | style="background: #f8e2a1;" | {{c|-|Ajout :}} Chaque attaque est un mini-crit et marque à mort pendant cinq secondes (ne s'additionne pas) | + | | style="background:#f8e2a1;" | {{c|-|Ajout :}} Chaque attaque est un mini-crit et marque à mort pendant cinq secondes (ne s'additionne pas) |
|- | |- | ||
| − | | style="background: #f8e2a1;" | {{c|+|Suppression :}} La marque à mort disparaît quand l'effet expire | + | | style="background:#f8e2a1;" | {{c|+|Suppression :}} La marque à mort disparaît quand l'effet expire |
|- | |- | ||
| − | | style="background: #f8e2a1;" | {{c|+|Suppression :}} +10 % de dégâts reçus | + | | style="background:#f8e2a1;" | {{c|+|Suppression :}} +10 % de dégâts reçus |
|- | |- | ||
| − | | style="background: #f8e2a1;" | {{c|-|Suppression :}} +25 % de bonus de vitesse | + | | style="background:#f8e2a1;" | {{c|-|Suppression :}} +25 % de bonus de vitesse |
|- | |- | ||
| − | ! style="background: #f8d28c;" colspan=2 rowspan=5 | {{Icon item|Pretty Boy's Pocket Pistol|icon-size=75px}} <br /> {{item link|Pretty Boy's Pocket Pistol}} | + | ! style="background:#f8d28c;" colspan=2 rowspan=5 | {{Icon item|Pretty Boy's Pocket Pistol|icon-size=75px}} <br /> {{item link|Pretty Boy's Pocket Pistol}} |
| − | | style="background: #f8e2a1;" | {{c|-|Ajout :}} Capacité chargeur -25 % (9 tirs) | + | | style="background:#f8e2a1;" | {{c|-|Ajout :}} Capacité chargeur -25 % (9 tirs) |
|- | |- | ||
| − | | style="background: #f8e2a1;" | {{c|+|Modification :}} Cadence 15 % fois plus élevée | + | | style="background:#f8e2a1;" | {{c|+|Modification :}} Cadence 15 % fois plus élevée |
|- | |- | ||
| − | | style="background: #f8e2a1;" | {{c|+|Modification :}} +7 points de santé lorsque vous touchez (au lieu de +5) | + | | style="background:#f8e2a1;" | {{c|+|Modification :}} +7 points de santé lorsque vous touchez (au lieu de +5) |
|- | |- | ||
| − | | style="background: #f8e2a1;" | {{c|+|Suppression :}} Vulnérabilité aux dégâts de 20 % pour le porteur | + | | style="background:#f8e2a1;" | {{c|+|Suppression :}} Vulnérabilité aux dégâts de 20 % pour le porteur |
|- | |- | ||
| − | | style="background: #f8e2a1;" | {{c|-|Suppression :}} Le porteur ne subit pas de dégâts de chute | + | | style="background:#f8e2a1;" | {{c|-|Suppression :}} Le porteur ne subit pas de dégâts de chute |
|- | |- | ||
| − | ! style="background: #f8d28c;" colspan=2 rowspan=4 | {{Icon item|Flying Guillotine|icon-size=75px}} <br /> {{item link|Flying Guillotine}} | + | ! style="background:#f8d28c;" colspan=2 rowspan=4 | {{Icon item|Flying Guillotine|icon-size=75px}} <br /> {{item link|Flying Guillotine}} |
| − | | style="background: #f8e2a1;" | {{c|+|Ajout :}} Les coups à longue portée réduisent le rechargement (de 1,5 seconde) | + | | style="background:#f8e2a1;" | {{c|+|Ajout :}} Les coups à longue portée réduisent le rechargement (de 1,5 seconde) |
|- | |- | ||
| − | | style="background: #f8e2a1;" | {{c|+|Modification :}} Distance nécessaire pour atteindre le statut "longue portée" à été réduite de moitié par rapport à la valeur précédente pour évaluer les coups mini-critiques | + | | style="background:#f8e2a1;" | {{c|+|Modification :}} Distance nécessaire pour atteindre le statut "longue portée" à été réduite de moitié par rapport à la valeur précédente pour évaluer les coups mini-critiques |
|- | |- | ||
| − | | style="background: #f8e2a1;" | {{c|-|Suppression :}} Coup critique contre les joueurs étourdis | + | | style="background:#f8e2a1;" | {{c|-|Suppression :}} Coup critique contre les joueurs étourdis |
|- | |- | ||
| − | | style="background: #f8e2a1;" | {{c|-|Suppression :}} Coup mini-critiques à longue portée | + | | style="background:#f8e2a1;" | {{c|-|Suppression :}} Coup mini-critiques à longue portée |
|- | |- | ||
| − | ! style="background: #f8d28c;" colspan=2 rowspan=4 | {{Icon item|Sandman|icon-size=75px}} <br /> {{item link|Sandman}} | + | ! style="background:#f8d28c;" colspan=2 rowspan=4 | {{Icon item|Sandman|icon-size=75px}} <br /> {{item link|Sandman}} |
| − | | style="background: #f8e2a1;" | {{c|+|Modification :}} Une balle lancée sur sa portée maximale fera 50 % plus mal (à partir d'une base de 15) | + | | style="background:#f8e2a1;" | {{c|+|Modification :}} Une balle lancée sur sa portée maximale fera 50 % plus mal (à partir d'une base de 15) |
|- | |- | ||
| − | | style="background: #f8e2a1;" | {{c|+|Modification :}} Le temps de vol nécessaire pour atteindre la portée maximale a été réduit de 20 % | + | | style="background:#f8e2a1;" | {{c|+|Modification :}} Le temps de vol nécessaire pour atteindre la portée maximale a été réduit de 20 % |
|- | |- | ||
| − | | style="background: #f8e2a1;" | {{c|+|Modification :}} La période de réapprovisionnement de la balle a été réduite à 10 secondes (au lieu de 15) | + | | style="background:#f8e2a1;" | {{c|+|Modification :}} La période de réapprovisionnement de la balle a été réduite à 10 secondes (au lieu de 15) |
|- | |- | ||
| − | | style="background: #f8e2a1;" | {{c|-|Modification :}} Les balles lancées de loin ne retirent plus la capacité au joueur touché de tirer avec son arme (mais la victime reste ralentie) | + | | style="background:#f8e2a1;" | {{c|-|Modification :}} Les balles lancées de loin ne retirent plus la capacité au joueur touché de tirer avec son arme (mais la victime reste ralentie) |
|- | |- | ||
| − | ! style="background: #f8d28c;" colspan=2 rowspan=6 | {{Icon item|Atomizer|icon-size=75px}} <br /> {{item link|Atomizer}} | + | ! style="background:#f8d28c;" colspan=2 rowspan=6 | {{Icon item|Atomizer|icon-size=75px}} <br /> {{item link|Atomizer}} |
| − | | style="background: #f8e2a1;" | {{c|+|Ajout :}} Les attaques au corps-à-corps infligent des mini-crits lorsque vous êtes en l'air | + | | style="background:#f8e2a1;" | {{c|+|Ajout :}} Les attaques au corps-à-corps infligent des mini-crits lorsque vous êtes en l'air |
|- | |- | ||
| − | | style="background: #f8e2a1;" | {{c|-|Ajout :}} Cette arme se déploie 50 % plus lentement | + | | style="background:#f8e2a1;" | {{c|-|Ajout :}} Cette arme se déploie 50 % plus lentement |
|- | |- | ||
| − | | style="background: #f8e2a1;" | {{c|+|Modification :}} Réduction de la pénalité de dégâts contre les joueurs à -15% (au lieu de -20%) | + | | style="background:#f8e2a1;" | {{c|+|Modification :}} Réduction de la pénalité de dégâts contre les joueurs à -15% (au lieu de -20%) |
|- | |- | ||
| − | | style="background: #f8e2a1;" | {{c|-|Modification :}} Octroie un troisième saut que lorsque l'arme est active. | + | | style="background:#f8e2a1;" | {{c|-|Modification :}} Octroie un troisième saut que lorsque l'arme est active. |
|- | |- | ||
| − | | style="background: #f8e2a1;" | {{c|+|Suppression :}} Dégâts auto-infligés lors du triple-saut | + | | style="background:#f8e2a1;" | {{c|+|Suppression :}} Dégâts auto-infligés lors du triple-saut |
|- | |- | ||
| − | | style="background: #f8e2a1;" | {{c|+|Suppression :}} Pénalité de vitesse de frappe | + | | style="background:#f8e2a1;" | {{c|+|Suppression :}} Pénalité de vitesse de frappe |
|- | |- | ||
| − | ! style="background: #b5b85c;" rowspan=8 | {{ | + | ! style="background:#b5b85c;" rowspan=8 | {{class link|Soldier|br=yes|color=black}} |
| − | ! style="background: #f8d28c;" colspan=2 rowspan=2 | {{Icon item|Cow Mangler 5000|icon-size=75px}} <br /> {{item link|Cow Mangler 5000}} | + | ! style="background:#f8d28c;" colspan=2 rowspan=2 | {{Icon item|Cow Mangler 5000|icon-size=75px}} <br /> {{item link|Cow Mangler 5000}} |
| − | | style="background: #f8e2a1;" | {{c|-|Ajout :}} Les tirs critiques octroyés/gagnés seront convertis en mini-crits | + | | style="background:#f8e2a1;" | {{c|-|Ajout :}} Les tirs critiques octroyés/gagnés seront convertis en mini-crits |
|- | |- | ||
| − | | style="background: #f8e2a1;" | {{c|+|Suppression :}} Ne peut plus être boosté par des tirs critiques | + | | style="background:#f8e2a1;" | {{c|+|Suppression :}} Ne peut plus être boosté par des tirs critiques |
|- | |- | ||
| − | ! style="background: #f8d28c;" colspan=2 rowspan=2 | {{Icon item|Mantreads|icon-size=75px}} <br /> {{item link|Mantreads}} | + | ! style="background:#f8d28c;" colspan=2 rowspan=2 | {{Icon item|Mantreads|icon-size=75px}} <br /> {{item link|Mantreads}} |
| − | | style="background: #f8e2a1;" | {{c|+|Ajout :}} Contrôle aérien augmenté de 200 % lors d'un saut explosif | + | | style="background:#f8e2a1;" | {{c|+|Ajout :}} Contrôle aérien augmenté de 200 % lors d'un saut explosif |
|- | |- | ||
| − | | style="background: #f8e2a1;" | {{c|+|Modification :}} réduction de -75 % des contre-coups subis suite aux dégâts concerne aussi les tirs d'air comprimés | + | | style="background:#f8e2a1;" | {{c|+|Modification :}} réduction de -75 % des contre-coups subis suite aux dégâts concerne aussi les tirs d'air comprimés |
|- | |- | ||
| − | ! style="background: #f8d28c;" colspan=2 rowspan=4 | {{Icon item|Righteous Bison|icon-size=75px}} <br /> {{item link|Righteous Bison}} | + | ! style="background:#f8d28c;" colspan=2 rowspan=4 | {{Icon item|Righteous Bison|icon-size=75px}} <br /> {{item link|Righteous Bison}} |
| − | | style="background: #f8e2a1;" | {{c|=|Note :}} Cette arme est revenue à son ancien design | + | | style="background:#f8e2a1;" | {{c|=|Note :}} Cette arme est revenue à son ancien design |
|- | |- | ||
| − | | style="background: #f8e2a1;" | {{c|+|Modification :}} Les projectiles ne sont plus limités par le nombre de fois où il touche une même cible(s) | + | | style="background:#f8e2a1;" | {{c|+|Modification :}} Les projectiles ne sont plus limités par le nombre de fois où il touche une même cible(s) |
|- | |- | ||
| − | | style="background: #f8e2a1;" | {{c|+|Modification :}} Vélocité du projectile augmentée de 1200 (au lieu de 840) | + | | style="background:#f8e2a1;" | {{c|+|Modification :}} Vélocité du projectile augmentée de 1200 (au lieu de 840) |
|- | |- | ||
| − | | style="background: #f8e2a1;" | {{c|-|Modification :}} Réalise 20 dégâts par coup (au lieu de 45) | + | | style="background:#f8e2a1;" | {{c|-|Modification :}} Réalise 20 dégâts par coup (au lieu de 45) |
|- | |- | ||
| − | ! style="background: #b5b85c;" rowspan=3 | {{ | + | ! style="background:#b5b85c;" rowspan=3 | {{class link|Demoman|br=yes|color=black}} |
| − | ! style="background: #f8d28c;" colspan=2 rowspan=3 | {{Icon item|Claidheamh Mòr|icon-size=75px}} <br /> {{item link|Claidheamh Mòr}} | + | ! style="background:#f8d28c;" colspan=2 rowspan=3 | {{Icon item|Claidheamh Mòr|icon-size=75px}} <br /> {{item link|Claidheamh Mòr}} |
| − | | style="background: #f8e2a1;" | {{c|=|Note :}} Cette arme est revenue à son ancien design | + | | style="background:#f8e2a1;" | {{c|=|Note :}} Cette arme est revenue à son ancien design |
|- | |- | ||
| − | | style="background: #f8e2a1;" | {{c|+|Ajout :}} Augmentation de 0.5 seconde pour la durée de la charge | + | | style="background:#f8e2a1;" | {{c|+|Ajout :}} Augmentation de 0.5 seconde pour la durée de la charge |
|- | |- | ||
| − | | style="background: #f8e2a1;" | {{c|-|Suppression :}} +25 points de santé par victime | + | | style="background:#f8e2a1;" | {{c|-|Suppression :}} +25 points de santé par victime |
|- | |- | ||
| − | ! style="background: #b5b85c;" rowspan=11 | {{ | + | ! style="background:#b5b85c;" rowspan=11 | {{class link|Heavy|br=yes|color=black}} |
| − | ! style="background: #f8d28c;" rowspan=5 width=128px| {{Icon item|Gloves of Running Urgently|icon-size=75px}} <br /> {{item link|Gloves of Running Urgently}} | + | ! style="background:#f8d28c;" rowspan=5 width=128px| {{Icon item|Gloves of Running Urgently|icon-size=75px}} <br /> {{item link|Gloves of Running Urgently}} |
| − | ! style="background: #f8d28c;" rowspan=5 width=128px| {{Icon item|Bread Bite|icon-size=75px}} <br /> {{item link|Bread Bite}} | + | ! style="background:#f8d28c;" rowspan=5 width=128px| {{Icon item|Bread Bite|icon-size=75px}} <br /> {{item link|Bread Bite}} |
| − | | style="background: #f8e2a1;" | {{c|-|Ajout:}} La santé maximale est drainée lorsque cet item est actif (-10/sec) et se régénère lorsque rangé. | + | | style="background:#f8e2a1;" | {{c|-|Ajout:}} La santé maximale est drainée lorsque cet item est actif (-10/sec) et se régénère lorsque rangé. |
|- | |- | ||
| − | | style="background: #f8e2a1;" | {{c|=|Note:}} La santé sera uniquement régénéré de la quantité drainée lorsque actif, moins les dégâts subis durant cette période | + | | style="background:#f8e2a1;" | {{c|=|Note:}} La santé sera uniquement régénéré de la quantité drainée lorsque actif, moins les dégâts subis durant cette période |
|- | |- | ||
| − | | style="background: #f8e2a1;" | {{c|=|Note:}} À chaque fois que les gants sont déployés, la vitesse de drainage est accéléré pour un bref moment. | + | | style="background:#f8e2a1;" | {{c|=|Note:}} À chaque fois que les gants sont déployés, la vitesse de drainage est accéléré pour un bref moment. |
|- | |- | ||
| − | | style="background: #f8e2a1;" | {{c|+|Suppression:}} Marqué-à-mort lorsque actif | + | | style="background:#f8e2a1;" | {{c|+|Suppression:}} Marqué-à-mort lorsque actif |
|- | |- | ||
| − | | style="background: #f8e2a1;" | {{c|+|Suppression:}} 25% de pénalité de dégats | + | | style="background:#f8e2a1;" | {{c|+|Suppression:}} 25% de pénalité de dégats |
|- | |- | ||
| − | ! style="background: #f8d28c;" colspan=2 rowspan=2 | {{Icon item|Fists of Steel|icon-size=75px}} <br /> {{item link|Fists of Steel}} | + | ! style="background:#f8d28c;" colspan=2 rowspan=2 | {{Icon item|Fists of Steel|icon-size=75px}} <br /> {{item link|Fists of Steel}} |
| − | | style="background: #f8e2a1;" | {{c|-|Ajout:}} 40% d'extra santé en moins lorsque actif | + | | style="background:#f8e2a1;" | {{c|-|Ajout:}} 40% d'extra santé en moins lorsque actif |
|- | |- | ||
| − | | style="background: #f8e2a1;" | {{c|-|Ajout:}} 40% de taux de soin lorsque actif | + | | style="background:#f8e2a1;" | {{c|-|Ajout:}} 40% de taux de soin lorsque actif |
|- | |- | ||
| − | ! style="background: #f8d28c;" colspan=2 rowspan=4 | {{Icon item|Eviction Notice|icon-size=75px}} <br /> {{item link|Eviction Notice}} | + | ! style="background:#f8d28c;" colspan=2 rowspan=4 | {{Icon item|Eviction Notice|icon-size=75px}} <br /> {{item link|Eviction Notice}} |
| − | | style="background: #f8e2a1;" | {{c|-|Ajout:}} La santé maximale est drainée lorsque cet item est actif (-5/sec) et se régénère lorsque rangé. | + | | style="background:#f8e2a1;" | {{c|-|Ajout:}} La santé maximale est drainée lorsque cet item est actif (-5/sec) et se régénère lorsque rangé. |
|- | |- | ||
| − | | style="background: #f8e2a1;" | {{c|=|Note:}} La santé sera uniquement régénéré de la quantité drainée lorsque actif, moins les dégâts subis durant cette période | + | | style="background:#f8e2a1;" | {{c|=|Note:}} La santé sera uniquement régénéré de la quantité drainée lorsque actif, moins les dégâts subis durant cette période |
|- | |- | ||
| − | | style="background: #f8e2a1;" | {{c|=|Note:}} À chaque fois que les gants sont déployés, la vitesse de drainage est accéléré pour un bref moment. | + | | style="background:#f8e2a1;" | {{c|=|Note:}} À chaque fois que les gants sont déployés, la vitesse de drainage est accéléré pour un bref moment. |
|- | |- | ||
| − | | style="background: #f8e2a1;" | {{c|+|Suppression:}} 20% de vulnérabilité aux dégâts | + | | style="background:#f8e2a1;" | {{c|+|Suppression:}} 20% de vulnérabilité aux dégâts |
|- | |- | ||
| − | ! style="background: #b5b85c;" | {{ | + | ! style="background:#b5b85c;" | {{class link|Engineer|br=yes|color=black}} |
| − | ! style="background: #f8d28c;" colspan=2 | {{Icon item|Rescue Ranger|icon-size=75px}} <br /> {{item link|Rescue Ranger}} | + | ! style="background:#f8d28c;" colspan=2 | {{Icon item|Rescue Ranger|icon-size=75px}} <br /> {{item link|Rescue Ranger}} |
| − | | style="background: #f8e2a1;" | {{c|-|Modification :}} Les réparations à distance consomment maintenant du métal (à raison de 4 points de santé pour 1 métal) | + | | style="background:#f8e2a1;" | {{c|-|Modification :}} Les réparations à distance consomment maintenant du métal (à raison de 4 points de santé pour 1 métal) |
|- | |- | ||
| − | ! style="background: #b5b85c;" rowspan=5 | {{ | + | ! style="background:#b5b85c;" rowspan=5 | {{class link|Medic|br=yes|color=black}} |
| − | ! style="background: #f8d28c;" colspan=2 rowspan=2 | {{Icon item|Crusader's Crossbow|icon-size=75px}} <br /> {{item link|Crusader's Crossbow}} | + | ! style="background:#f8d28c;" colspan=2 rowspan=2 | {{Icon item|Crusader's Crossbow|icon-size=75px}} <br /> {{item link|Crusader's Crossbow}} |
| − | | style="background: #f8e2a1;" | {{c|-|Modification:}} Les taux de gains d'Übercharge sont réduits de la même manière que les soins du Medigun - en fonction de la dernière fois que le patient a pris des dégâts | + | | style="background:#f8e2a1;" | {{c|-|Modification:}} Les taux de gains d'Übercharge sont réduits de la même manière que les soins du Medigun - en fonction de la dernière fois que le patient a pris des dégâts |
|- | |- | ||
| − | | style="background: #f8e2a1;" | {{c|=|Note:}} Réduit par un tier lorsque 1 à 10 secs hors combat, et augmente jusqu'à un taux normal entre 10 et 15 secs hors combat | + | | style="background:#f8e2a1;" | {{c|=|Note:}} Réduit par un tier lorsque 1 à 10 secs hors combat, et augmente jusqu'à un taux normal entre 10 et 15 secs hors combat |
|- | |- | ||
| − | ! style="background: #f8d28c;" colspan=2 rowspan=3 | {{Icon item|Vita-Saw|icon-size=75px}} <br /> {{item link|Vita-Saw}} | + | ! style="background:#f8d28c;" colspan=2 rowspan=3 | {{Icon item|Vita-Saw|icon-size=75px}} <br /> {{item link|Vita-Saw}} |
| − | | style="background: #f8e2a1;" | {{c|+|Ajout:}} Chaque coup porté par la Vita-Scie collecte un organe de la victime (montré dans l'ATH) | + | | style="background:#f8e2a1;" | {{c|+|Ajout:}} Chaque coup porté par la Vita-Scie collecte un organe de la victime (montré dans l'ATH) |
|- | |- | ||
| − | | style="background: #f8e2a1;" | {{c|+|Ajout:}} À la mort, conserve 15% d'Übercharge par organe collecté. Les effets sont restreints à 60% maximum. | + | | style="background:#f8e2a1;" | {{c|+|Ajout:}} À la mort, conserve 15% d'Übercharge par organe collecté. Les effets sont restreints à 60% maximum. |
|- | |- | ||
| − | | style="background: #f8e2a1;" | {{c|-|Suppression:}} À la mort, jusqu'à 20% de votre Übercharge est conservée. | + | | style="background:#f8e2a1;" | {{c|-|Suppression:}} À la mort, jusqu'à 20% de votre Übercharge est conservée. |
|- | |- | ||
| − | ! style="background: #b5b85c;" rowspan=7 | {{ | + | ! style="background:#b5b85c;" rowspan=7 | {{class link|Sniper|br=yes|color=black}} |
| − | ! style="background: #f8d28c;" colspan=2 rowspan=2 | {{Icon item|Razorback|icon-size=75px}} <br /> {{item link|Razorback}} | + | ! style="background:#f8d28c;" colspan=2 rowspan=2 | {{Icon item|Razorback|icon-size=75px}} <br /> {{item link|Razorback}} |
| − | | style="background: #f8e2a1;" | {{c|+|Ajout:}} Le bouclier se régénère après 30 secs | + | | style="background:#f8e2a1;" | {{c|+|Ajout:}} Le bouclier se régénère après 30 secs |
|- | |- | ||
| − | | style="background: #f8e2a1;" | {{c|-|Ajout:}} -100% de pénalité d'extra santé | + | | style="background:#f8e2a1;" | {{c|-|Ajout:}} -100% de pénalité d'extra santé |
|- | |- | ||
| − | ! style="background: #f8d28c;" colspan=2 rowspan=5 | {{Icon item|Darwin's Danger Shield|icon-size=75px}} <br /> {{item link|Darwin's Danger Shield}} | + | ! style="background:#f8d28c;" colspan=2 rowspan=5 | {{Icon item|Darwin's Danger Shield|icon-size=75px}} <br /> {{item link|Darwin's Danger Shield}} |
| − | | style="background: #f8e2a1;" | {{c|+|Ajout:}} Immunité aux brûlures | + | | style="background:#f8e2a1;" | {{c|+|Ajout:}} Immunité aux brûlures |
|- | |- | ||
| − | | style="background: #f8e2a1;" | {{c|+|Ajout:}} +50% de résistance au feu pour le porteur | + | | style="background:#f8e2a1;" | {{c|+|Ajout:}} +50% de résistance au feu pour le porteur |
|- | |- | ||
| − | | style="background: #f8e2a1;" | {{c|+|Suppression:}} 20% de vulnérabilité aux explosions pour le porteur | + | | style="background:#f8e2a1;" | {{c|+|Suppression:}} 20% de vulnérabilité aux explosions pour le porteur |
|- | |- | ||
| − | | style="background: #f8e2a1;" | {{c|-|Suppression:}} +25 de santé maximale pour le porteur | + | | style="background:#f8e2a1;" | {{c|-|Suppression:}} +25 de santé maximale pour le porteur |
|- | |- | ||
| − | | style="background: #f8e2a1;" | {{c|-|Suppression:}} +15% de résistance aux balles pour le porteur | + | | style="background:#f8e2a1;" | {{c|-|Suppression:}} +15% de résistance aux balles pour le porteur |
|- | |- | ||
| − | ! style="background: #b5b85c;" rowspan=8 | {{ | + | ! style="background:#b5b85c;" rowspan=8 | {{class link|Spy|br=yes|color=black}} |
| − | ! style="background: #f8d28c;" colspan=2 rowspan=2 | {{Icon item|Ambassador|icon-size=75px}} <br /> {{item link|Ambassador}} | + | ! style="background:#f8d28c;" colspan=2 rowspan=2 | {{Icon item|Ambassador|icon-size=75px}} <br /> {{item link|Ambassador}} |
| − | | style="background: #f8e2a1;" | {{c|-|Modification:}} Les dégats de tir en pleine tête sont maintenant soumis à la modification des dégâts par la distance. | + | | style="background:#f8e2a1;" | {{c|-|Modification:}} Les dégats de tir en pleine tête sont maintenant soumis à la modification des dégâts par la distance. |
|- | |- | ||
| − | | style="background: #f8e2a1;" | {{c|-|Modification:}} Les tirs en pleine tête effectués au delà de 1200 HU feront les dégâts (non critique) de base | + | | style="background:#f8e2a1;" | {{c|-|Modification:}} Les tirs en pleine tête effectués au delà de 1200 HU feront les dégâts (non critique) de base |
|- | |- | ||
| − | ! style="background: #f8d28c;" rowspan=3 | {{Icon item|Your Eternal Reward|icon-size=75px}} <br /> {{item link|Your Eternal Reward}} | + | ! style="background:#f8d28c;" rowspan=3 | {{Icon item|Your Eternal Reward|icon-size=75px}} <br /> {{item link|Your Eternal Reward}} |
| − | ! style="background: #f8d28c;" rowspan=3 | {{Icon item|Wanga Prick|icon-size=75px}} <br /> {{item link|Wanga Prick}} | + | ! style="background:#f8d28c;" rowspan=3 | {{Icon item|Wanga Prick|icon-size=75px}} <br /> {{item link|Wanga Prick}} |
| − | | style="background: #f8e2a1;" | {{c|-|Ajout:}} Les déguisements sans victime demande (et requiert) une barre complète d'invisibilité | + | | style="background:#f8e2a1;" | {{c|-|Ajout:}} Les déguisements sans victime demande (et requiert) une barre complète d'invisibilité |
|- | |- | ||
| − | | style="background: #f8e2a1;" | {{c|-|Ajout:}} Augmentation du taux de drainage de l'invisibilité par 33% | + | | style="background:#f8e2a1;" | {{c|-|Ajout:}} Augmentation du taux de drainage de l'invisibilité par 33% |
|- | |- | ||
| − | | style="background: #f8e2a1;" | {{c|+|Suppression:}} "Ne peut pas se déguiser" | + | | style="background:#f8e2a1;" | {{c|+|Suppression:}} "Ne peut pas se déguiser" |
|- | |- | ||
| − | ! style="background: #f8d28c;" colspan=2 rowspan=3 | {{Icon item|Dead Ringer|icon-size=75px}} <br /> {{item link|Dead Ringer}} | + | ! style="background:#f8d28c;" colspan=2 rowspan=3 | {{Icon item|Dead Ringer|icon-size=75px}} <br /> {{item link|Dead Ringer}} |
| − | | style="background: #f8e2a1;" | {{c|-|Ajout:}} Les boîtes de munitions et les Distributeurs ne rechargent plus la barre d'invisibilité | + | | style="background:#f8e2a1;" | {{c|-|Ajout:}} Les boîtes de munitions et les Distributeurs ne rechargent plus la barre d'invisibilité |
|- | |- | ||
| − | | style="background: #f8e2a1;" | {{c|+|Suppression:}} Pas d'invisibilité récupérée depuis les boîtes de munitions lorsque invisible | + | | style="background:#f8e2a1;" | {{c|+|Suppression:}} Pas d'invisibilité récupérée depuis les boîtes de munitions lorsque invisible |
|- | |- | ||
| − | | style="background: #f8e2a1;" | {{c|+|Suppression:}} -35% de barre d'invisibilité récupérée depuis les boites de munitions | + | | style="background:#f8e2a1;" | {{c|+|Suppression:}} -35% de barre d'invisibilité récupérée depuis les boites de munitions |
|- | |- | ||
| − | ! style="background: #b5b85c;" rowspan=2 | {{ | + | ! style="background:#b5b85c; text-align:left;" rowspan=2 | {{class link|Soldier|color=black}}<br />{{class link|Pyro|color=black}} |
| − | ! style="background: #f8d28c;" colspan=2 rowspan=2 | {{Icon item|Reserve Shooter|icon-size=75px}} <br /> {{item link|Reserve Shooter}} | + | ! style="background:#f8d28c;" colspan=2 rowspan=2 | {{Icon item|Reserve Shooter|icon-size=75px}} <br /> {{item link|Reserve Shooter}} |
| − | | style="background: #f8e2a1;" | {{c|+|Ajout:}} Mini-crits sur les ennemis utilisant le Propulseur Thermique | + | | style="background:#f8e2a1;" | {{c|+|Ajout:}} Mini-crits sur les ennemis utilisant le Propulseur Thermique |
|- | |- | ||
| − | | style="background: #f8e2a1;" | {{c|-|Modification:}} Les attaques sur les ennemis propulsés en l'air par le tir d'air comprimé du Pyro ne font plus de mini-crits | + | | style="background:#f8e2a1;" | {{c|-|Modification:}} Les attaques sur les ennemis propulsés en l'air par le tir d'air comprimé du Pyro ne font plus de mini-crits |
|- | |- | ||
| − | ! style="background: #b5b85c;" rowspan=2 | {{ | + | ! style="background:#b5b85c; text-align:left;" rowspan=2 | {{class link|Soldier|color=black}}<br />{{class link|Demoman|color=black}} |
| − | ! style="background: #f8d28c;" colspan=2 rowspan=2 | {{Icon item|B.A.S.E. Jumper|icon-size=75px}} <br /> {{item link|B.A.S.E. Jumper}} | + | ! style="background:#f8d28c;" colspan=2 rowspan=2 | {{Icon item|B.A.S.E. Jumper|icon-size=75px}} <br /> {{item link|B.A.S.E. Jumper}} |
| − | | style="background: #f8e2a1;" | {{c|-|Ajout:}} Réduction de la quantité de contrôle aérien lorsque déployé par 50% | + | | style="background:#f8e2a1;" | {{c|-|Ajout:}} Réduction de la quantité de contrôle aérien lorsque déployé par 50% |
|- | |- | ||
| − | | style="background: #f8e2a1;" | {{c|-|Modification:}} Suppression de la capacité de redéployer le parachute après l'avoir déployé (jusqu'à ce que le joueur touche le sol) | + | | style="background:#f8e2a1;" | {{c|-|Modification:}} Suppression de la capacité de redéployer le parachute après l'avoir déployé (jusqu'à ce que le joueur touche le sol) |
|- | |- | ||
| − | ! style="background: #b5b85c;" rowspan=8 | {{ | + | ! style="background:#b5b85c; text-align:left;" rowspan=8 | {{class link|Soldier|color=black}}<br />{{class link|Pyro|color=black}}<br />{{class link|Heavy|color=black}}<br />{{class link|Engineer|color=black}} |
| − | ! style="background: #f8d28c;" colspan=2 rowspan=8 | {{Icon item|Panic Attack|icon-size=75px}} <br /> {{item link|Panic Attack}} | + | ! style="background:#f8d28c;" colspan=2 rowspan=8 | {{Icon item|Panic Attack|icon-size=75px}} <br /> {{item link|Panic Attack}} |
| − | | style="background: #f8e2a1;" | {{c|+|Ajout :}} 50 % de balles en plus par tir | + | | style="background:#f8e2a1;" | {{c|+|Ajout :}} 50 % de balles en plus par tir |
|- | |- | ||
| − | | style="background: #f8e2a1;" | {{c|-|Ajout :}} Pénalité de dégâts -30 % | + | | style="background:#f8e2a1;" | {{c|-|Ajout :}} Pénalité de dégâts -30 % |
|- | |- | ||
| − | | style="background: #f8e2a1;" | {{c|+|Ajout :}} Tire un motif de balles prédéfini (en fonction des réglages du serveur) | + | | style="background:#f8e2a1;" | {{c|+|Ajout :}} Tire un motif de balles prédéfini (en fonction des réglages du serveur) |
|- | |- | ||
| − | | style="background: #f8e2a1;" | {{c|+|Modification :}} Changement d'arme 50% plus rapide (précédemment : déploiement 50% plus rapide) | + | | style="background:#f8e2a1;" | {{c|+|Modification :}} Changement d'arme 50% plus rapide (précédemment : déploiement 50% plus rapide) |
|- | |- | ||
| − | | style="background: #f8e2a1;" | {{c|=|Modification :}} Le motif de balles augmente avec la succession des tirs, mais se réinitialise après avoir arrêté de tirer ou recharger (précédemment: la dispersion des balles augmentait lorsque la santé diminuait) | + | | style="background:#f8e2a1;" | {{c|=|Modification :}} Le motif de balles augmente avec la succession des tirs, mais se réinitialise après avoir arrêté de tirer ou recharger (précédemment: la dispersion des balles augmentait lorsque la santé diminuait) |
|- | |- | ||
| − | | style="background: #f8e2a1;" | {{c|-|Suppression :}} Rechargement 50% plus rapide | + | | style="background:#f8e2a1;" | {{c|-|Suppression :}} Rechargement 50% plus rapide |
|- | |- | ||
| − | | style="background: #f8e2a1;" | {{c|=|Suppression :}} La cadence de tir augmente à mesure que la santé diminue | + | | style="background:#f8e2a1;" | {{c|=|Suppression :}} La cadence de tir augmente à mesure que la santé diminue |
| − | |||
| − | |||
|- | |- | ||
| + | | style="background:#f8e2a1;" | {{c|=|Suppression :}} Maintenez la touche de tir enfoncée pour charger jusqu'à 4 cartouches | ||
|} | |} | ||
==== Retard de la mise à jour ==== | ==== Retard de la mise à jour ==== | ||
Le jour de la mise à jour, le jour 4, un [http://www.teamfortress.com/post.php?id=33776 message blog {{lang icon|en}}] a été posté pour indiquer un retard d'une journée pour que l'équipe de TF2 puisse faire des tests de performance supplémentaires.* | Le jour de la mise à jour, le jour 4, un [http://www.teamfortress.com/post.php?id=33776 message blog {{lang icon|en}}] a été posté pour indiquer un retard d'une journée pour que l'équipe de TF2 puisse faire des tests de performance supplémentaires.* | ||
| − | |||
== Anecdotes == | == Anecdotes == | ||
| Line 604: | Line 683: | ||
</gallery> | </gallery> | ||
| − | == | + | == Voir aussi == |
* {{item link|Jungle Inferno Contracts Pass}} | * {{item link|Jungle Inferno Contracts Pass}} | ||
| Line 620: | Line 699: | ||
{{Jungle Inferno Update Nav}} | {{Jungle Inferno Update Nav}} | ||
{{Major updates nav}} | {{Major updates nav}} | ||
| + | {{Pyro Nav}} | ||
[[Category:Events/fr]] | [[Category:Events/fr]] | ||
[[Category:Major updates/fr]] | [[Category:Major updates/fr]] | ||
Revision as of 21:01, 28 August 2020

| « | Si Jurassic Park nous a appris une chose, c'est que la vie sait trouver son équilibre. Si Jurassic Park nous a appris deux choses, c'est que la vie sait trouver son équilibre et que Jurassic Park est une superbe idée à piquer pour une mise à jour. Et si l'équipe juridique de Valve nous a appris une chose, c'était de nous crier dessus de ne surtout pas vous dire ce qu'est la deuxième chose que Jurassic Parc nous a dit.
Si les gens qui nous crient dessus nous ont appris une seule chose, c'est que les bruits agressifs nous rendent anxieux et que nous oublions où est la touche retour arrière. Donc nous sommes allés de l'avant et nous somme heureux de vous annoncer notre mise à jour complète et originale sur des animaux mortels qui se sont échappés d'un parc à thème. La vie sait trouver son équilibre, c'est la seule chose que nous avons — Site officiel de TF2
|
» |
La Mise à jour Jungle Inferno était une mise à jour majeure pour Team Fortress 2 qui a été dévoilée sur quatre jours, commençant le 17 octobre 2017, pour finalement sortir le 21 octobre 2017 après une journée de retard. Elle ajoute cinq nouvelles armes, cinq nouvelles cartes communautaires, une nouvelle carte de Valve, sept railleries, une nouvelle raillerie d'attaque, plus de quarante objets cosmétiques, un nouvel équilibre des armes et un équilibre pour la classe du Pyro. Elle a aussi introduit une refonte du système de contrat avec le Contr'Assistant ainsi que des Peinture de guerre.
Sommaire
Vidéo
Annonce
La page de la Jungle Inferno Update a officiellement débuté le 17 octobre 2017, annoncé dans le post « Welcome to... Mercenary Park! (anglais) » du Blog officiel de TF2.
Révélation de la mise à jour
La Jungle Inferno Update a été publiée sur une période de quatre jours.
- Le jour 1 a introduit les sept nouvelles railleries, les six nouvelles cartes et un court trailer SFM.
- Le jour 2 a introduit les Peinture de guerre, le nouveau PDA de contrat avec des contrats gratuits et payants, où les gratuits donnaient les nouvelles armes, et les payants donnaient de l'Argent sale et des Peintures de guerre.
- Le jour 3 a révélé les nouvelles armes : la Fureur du Dragon (une arme principale/lance-flammes), le Propulseur Thermique (une arme secondaire/jetpack avec une raillerie d'attaque), le Bidon d'Essence (une arme secondaire/gaz toxique), la Main Chaude (une arme de corps-à-corps/gant), et une arme pour le Heavy : la banane secondaire (un panier déjeuner)
- Le jour 4 a été le dernier jour, accompagné d'un post sur le blog avec un patch note complet et une date de sortie.
Jour 1
La Jungle Inferno Update a révélé une nouvelle carte officielle et cinq nouvelles cartes communautaires , accompagnée de deux nouvelles railleries de Valve et cinq nouvelles railleries communautaires.
Cartes
| Nom | Image | Mode de jeu | Nom du fichier |
|---|---|---|---|
| Banana Bay | 
|
Course à la charge utile |
plr_bananabay
|
| Brazil | 
|
Roi de la colline |
koth_brazil
|
| Enclosure | 
|
Charge utile
|
pl_enclosure_final
|
| Lazarus | 
|
Roi de la colline |
koth_lazarus
|
| Mercenary Park | 
|
Attaque/Défense |
cp_mercenarypark
|
| Mossrock | 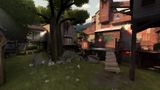
|
Attaque/Défense |
cp_mossrock
|
Railleries
| Plat de résistance | ||
| Grandes pompes | ||
| Halte aux haltères | ||
| Pro du banjo | ||
| Marteau piqueur | ||
| En plein dans le migou | ||
| Abominable mercenaire des neiges |
Jour 2
Le deuxième jour a révélé la Campagne Jungle Inferno et les caisses Peinture de guerre qui vont remplacer les armes de campagnes dropées et les caisses à armes. Deux nouvelles caisses à cosmétiques ainsi qu'un nouveau système de campagne ont été annoncés. Cette campagne inclus 36 nouveaux contrats qui peuvent être complétés en coopération. La réussite des contrats vous fait gagner soit un objet de la campagne ou soit de l'Argent sale, qui peut être utilisé pour acheter des Peinture de guerre ou des caisses.
Campagne
La campagne Jungle Inferno requiert d'acheter le Passe de la campagne Jungle Inferno. Le Contr'Assistant est un PDA qui a aussi été introduit et présenté comme un objet vous montrant vos contrats personnalisés en cours et le magasin du Mercenary Park. Le Tir ami est maintenant disponible, ce qui permet aux joueurs de jouer contre leurs amis et aider chacun à compléter leurs contrats.
Cosmétiques
Ensemble d'objets
| Pack Maximonstres |
Abominable homme des jungles | ||
| Touffe himalayenne | |||
| Abominables pantalons de ski |
Outils
Objets d'action
| Contr'assistant Jungle Inferno |
Peintures de guerre
Collection Jungle Jackpot
- Backpack War Paint Park Pigmented.pngYeti Park
- Backpack War Paint Sax Waxed.pngSaxton
- Backpack War Paint Yeti Coated.pngYéti
- Backpack War Paint Croc Dusted.pngCroco
- Backpack War Paint Macaw Masked.pngAra macao
- Backpack War Paint Piña Polished.pngPiña
- Backpack War Paint Anodized Aloha.pngAloha
- Backpack War Paint Bamboo Brushed.pngBambou
- Backpack War Paint Leopard Printed.pngLéopard
- Backpack War Paint Mannana Peeled.pngMannanas
- Backpack War Paint Tiger Buffed.pngTigre
Collection Infernal Reward
- Backpack War Paint Fire Glazed.pngBrasier
- Backpack War Paint Bonk Varnished.pngBonk
- Backpack War Paint Dream Piped.pngRose bonbon
- Backpack War Paint Freedom Wrapped.pngLibertaire
- Backpack War Paint Bank Rolled.pngBillets de banque
- Backpack War Paint Clover Camo'd.pngPorte-bonheur
- Backpack War Paint Kill Covered.pngDénombrement
- Backpack War Paint Pizza Polished.pngPizza
- Backpack War Paint Bloom Buffed.pngFloraison
- Backpack War Paint Cardboard Boxed.pngEmboité
- Backpack War Paint Merc Stained.pngMercenaire
- Backpack War Paint Quack Canvassed.pngCoincoin
- Backpack War Paint Star Crossed.pngStellaire
Collection Decorated War Hero
- Backpack War Paint Carpet Bomber Mk.II.pngBombardier tapissé Mk.II
- Backpack War Paint Woodland Warrior Mk.II.pngVa-t-en-guerre des bois Mk.II
- Backpack War Paint Wrapped Reviver Mk.II.pngRésurrection emballée Mk.II
- Backpack War Paint Forest Fire Mk.II.pngFeu de forêt Mk.II
- Backpack War Paint Night Owl Mk.II.pngOiseau de nuit Mk.II
- Backpack War Paint Woodsy Widowmaker Mk.II.pngEndeuilleur boisé Mk.II
- Backpack War Paint Autumn Mk.II.pngAutomne Mk.II
- Backpack War Paint Plaid Potshotter Mk.II.pngTir à carreau Mk.II
- Backpack War Paint Civil Servant Mk.II.pngFonctionnaire Mk.II
- Backpack War Paint Civic Duty Mk.II.pngDevoir civique Mk.II
Collection Contract Campaigner
- Backpack War Paint Bovine Blazemaker Mk.II.pngBovin Mk.II
- Backpack War Paint Dead Reckoner Mk.II.pngCible de la mort Mk.II
- Backpack War Paint Backwoods Boomstick Mk.II.pngFusil de derrière les fagots Mk.II
- Backpack War Paint Masked Mender Mk.II.pngDépannage masqué Mk.II
- Backpack War Paint Iron Wood Mk.II.pngBois métallique Mk.II
- Backpack War Paint Macabre Web Mk.II.pngToiles macabres Mk.II
- Backpack War Paint Nutcracker Mk.II.pngCasse-noix Mk.II
- Backpack War Paint Smalltown Bringdown Mk.II.pngCasse-village Mk.II
Collection Saxton Select
- Backpack War Paint Dragon Slayer.pngDécime-dragon
Jour 3
Le jour 3 a révélé quatre nouvelles armes pour le Pyro, une nouvelle raillerie d'attaque pour une arme du Pyro (le Propulseur thermique), un panier déjeuner pour le Heavy, et des changements pour le lance-flammes.
Armes
| Fureur du dragon | ||
| Bidon d'essence | ||
| Main chaude | ||
| Propulseur thermique | ||
| Banane de consolation |
Modification des classes
| Classe | Modifications |
|---|---|
Modifications des armes
| Classe | Armes | Modifications |
|---|---|---|
Lance-flammes + Variantes |
||
Jour 4
Au jour 4, les notes du patch pour la mise à jour de la Jungle Inferno ont été annoncées, incluant de différents changements d'armes, des informations sur les nouvelles armes, plusieurs corrections de bug et le changement du système du matchmaking. Les notes de patch ont également annoncés la mécanique d'inspection première personne pour toutes les armes.
Modifications des classes
| Classe | Modifications |
|---|---|
Modifications des armes
| Classe | Arme | Modifications | |
|---|---|---|---|
Bonk! Atomic Punch |
|||
Crit-a-Cola |
|||
Pistolet de Poche du Beau Gosse |
|||
Guillotine volante |
|||
Marchand de sable |
|||
Atomiseur |
|||
Broyeur Bovin 5000 |
|||
Bottes de Combat |
|||
Bison Vertueux |
|||
Claidheamh Mòr |
|||
Gants de Retraite Urgente |
Morsure du pain |
||
Poings d'Acier |
|||
Avis d'Expulsion |
|||
Ranger du risque |
|||
Arbalète du Croisé |
|||
Vita-Scie |
|||
Razorback |
|||
Bouclier du risque Darwinien |
|||
Ambassadeur |
|||
Ton Éternelle Récompense |
Aiguille de Wanga |
||
Dead Ringer |
|||
Tireur Réserviste |
|||
B.A.S.E. Jumper |
|||
Crise de Panique |
|||
Retard de la mise à jour
Le jour de la mise à jour, le jour 4, un message blog (anglais) a été posté pour indiquer un retard d'une journée pour que l'équipe de TF2 puisse faire des tests de performance supplémentaires.*
Anecdotes
- La dernière mise à jour à avoir été dévoilée avec un système à quatre jour était l'Über Update sortie en 2011.
- Ce fut la plus longue attente pour une mise à jour dans l'histoire du jeu pour une période de 10 mois et 29 jours (272 jours) depuis la dernière mise à jour majeure : Smissmas 2016.
- Au bas de la page du premier jour, il y a plusieurs fuites sur les nouvelles armes du Pyro. On peut y voir un Gas Passer sur le sol, et en arrière fond, le Pyro peut être vu en volant en utilisant le propulseur thermique.
- Sur la page du deuxième jour, il y a de nouveau plusieurs indices sur les nouvelles armes du Pyro. Dans la pile d'armes on peut apercevoir que les peintures de guerre peuvent être appliquées, on peut y voir une fureur du dragon en arrière plan. Sur la lineup de l'équipe on peut y apercevoir de nouveaux cosmétiques et avec le Pyro qui pose avec la fureur du dragon.
- Au fond de la page du jour deux, Saxton Hale est visible avec un ConTracker en main. Sur l'écran il y a deux noms. Un stipule On the "Mercenary Park", et l'autre dit "Pyroland". Il a été révélé plus tard que dans les options de "Pyroland", que les joueurs pouvaient gagner toutes les nouvelles armes du Pyro en complétant les 6 contrats gratuits.
Galerie

Notification in-game concernant la sortie de la mise à jour.

Jour 1. Cartes et railleries.

Jour 2. Pass de la campagne et cosmétiques.

Jour 4. Notes de mise à jour finales.
Le titre Jungle Inferno pendant l'événement d'Halloween.

Voir aussi
Liens externes
- Bienvenue au... Mercenary Park ! (anglais)
- Jungle Inferno Update, jour 1 (anglais)
- Le fil conducteur de la campagne ! (anglais)
- Jungle Inferno Update, jour 2 (anglais)
- Informations chaudes ! (anglais)
- Jungle Inferno Update, jour 3 (anglais)
- On y est presque ! (anglais)
- Jungle Inferno Update, jour 4 (anglais)
- Jungle Inferno est là ! (anglais)
| ||||||||||||||||||||||||||||||||||||||||||||||||||||||||||||||||||||||||||||||||||||||||||||||||||
| |||||||||||||||||||||||||||||||||||||||||||